DIY No-Wax Candles: Eco-Friendly & Stylish
Diy no wax candles – DIY no-wax candles are a fantastic way to bring a touch of handmade charm to your home while being mindful of the environment. Forget the traditional wax and embrace a world of creative possibilities with these eco-friendly alternatives.
From the gentle glow of beeswax to the vibrant hues of gel candles, no-wax candle making offers a delightful journey of experimentation and self-expression. Not only are they eco-friendly, but they also allow you to personalize your home décor with unique scents and designs that perfectly reflect your style.
Introduction to DIY No-Wax Candles
The world of candle making is evolving, and with it, a growing interest in eco-friendly alternatives to traditional wax candles. No-wax candles offer a unique and sustainable approach to enjoying the ambiance and benefits of candlelight. These candles are crafted without any wax, relying on alternative materials that are natural, biodegradable, and often have a smaller environmental footprint.
Environmental Impact of Traditional Wax Candles
Traditional wax candles, primarily made from paraffin wax, a byproduct of petroleum, contribute to environmental concerns. The production and burning of paraffin wax candles release harmful pollutants into the air, including volatile organic compounds (VOCs) and soot.
- Paraffin wax is a non-renewable resource derived from fossil fuels, adding to the demand for oil extraction and its associated environmental impacts.
- Burning paraffin wax releases harmful chemicals, including toluene and benzene, which are known carcinogens. These chemicals can contribute to indoor air pollution and pose health risks, especially for people with respiratory conditions.
- The soot produced by burning paraffin wax candles can accumulate on surfaces and contribute to indoor air pollution. It can also be detrimental to respiratory health.
History and Origins of No-Wax Candle Making
No-wax candle making has its roots in ancient practices and traditional knowledge. Historically, people relied on natural materials to create light sources, such as beeswax, tallow, and vegetable oils. These materials were readily available and provided a sustainable alternative to paraffin wax.
DIY no wax candles are a fun and eco-friendly way to create a cozy atmosphere. They’re also a great way to personalize your home decor, and you can even customize the scents to match your mood. Since Valentine’s Day is just around the corner, I’m thinking about making some heart-shaped candles with romantic scents like rose or lavender.
I’m not sure what I’ll wear on Valentine’s Day, but I’m thinking something red and sparkly! What will you wear on Valentine’s Day ? Back to the candles, I’m excited to experiment with different colors and textures to make my candles even more unique.
- Beeswax candles have been used for centuries and are known for their clean burn and pleasant honey-like aroma. Beeswax is a natural and renewable resource, making it an eco-friendly option.
- Tallow, rendered from animal fat, was a common candle-making material in the past. While tallow candles are not as popular today, they remain a traditional option and are often used in historical reenactments.
- Vegetable oils, such as soy, coconut, and palm oil, have become increasingly popular for candle making in recent years. These oils are renewable and biodegradable, offering a more sustainable alternative to paraffin wax.
Materials and Supplies for No-Wax Candle Making
No-wax candles are a fantastic alternative to traditional wax candles, offering a unique and eco-friendly approach to enjoying candlelight. To embark on this DIY journey, you’ll need a few essential materials and supplies. This section delves into the specifics of each material, highlighting its purpose and exploring alternative options for those who want to experiment or customize their candle-making process.
Essential Materials and Supplies, Diy no wax candles
Here’s a comprehensive list of materials and supplies for making no-wax candles, categorized for easy reference:
| Material | Description | Purpose | Alternatives |
|---|---|---|---|
| Soy Wax Flakes | Soy wax is a natural, plant-based wax derived from soybeans. It’s non-toxic, biodegradable, and burns cleanly with minimal soot. | Soy wax flakes are the primary ingredient for making no-wax candles. They provide the base for the candle and determine its overall structure and melting point. | Beeswax, palm wax, or a blend of different waxes can be used as alternatives. |
| Essential Oils | Essential oils are concentrated extracts from plants, offering a wide range of scents and therapeutic benefits. | Essential oils are added to the candle mixture to impart fragrance and enhance the overall sensory experience. | Fragrance oils or natural botanicals like dried flowers or herbs can be used as alternatives. |
| Candle Wicks | Candle wicks are made from natural materials like cotton or wood. They are designed to absorb melted wax and draw it up to the flame, ensuring a consistent and controlled burn. | Candle wicks are crucial for the candle’s combustion process. They act as the conduit for the wax to reach the flame, creating a stable and reliable burn. | Pre-tabbed wicks, braided wicks, or even natural materials like cotton string can be used as alternatives. |
| Glass Jars or Containers | Glass jars or containers are the vessels that hold the candle mixture. They come in various sizes and shapes, offering a wide range of aesthetic options. | Glass jars or containers provide the structural support for the candle and allow for its presentation. They also offer the advantage of being reusable and recyclable. | Ceramic containers, metal tins, or even repurposed materials like teacups or mason jars can be used as alternatives. |
| Thermometer | A thermometer is used to monitor the temperature of the melted wax mixture. It helps ensure that the wax is heated to the appropriate temperature for optimal candle performance. | A thermometer is crucial for ensuring the wax is melted to the correct temperature for optimal blending with other ingredients and for achieving the desired consistency. | A digital thermometer or a candy thermometer can be used as alternatives. |
| Double Boiler or Heat-Safe Pot | A double boiler or a heat-safe pot is used to melt the wax safely and evenly. It prevents the wax from burning or scorching. | A double boiler or heat-safe pot is essential for melting the wax without overheating or causing any unwanted reactions. It ensures a smooth and consistent melting process. | A heat-safe pot with a heat diffuser or a slow cooker can be used as alternatives. |
| Stirring Utensils | Stirring utensils are used to mix the melted wax with other ingredients, ensuring a homogenous mixture. | Stirring utensils are essential for achieving a well-blended candle mixture. They help distribute the ingredients evenly and create a uniform consistency. | Wooden spoons, spatulas, or even heat-resistant silicone spatulas can be used as alternatives. |
| Measuring Cups and Spoons | Measuring cups and spoons are used to measure the precise quantities of each ingredient, ensuring consistent results. | Accurate measurements are crucial for achieving the desired consistency and performance of the candle. They ensure a consistent outcome for each candle batch. | Measuring cups and spoons made of heat-resistant materials like glass or stainless steel are recommended. |
Methods for Creating No-Wax Candles: Diy No Wax Candles
The world of candle making is brimming with possibilities, and no-wax candles offer a unique and exciting alternative to traditional wax-based options. These candles, crafted from a variety of materials, provide a captivating ambiance while offering a sustainable and eco-friendly approach to illumination.
I’ve been on a roll with DIY projects lately, and my latest obsession is making no-wax candles. The process is surprisingly simple, and I’m loving the creative freedom it allows. Of course, I got a little sidetracked when I stumbled upon this article about restoring media balance in my home , but I’m back to my candles now.
I’m planning on experimenting with different essential oils and natural dyes to create unique scents and colors.
Let’s delve into the diverse techniques for creating these enchanting no-wax candles.
Soy Wax Candles
Soy wax, derived from soybeans, is a popular choice for candle making due to its natural origin, clean burning properties, and versatility. It’s a renewable resource, making it a more sustainable option than paraffin wax.
Soy wax candles offer a clean and even burn, producing less soot than paraffin wax candles. This is attributed to the lower melting point of soy wax, which allows for a more complete combustion process. The resulting fragrance throw is also often stronger and more consistent, making soy wax a favorite among candle enthusiasts.
Here’s a step-by-step guide for creating soy wax candles:
- Prepare the Supplies:Gather soy wax flakes, wicks, candle jars, a double boiler or heat-safe pot and bowl, a thermometer, and essential oils or fragrance oils (optional).
- Melt the Wax:Place the soy wax flakes in the double boiler or heat-safe bowl over low heat. Stir occasionally until the wax is completely melted and reaches the desired temperature, typically around 180°F (82°C).
- Add Fragrance (Optional):Once the wax has melted, remove it from the heat source and allow it to cool slightly. Add your chosen essential oils or fragrance oils, stirring gently to distribute them evenly.
- Prepare the Wicks:Secure the wicks to the bottom of the candle jars using a wick sticker or a small amount of hot glue.
- Pour the Wax:Carefully pour the melted wax into the prepared jars, leaving a small space at the top for expansion as the wax cools.
- Cool and Cure:Allow the candles to cool and harden completely. This may take several hours or overnight. Once cured, trim the wicks to about ¼ inch and enjoy your handmade soy wax candles.
Beeswax Candles
Beeswax candles have a rich history, dating back centuries. Their natural origin, pleasant honey-like scent, and clean burning properties make them a sought-after choice. Beeswax is known for its ability to purify the air, making it a popular option for those seeking natural and healthy candle alternatives.
Beeswax candles are typically harder and have a higher melting point than soy wax candles. This results in a longer burn time and a brighter flame. The natural color of beeswax ranges from pale yellow to deep golden, adding to the charm of these candles.
Here’s a step-by-step guide for creating beeswax candles:
- Prepare the Supplies:Gather beeswax pellets or blocks, wicks, candle jars, a double boiler or heat-safe pot and bowl, a thermometer, and essential oils or fragrance oils (optional).
- Melt the Wax:Place the beeswax in the double boiler or heat-safe bowl over low heat. Stir occasionally until the wax is completely melted and reaches the desired temperature, typically around 180°F (82°C).
- Add Fragrance (Optional):Once the wax has melted, remove it from the heat source and allow it to cool slightly. Add your chosen essential oils or fragrance oils, stirring gently to distribute them evenly.
- Prepare the Wicks:Secure the wicks to the bottom of the candle jars using a wick sticker or a small amount of hot glue.
- Pour the Wax:Carefully pour the melted wax into the prepared jars, leaving a small space at the top for expansion as the wax cools.
- Cool and Cure:Allow the candles to cool and harden completely. This may take several hours or overnight. Once cured, trim the wicks to about ¼ inch and enjoy your handmade beeswax candles.
Gel Candles
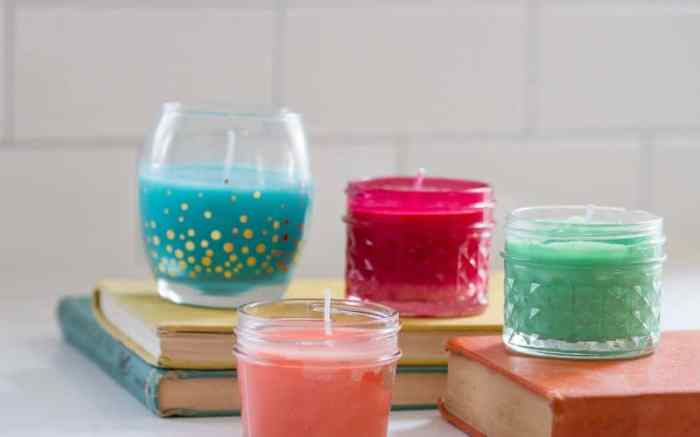
Gel candles, made with a clear gel medium, offer a unique and modern aesthetic. The gel medium is typically a mixture of a polymer and a solvent, creating a translucent, jelly-like consistency. Gel candles are often infused with decorative elements, such as dried flowers, seashells, or glitter, adding a touch of artistry to their design.
Gel candles provide a clean and smokeless burn, creating a beautiful, shimmering effect. They are known for their ability to hold intricate designs and embellishments, allowing for endless creative possibilities. The gel medium can also be tinted with dyes to create a variety of colors, enhancing the overall visual appeal.
Here’s a step-by-step guide for creating gel candles:
- Prepare the Supplies:Gather gel candle medium, wicks, candle jars, a double boiler or heat-safe pot and bowl, a thermometer, and decorative elements (optional).
- Melt the Gel:Place the gel candle medium in the double boiler or heat-safe bowl over low heat. Stir occasionally until the gel is completely melted and reaches the desired temperature, typically around 160°F (71°C). Avoid overheating the gel, as it can become cloudy or lose its clarity.
- Add Decorative Elements (Optional):Once the gel has melted, remove it from the heat source and allow it to cool slightly. Add your chosen decorative elements, such as dried flowers, seashells, or glitter, making sure they are evenly distributed.
- Prepare the Wicks:Secure the wicks to the bottom of the candle jars using a wick sticker or a small amount of hot glue.
- Pour the Gel:Carefully pour the melted gel into the prepared jars, leaving a small space at the top for expansion as the gel cools. Avoid pouring the gel too quickly, as this can create air bubbles.
- Cool and Cure:Allow the candles to cool and harden completely. This may take several hours or overnight. Once cured, trim the wicks to about ¼ inch and enjoy your handmade gel candles.
Tips and Tricks for Successful No-Wax Candle Making

No-wax candle making is a fun and rewarding hobby that allows you to create unique and beautiful candles without the use of traditional wax. However, achieving consistent and high-quality results requires attention to detail and adherence to certain best practices.
DIY no wax candles are a fun and creative project, especially for kids. You can use all sorts of materials to make them, like soy wax, beeswax, or even recycled materials. Just remember to always supervise children when they’re working with heat and fire.
If you’re looking for inspiration, check out this article on take one sturdy kid add the following ingredients , which has some great ideas for fun and safe projects. With a little creativity and a few simple ingredients, you can make beautiful and unique candles that are sure to impress.
This section delves into essential tips and tricks to help you navigate the process effectively and create stunning no-wax candles.
Choosing the Right Wick Size and Type
The wick plays a crucial role in the performance of your no-wax candle. A properly sized and chosen wick ensures a clean, even burn, preventing issues like excessive smoke, soot, or tunneling.
- Wick Size:The ideal wick size depends on the diameter of your candle vessel and the type of material used. A general rule of thumb is to choose a wick that is about one-third the diameter of your candle vessel.
- Wick Type:There are various wick types available, each designed for specific candle materials. For example, cotton wicks are commonly used for soy wax, while wooden wicks are popular for beeswax.
- Wick Testing:It’s essential to test your chosen wick before making a full batch of candles. This involves burning a small sample of your candle to ensure the wick is burning correctly and producing the desired flame.
Common Mistakes to Avoid During No-Wax Candle Making
Understanding common mistakes can help you avoid them and create flawless no-wax candles.
- Overfilling the Vessel:Overfilling your candle vessel can lead to a messy and uneven burn. Leave sufficient space at the top for the wax to melt and pool, creating a consistent flame.
- Using the Wrong Wick:As mentioned earlier, using a wick that is too small or too large can lead to poor candle performance. Ensure you select a wick that is appropriate for the size and material of your candle.
- Not Centering the Wick:A misaligned wick can result in an uneven burn and potential safety hazards. Ensure the wick is centered in the vessel before pouring the candle material.
- Inadequate Curing Time:Allowing your no-wax candles to cure properly is essential for optimal performance. Curing time varies depending on the material used, but generally, it takes at least 24 hours for the candle to fully harden.
Creative Candle Designs and Scents
The beauty of no-wax candles lies in their versatility. You can experiment with different shapes, colors, and textures to create unique and stunning designs. The fragrance possibilities are endless, allowing you to craft candles that evoke specific moods and memories.
No-Wax Candle Designs
The design of your no-wax candle can significantly impact its aesthetic appeal. Here are some ideas to inspire your creativity:
- Geometric Shapes:Experiment with simple shapes like cubes, spheres, pyramids, or even intricate geometric patterns. This approach offers a modern and minimalist look.
- Organic Forms:Embrace nature by crafting candles in the form of leaves, flowers, or even animals. These designs add a touch of whimsy and natural beauty.
- Layered Designs:Create visually interesting candles by layering different colors or textures. This technique allows for depth and dimension in your creations.
- Textured Surfaces:Incorporate textures like swirls, ripples, or even rough finishes to add visual interest. This approach can enhance the overall look and feel of your candles.
Popular and Unique Fragrance Combinations
The right fragrance can transform a simple no-wax candle into a sensory experience. Here are some popular and unique scent combinations:
- Citrus and Floral:This classic combination is refreshing and uplifting. Consider blending lemon with jasmine or grapefruit with rose for a bright and cheerful scent.
- Woody and Spicy:This combination evokes warmth and comfort. Pair cedarwood with cinnamon or sandalwood with clove for a rich and inviting aroma.
- Fresh and Green:This combination is ideal for creating a sense of peace and tranquility. Blend mint with eucalyptus or basil with rosemary for a revitalizing scent.
- Fruity and Sweet:This combination is playful and indulgent. Combine vanilla with strawberry or raspberry with peach for a delightful aroma.
Decorative Elements
Adding decorative elements can elevate your no-wax candles to a whole new level. Here are some ideas:
- Embedded Crystals:Incorporate crystals like amethyst, rose quartz, or clear quartz into your candle design for a touch of sparkle and mystical energy. Make sure the crystals are heat-resistant and will not melt or release harmful fumes.
- Dried Flowers:Add dried flowers like lavender, chamomile, or roses to your candle for a natural and fragrant touch. The dried flowers will add visual appeal and release their scent as the candle burns.
- Metallic Flakes:Add metallic flakes like gold, silver, or copper to your candle for a touch of glamour. The flakes will shimmer and reflect light, adding a touch of sophistication to your creation.
Safety Precautions for No-Wax Candle Making
While no-wax candles offer a safer alternative to traditional wax candles, it’s crucial to prioritize safety when working with any materials that can potentially cause harm. By taking necessary precautions, you can create beautiful and unique candles while minimizing risks.
Handling Hot Materials
Working with hot materials like melted soy wax, essential oils, and dyes requires careful handling to prevent burns and other injuries. It’s essential to wear appropriate protective gear and follow specific safety guidelines.
- Always use heat-resistant gloves when handling hot containers, pouring wax, or adjusting wicks. These gloves will protect your hands from burns and spills.
- Avoid wearing loose clothing or jewelry that could accidentally catch fire or get caught in the hot wax. Keep your hair tied back to prevent it from falling into the wax.
- Never leave hot wax unattended. Always keep a close eye on the melting process and ensure it’s under control.
- Use a designated workspace for candle making, free from clutter and flammable materials. This will minimize the risk of accidents and ensure a safe environment.
- Ensure adequate ventilation to prevent the buildup of fumes from melting wax and essential oils. Open windows or use a fan to circulate air.
- Keep a fire extinguisher readily available in case of an emergency. Familiarize yourself with its operation and ensure it’s in good working order.
Working with Flammable Materials
No-wax candle making involves using flammable materials like alcohol, essential oils, and certain dyes. It’s crucial to handle these materials with care and follow proper safety procedures.
- Always work in a well-ventilated area when using flammable materials. Open windows or use a fan to ensure adequate airflow and prevent the buildup of flammable vapors.
- Store flammable materials in a cool, dry place, away from heat sources and direct sunlight. Follow the manufacturer’s instructions for storage.
- Never mix flammable materials unless specifically instructed by the manufacturer. Mixing different chemicals can create hazardous reactions.
- Use a designated container for flammable materials, clearly labeled and stored separately from other materials. Avoid using containers that could be mistaken for food or beverages.
- Always use a heat-resistant container when working with flammable liquids. Avoid using glass containers, as they can shatter when exposed to heat.
- Keep a fire extinguisher readily available in case of an emergency. Familiarize yourself with its operation and ensure it’s in good working order.
Safety Equipment
Having the right safety equipment on hand is essential for creating candles safely. This equipment will help protect you from burns, spills, and other hazards.
- Heat-resistant gloves: These gloves are crucial for handling hot containers, pouring wax, and adjusting wicks. They protect your hands from burns and spills.
- Safety goggles: Protect your eyes from splashes of hot wax, essential oils, or other materials. Choose goggles specifically designed for chemical use.
- Apron: An apron protects your clothes from spills and stains. Choose an apron made from a heat-resistant material.
- Fire extinguisher: Keep a fire extinguisher readily available in case of an emergency. Familiarize yourself with its operation and ensure it’s in good working order.
- First-aid kit: Have a well-stocked first-aid kit on hand in case of minor burns, cuts, or other injuries.
- Well-ventilated workspace: Ensure your workspace is well-ventilated to prevent the buildup of fumes from melting wax and essential oils. Open windows or use a fan to circulate air.