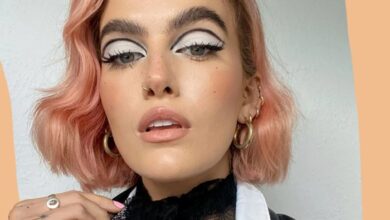
How To Natural Eyebrow Tutorial: Achieve Your Best Brows
How to natural eyebrow tutorial: Want to achieve perfectly sculpted, natural-looking brows that frame your face flawlessly? It’s all about understanding your brow shape, prepping them properly, and using the right techniques to fill and define them. This guide will take you through each step, from shaping to setting, ensuring you achieve the perfect natural brow look that enhances your features.
Whether you’re a beginner or looking to refine your brow routine, this tutorial will equip you with the knowledge and techniques to achieve the natural brow look you’ve always desired. Get ready to embrace your unique brow shape and learn how to enhance it with confidence.
Understanding Your Brow Shape

Knowing your natural brow shape is crucial for achieving a natural look when shaping your eyebrows. It helps you understand the potential of your brows and guides you in making the right decisions for your desired outcome.
Identifying Your Natural Brow Shape
Identifying your natural brow shape is the first step in the process. Understanding your brow shape will help you to define your brow goals and create a natural look.
- High Arch:This shape features a prominent arch that starts high on the brow bone and extends towards the tail.
- Rounded Arch:This shape has a gentle arch that creates a soft curve, giving the brow a rounded appearance.
- Straight Brow:This shape has a minimal arch, creating a straight line across the brow bone.
- Angled Brow:This shape features a sharp angle at the arch, creating a defined and dramatic look.
- Flat Brow:This shape lacks a noticeable arch and appears relatively flat across the brow bone.
Measuring and Marking Your Brows
Once you have identified your natural brow shape, you can start measuring and marking your brows for accurate shaping.
- Start Point:To determine the start point of your brow, hold a pencil vertically against the side of your nose, aligning it with the inner corner of your eye. Where the pencil intersects your brow bone is your starting point.
- Arch Point:Hold the pencil diagonally, aligning it with the outer edge of your iris. The point where the pencil intersects your brow bone is the peak of your arch.
- End Point:Hold the pencil diagonally, aligning it with the outer corner of your eye. The point where the pencil intersects your brow bone is the end point of your brow.
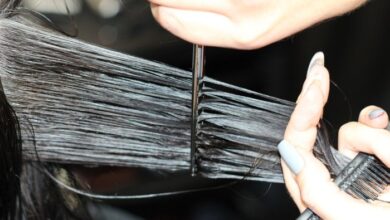
Preparing Your Brows
Before you start shaping your brows, it’s crucial to clean and prep them. This ensures a smooth and precise application of your brow products.
Cleaning and Prepping Your Brows
- Cleanse:Start by gently cleansing your brows with a mild cleanser or makeup remover. This removes any dirt, oil, or makeup residue that could interfere with your brow products.
- Exfoliate:For a smoother surface, consider using a gentle exfoliating scrub specifically designed for the face. This helps remove dead skin cells, allowing your brow products to adhere better.
- Moisturize:After cleansing and exfoliating, apply a light moisturizer to the area around your brows. This helps keep the skin hydrated and supple, preventing any dryness or flakiness.
Using a Brow Brush
A brow brush is an essential tool for shaping and defining your brows. It helps to comb and distribute brow hairs evenly, creating a more polished and defined look.
- Combing:Use a spoolie brush to comb your brow hairs upwards and outwards. This helps to separate the hairs and reveal their natural shape.
- Defining:Once you’ve combed your brows, use the spoolie brush to define the edges of your brow shape. This can help to create a more precise and polished look.
Filling in Sparse Areas
If you have sparse areas in your brows, filling them in with a brow pencil or powder can help to create a more defined and fuller look.
- Choosing the Right Product:Select a brow pencil or powder that matches your natural hair color. A lighter shade can be used for a softer look, while a darker shade can be used for a more dramatic look.
- Filling In:Use short, light strokes to fill in any sparse areas. Avoid harsh lines or heavy application, as this can make your brows look unnatural.
- Blending:Once you’ve filled in your brows, use a spoolie brush to blend the product evenly. This helps to create a more natural and seamless look.
Shaping Your Brows: How To Natural Eyebrow Tutorial

Once you’ve understood your natural brow shape and prepared them for shaping, it’s time to define your brows. There are several methods for shaping your brows, each with its own pros and cons.
Tweezing, How to natural eyebrow tutorial
Tweezing is a common and relatively affordable method for shaping brows. It involves using tweezers to pluck individual hairs, allowing for precise control and a natural look.
Tweezing Technique
1. Cleanse and exfoliate
Begin by washing your face with a gentle cleanser and exfoliating your brow area to remove any dead skin cells and make hair removal easier.
2. Apply a warm compress
A warm compress helps soften the hair follicles, making them easier to pluck.
3. Use a magnifying mirror
A magnifying mirror provides a clearer view of the hairs, helping you remove the right ones.
4. Pluck in the direction of hair growth
This minimizes the risk of ingrown hairs.
5. Pluck one hair at a time
Avoid plucking multiple hairs at once, as this can lead to unevenness and over-plucking.
6. Take breaks
Give your skin a break between plucking sessions to prevent irritation and redness.
Avoiding Over-Plucking
1. Use a brow template
A brow template can help you visualize your ideal brow shape and avoid over-plucking.
2. Start small
Pluck only a few hairs at a time and step back to assess your progress.
3. Don’t pluck below the brow bone
This can create a harsh look and make your brows appear thinner.
4. Leave the inner corner
Avoid plucking hairs in the inner corner of your brow, as this can make your brows appear too thin.
5. Consult a professional
If you’re unsure about shaping your brows, consider consulting a professional brow specialist.
Waxing
Waxing is a faster method of shaping brows, removing multiple hairs at once. It involves applying warm wax to the brow area and then removing it with a strip, pulling out the hairs from the root.
Waxing Considerations
1. Pain
Waxing can be painful, especially for those with sensitive skin.
2. Risk of irritation
Waxing can cause irritation, redness, and ingrown hairs, especially if done incorrectly.
Learning how to achieve natural-looking eyebrows can be a game-changer for your entire look. It’s all about enhancing your natural features, not creating a dramatic transformation. And while you’re focusing on your brows, why not explore some summer hairstyles that take only minutes ?
These quick styles will complement your perfectly groomed brows and make you feel confident and ready for anything, from a casual beach day to a fun evening out.
3. Skin type
Not all skin types are suitable for waxing. It’s best to consult a professional before waxing your brows.
Achieving natural-looking brows is all about enhancing your natural shape, not drastically changing it. A light hand with a brow pencil or powder can make all the difference, and remember, less is more! For a festive touch, try using a subtle shimmery shadow on your brow bone – it’s like a little sprinkle of holiday magic.
Speaking of festive magic, we wash you a merry christmas and hope you have a wonderful holiday season! Once the festivities are over, you can easily return to your everyday brow routine, but don’t forget to keep those brows groomed and well-defined for a polished look.
Threading
Threading is a traditional method of shaping brows that involves using a thin thread to twist and remove hairs. It’s a precise technique that can create a clean and defined brow shape.
Threading Advantages
1. Precision
Threading allows for precise hair removal, making it ideal for creating intricate brow shapes.
2. Less irritation
Threading is less likely to cause irritation and ingrown hairs than waxing.
Learning how to achieve natural-looking brows is a skill that can really boost your confidence, just like planning a fun and festive birthday party! Speaking of festive, if you’re looking for some inspiration, check out this amazing guide on throwing a carnival birthday bash.
It’s full of creative ideas that will make your celebration truly unforgettable. And just like a perfectly planned party, a natural eyebrow look requires a bit of practice and the right tools. So, let’s get those brows looking fabulous!
3. Long-lasting results
Threading can remove hairs from the root, resulting in longer-lasting results.
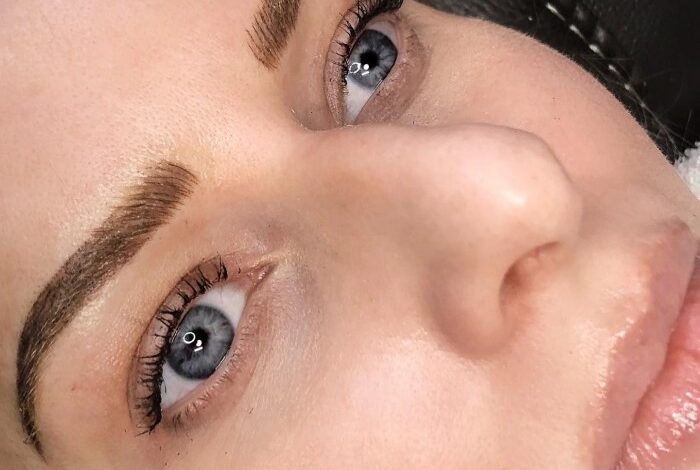
Filling in Your Brows
Filling in your brows is the final step in creating a natural, polished look. Choosing the right products and techniques can make a big difference in how your brows look.
Matching Brow Products to Hair Color
Selecting brow products that match your hair color is crucial for a natural-looking finish. Using a color that’s too light or too dark can make your brows look unnatural and even draw attention to the wrong areas of your face.
- Blonde Hair:Opt for light brown or taupe shades to create a soft, natural look.
- Brown Hair:Choose a medium brown or ash brown shade that complements your hair color.
- Black Hair:Select a deep brown or black shade, but avoid anything too harsh or jet black.
- Red Hair:Use a reddish-brown or auburn shade to enhance your natural brow color.
Using Brow Products
There are a variety of brow products available, each with its own advantages and techniques.
Brow Pencil
A brow pencil is a great option for creating precise lines and filling in sparse areas.
- Start by outlining the shape of your brow.Use short, light strokes to define the top and bottom edges of your brow, following your natural brow shape.
- Fill in any sparse areas.Use light, feathery strokes to fill in any gaps or areas where your brows are thin.
- Blend the color.Use a spoolie brush or a clean finger to blend the color and create a natural-looking finish.
Brow Powder
Brow powder is a great option for creating a soft, natural look.
- Use an angled brush to apply the powder.Start by lightly dusting the powder along the bottom edge of your brow, then gradually work your way up.
- Use a spoolie brush to blend the color.Brush the powder upwards and outwards to create a natural, feathery effect.
Brow Pomade
Brow pomade is a cream-based product that provides a more intense color and long-lasting hold.
- Use an angled brush to apply the pomade.Start by outlining the shape of your brow, then fill in any sparse areas.
- Use a spoolie brush to blend the color.Brush the pomade upwards and outwards to create a natural, feathery effect.
Creating a Natural Brow Shape
The key to achieving a natural-looking brow shape is to use shading and blending techniques.
- Use lighter shades to define the arch of your brow.This will create a natural lift and highlight the shape of your brow.
- Use darker shades to fill in the tail of your brow.This will add definition and depth to your brows.
- Blend the colors seamlessly.Use a spoolie brush or a clean finger to blend the colors together and create a natural, graduated effect.
Setting Your Brows
The final step in achieving natural-looking brows is setting them in place. This ensures your hard work doesn’t disappear throughout the day. A brow gel or wax is essential for holding your brow hairs in place and preventing them from straying.Brow gels and waxes come in various formulas, each with its own benefits.
Applying them correctly will help your brows stay put all day while maintaining a natural look.
Choosing the Right Formula
The type of brow gel or wax you choose depends on your preferences and the desired effect. Here are some common formulas:
- Clear Gel:This is a versatile option that provides a natural hold without adding color. It’s ideal for everyday use and can be used on both light and dark brows.
- Tinted Gel:Tinted gels offer a subtle tint that can enhance your brow color and fill in sparse areas. They are available in various shades to match your natural brow color.
- Wax:Brow wax provides a stronger hold than gel and is ideal for taming unruly brows. It can be applied with a spoolie brush or a small brush for precise application.
Applying Brow Gel or Wax
Applying brow gel or wax is easy, and it takes only a few seconds to achieve a natural, long-lasting hold.
- Start with a clean spoolie brush.Dip the brush into the brow gel or wax and gently brush upwards through your brow hairs, following the natural shape of your brows.
- Work in small strokes, starting from the inner corner of your brow and moving outwards.
- Avoid using too much product, as this can make your brows look stiff and unnatural. A little goes a long way.
- Use a clean spoolie brush to comb through your browsafter applying the gel or wax to ensure a smooth and even application.
Tips for a Natural Look
Here are some tips for achieving a natural look when using brow gel or wax:
- Use a light handwhen applying the product to avoid a stiff or unnatural look.
- Avoid applying too much productto the tail of your brow, as this can make it look too heavy.
- Use a spoolie brush to blend the productinto your brow hairs for a more natural look.
Troubleshooting Common Mistakes
Even the most skilled brow artists can make mistakes, but don’t worry! These common mistakes are easy to fix and prevent. By understanding the common pitfalls and how to correct them, you can achieve a more natural and flattering brow shape.
Over-Plucking
Over-plucking is a common mistake that can lead to thin, sparse brows. This can be especially difficult to fix, as it takes time for brow hairs to grow back. It is crucial to avoid over-plucking by using a light touch and plucking only stray hairs outside of your natural brow shape.
You can also use a brow pencil or powder to fill in any sparse areas. Here are some tips to prevent over-plucking:
- Start by defining your brow shape with a brow pencil or powder.
- Use a magnifying mirror to get a closer look at your brows.
- Pluck hairs one at a time, and always check your progress in a mirror.
- If you’re unsure about a particular hair, leave it alone.
- Avoid plucking hairs in the center of your brows.
Over-Filling
Over-filling brows can create a harsh, unnatural look. To avoid this, start with a light hand and gradually build up the color until you achieve the desired look. Use a brow pencil or powder that is one shade lighter than your natural hair color.
- Start with a light hand and build up the color gradually.
- Use a brow brush to blend the color and create a natural look.
- Avoid using too much product.
- Use a brow pencil or powder that is one shade lighter than your natural hair color.
Creating Harsh Lines
Harsh lines can make your brows look unnatural and drawn on. To avoid this, use a light hand and blend the color thoroughly. You can also use a brow brush to soften the lines and create a more natural look.
- Use a light hand and blend the color thoroughly.
- Use a brow brush to soften the lines and create a more natural look.
- Avoid using a brow pencil or powder that is too dark.
- Use short, feathery strokes to create a natural look.