Easy DIY Nail Art Templates: Unleash Your Inner Artist
Easy DIY nail art templates are a game-changer for anyone who wants to create stunning nail designs without the hassle of freehand painting. These affordable and accessible tools empower you to achieve professional-looking results with minimal effort. Whether you’re a beginner or a seasoned nail art enthusiast, templates offer a fun and easy way to express your creativity and personalize your style.
From simple geometric patterns to intricate floral designs, there’s a template out there for every taste and skill level. With a little practice, you can transform your nails into miniature works of art that will turn heads. This blog post will guide you through everything you need to know about easy DIY nail art templates, from choosing the right type to creating flawless designs.
Introduction to Easy DIY Nail Art Templates
DIY nail art templates are a fun and easy way to create beautiful and intricate designs on your nails without needing extensive artistic skills. These templates are typically made of thin, flexible materials like plastic or metal, with various patterns and shapes cut out.
By applying polish through the cutouts, you can achieve professional-looking nail art designs at home.The use of nail art templates offers several benefits, making them a popular choice for both beginners and experienced nail art enthusiasts.
Benefits of Using Nail Art Templates
Nail art templates offer several advantages, making them a convenient and accessible option for creating beautiful nail designs.
- Easy to Use:Templates are incredibly user-friendly, even for those with limited nail art experience. Simply place the template on your nail, apply polish through the cutouts, and remove the template once the polish dries. This straightforward process eliminates the need for meticulous freehand drawing or intricate dotting techniques.
- Precise Designs:Templates ensure clean, crisp lines and precise patterns, enhancing the overall aesthetic appeal of your nail art. This precision is particularly helpful for creating intricate designs that would be challenging to achieve freehand.
- Versatile Designs:Templates come in a wide variety of designs, ranging from classic geometric patterns to trendy abstract shapes and intricate floral motifs. This versatility allows you to experiment with different styles and create unique looks to match your mood or outfit.
- Time-Saving:Using templates can significantly reduce the time required to create nail art designs. The pre-cut patterns eliminate the need for meticulous freehand painting, allowing you to achieve stunning results quickly and efficiently.
Accessibility and Affordability of DIY Nail Art Templates
Nail art templates are widely available and affordable, making them an accessible option for anyone interested in trying out nail art.
- Online Retailers:A vast selection of nail art templates can be found on popular online retailers like Amazon, Etsy, and eBay. These platforms offer a wide range of designs, materials, and price points to suit different preferences and budgets.
- Local Beauty Supply Stores:Many local beauty supply stores carry a selection of nail art templates, providing an opportunity to browse and choose in person. This option allows you to examine the quality and designs before purchasing.
- Affordable Prices:Nail art templates are generally inexpensive, with prices ranging from a few dollars for basic sets to a bit more for more elaborate designs or larger sets. This affordability makes it easy to experiment with different styles without breaking the bank.
Easy DIY nail art templates are a great way to express your creativity without having to be a pro. You can find all sorts of fun designs online, from simple polka dots to intricate floral patterns. And if you’re feeling really ambitious, you can even try decoupaging your nails with fabric scraps, just like you would with mod podge shoes.
The possibilities are endless! Just remember to seal your nail art with a top coat to make it last longer.
Types of Easy DIY Nail Art Templates

There are several types of DIY nail art templates available, each with its own advantages and disadvantages. These templates make it easy to achieve professional-looking nail art designs without requiring extensive artistic skills.
Template Types
The different types of templates offer various benefits and drawbacks. This section examines some of the most common types, their features, and considerations for choosing the right template.
| Template Type | Description | Advantages | Disadvantages |
|---|---|---|---|
| Stickers | Pre-designed adhesive stickers that are applied directly to the nail. | Easy to use, wide variety of designs available, no drying time required. | Can be difficult to apply precisely, may not adhere well to all nail types, limited design customization. |
| Stencils | Thin, reusable sheets with cut-out designs that are placed on the nail before applying nail polish. | Versatile, can be used with multiple colors, reusable. | Requires more precision in application, can be difficult to remove without smudging the polish. |
| Guides | Strips or dots that help create straight lines or evenly spaced dots. | Simple to use, can be used with various nail polish colors, affordable. | Limited design options, may require multiple applications for more complex designs. |
| Nail Art Pens | Pens with fine-tipped applicators that allow for precise drawing and detail work. | Versatile, can be used for intricate designs, allows for customization. | Requires more practice and skill, may be more expensive than other templates. |
Essential Supplies for Easy DIY Nail Art: Easy Diy Nail Art Templates
Creating stunning nail art at home doesn’t require a professional studio or a massive collection of supplies. With a few essential tools and products, you can achieve impressive results and unleash your creativity. Here’s a breakdown of the key supplies you’ll need for your DIY nail art journey.
Easy DIY nail art templates are a fun way to express your creativity, and they’re especially perfect for the holidays! You can find tons of inspiration online, from festive snowflakes to cute reindeer. And speaking of festive, have you seen those adorable reusable Christmas wrapping options?
Check out this awesome guide for some eco-friendly wrapping ideas ! Once you’ve mastered your nail art skills, you can even use those reusable wrapping papers as inspiration for your next nail design.
Base Coat
A base coat is crucial for preparing your nails for polish application and protecting them from staining. It creates a smooth surface that allows the color to adhere better and last longer. Look for a base coat that is formulated to prevent discoloration and strengthen your nails.
Nail Polish
The heart of any nail art project is the nail polish. Experiment with different colors, finishes, and textures to express your style. From classic reds and blacks to vibrant neons and shimmering metallics, the possibilities are endless.
Top Coat
A top coat seals in the design and protects your nail art from chipping and fading. It adds shine and helps the polish last longer. Choose a top coat that is quick-drying and offers a high-gloss finish for a professional look.
Easy DIY nail art templates are a great way to add a touch of personality to your look. You can find all sorts of fun designs online, from simple polka dots to intricate floral patterns. And if you’re feeling really adventurous, you can even try creating your own designs! But before you get started, take a look at this can you spot the difference game – it’s a great way to test your eye for detail and see if you can spot the subtle differences in two seemingly identical images.
This skill can come in handy when you’re trying to create your own nail art designs, as you’ll need to be able to see the fine details and make sure everything is symmetrical.
Tools, Easy diy nail art templates
- Nail Art Templates:These are essential for creating intricate designs with ease. They come in various shapes and sizes, allowing you to achieve geometric patterns, floral motifs, and more.
- Dotting Tool:This versatile tool is used for creating dots, circles, and other small details. You can find dotting tools in various sizes, allowing you to create different effects.
- Toothpick:A simple toothpick can be used for cleaning up any mistakes, applying small amounts of polish, or creating thin lines.
- Nail Art Brushes:These specialized brushes come in different shapes and sizes for creating detailed designs. They allow for precise application and intricate details.
- Nail Art Striper:This thin brush is ideal for creating lines, stripes, and other geometric patterns. It helps to create clean and sharp edges.
- Q-tips:These are essential for cleaning up any mistakes and removing excess polish.
- Nail Polish Remover:Keep nail polish remover on hand for cleaning up any spills or mistakes.
Step-by-Step Guide to Using Easy DIY Nail Art Templates

Now that you have your supplies, let’s dive into the fun part – applying those nail art templates! This step-by-step guide will walk you through the process of creating stunning nail art designs, even if you’re a beginner.
Applying Nail Art Templates
Applying nail art templates is a simple process that allows you to create intricate designs with ease.
| Step | Description | Tips | Illustration |
|---|---|---|---|
| 1. Prepare your nails | Start by cleaning your nails with a cotton ball soaked in acetone to remove any oils or residue. Then, apply a base coat to protect your nails and create a smooth surface for the template to adhere to. | Ensure your nails are completely dry before applying the template. | [Imagine a hand with freshly painted nails, ready for the template application.] |
| 2. Apply the template | Carefully place the template onto your nail, ensuring it is centered and aligned. Use your finger or a tool like a cuticle pusher to gently smooth out any air bubbles or wrinkles. | Use tweezers to help position the template, especially for smaller designs. | [Imagine a close-up of a nail with a template being placed onto it.] |
| 3. Paint the design | Use a fine-tipped nail polish brush to carefully paint the design within the template’s openings. Start with a thin coat of polish and let it dry completely before applying a second coat for a more vibrant look. | Use a steady hand and avoid going outside the template’s lines. | [Imagine a hand with a template on a nail and nail polish being carefully applied within the template’s openings.] |
| 4. Remove the template | Once the polish is completely dry, carefully peel off the template, starting from one edge. | Remove the template slowly and gently to prevent smudging the design. | [Imagine a hand with a nail where the template is being carefully peeled off.] |
| 5. Seal the design | After removing the template, apply a top coat to seal the design and protect it from chipping. | Choose a quick-drying top coat to minimize smudging. | [Imagine a hand with a nail where the top coat is being applied.] |
Creative Ideas for Easy DIY Nail Art Designs
Now that you’ve got the basics down, let’s explore some fun and trendy nail art designs you can create with templates! The possibilities are endless, and templates are a fantastic way to achieve intricate patterns and designs without being a professional nail artist.
Easy and Trendy Nail Art Designs
Templates are perfect for achieving a variety of popular nail art trends. Here are some examples:
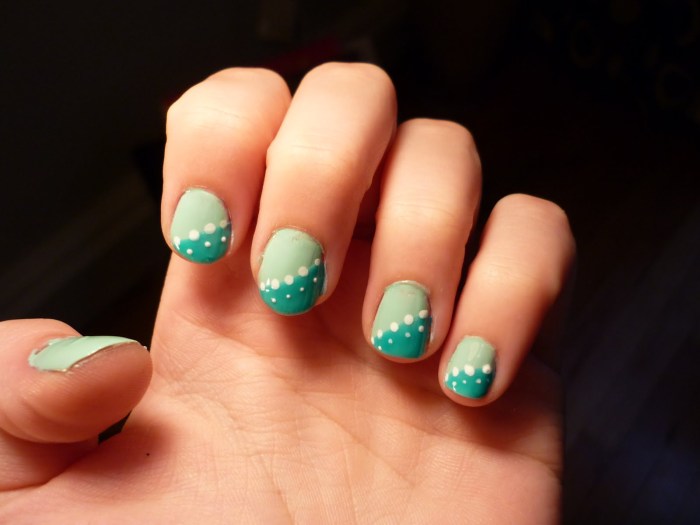
- Geometric Designs:Templates make creating sharp lines and geometric shapes a breeze. You can use them to create stripes, chevrons, triangles, and more. Consider using contrasting colors for a bold look, or opt for a more subtle design with shades from the same color family.
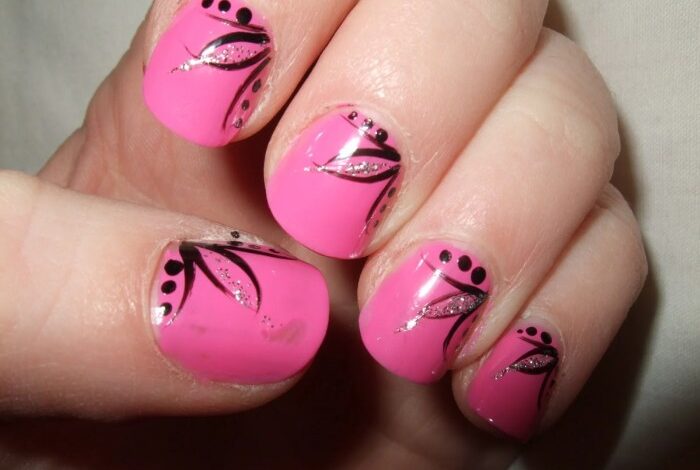
- Floral Patterns:Delicate floral designs are a timeless classic, and templates make it easy to create intricate blooms. Choose from a variety of floral templates, from simple single blossoms to more elaborate arrangements.
- Animal Prints:Templates can help you achieve trendy animal prints like leopard, zebra, or snake skin. Use black and white for a classic look, or experiment with different color combinations for a more modern twist.
- Abstract Art:Templates can be used to create abstract designs with interesting shapes and textures. Experiment with different colors, layering techniques, and even negative space to create unique and eye-catching nail art.
Color Combinations and Embellishments
The beauty of DIY nail art is that you can customize your designs to your heart’s content. Here are some ideas for adding a touch of personality to your creations:
- Color Combinations:Play with color combinations to create different moods. For a classic and elegant look, stick with neutral shades like black, white, and gray. For a vibrant and playful vibe, experiment with bright colors like pink, blue, and green.
You can even use metallics or holographic polishes for a touch of glamour.
- Embellishments:Elevate your nail art with embellishments like rhinestones, glitter, or even small charms. You can create simple accents by placing a few rhinestones on the edge of your nail or go all out with a more elaborate design. Use a dotting tool or tweezers to carefully apply your embellishments.
Nail Art Inspiration for Different Occasions
Here are some ideas for adapting your nail art designs to different occasions:
- Everyday Looks:For everyday wear, opt for simple and elegant designs. A subtle geometric pattern, a delicate floral design, or a single accent nail with a touch of glitter can add a touch of personality without being too overwhelming.
- Special Occasions:For special occasions like weddings, birthdays, or holidays, you can go all out with more elaborate designs. Consider using festive colors, incorporating glitter and rhinestones, or creating a unique design that reflects the theme of the event.
- Seasonal Trends:Embrace the changing seasons with nail art designs that reflect the current mood. In the summer, opt for bright and cheerful colors and tropical prints. In the fall, embrace warm tones like orange, brown, and gold, and try incorporating autumnal leaves or pumpkins.
In the winter, opt for cool colors like blue and silver, and consider adding snowflakes or other wintery designs.


