Homemade Rolling Stamp Wrapping Paper: Add a Personal Touch to Your Gifts
Homemade rolling stamp wrapping paper sets the stage for this enthralling narrative, offering readers a glimpse into a story that is rich in detail and brimming with originality from the outset.
Imagine crafting personalized wrapping paper that reflects your unique style and creativity. With homemade rolling stamps, you can create stunning, one-of-a-kind designs that add a special touch to your gifts. Whether you’re a seasoned crafter or just starting out, rolling stamps offer a fun and accessible way to personalize your wrapping paper and impress your loved ones.
Homemade Rolling Stamp Wrapping Paper
In the realm of gift-giving, personalized touches are always appreciated. Adding a unique element to your presents can make them even more special, and this is where homemade rolling stamp wrapping paper comes in. The trend of personalized wrapping paper has gained significant traction, as people seek ways to express their creativity and add a personal touch to their gifts.
Homemade rolling stamps offer a delightful way to create unique and eye-catching designs on wrapping paper. These stamps are easy to use, versatile, and allow you to create custom patterns that reflect your personal style or the occasion.
The appeal of homemade rolling stamps lies in their ability to transform ordinary wrapping paper into personalized masterpieces.
Benefits of Using Homemade Rolling Stamps
The advantages of creating custom designs with rolling stamps are numerous. Here are some key benefits:
- Uniqueness:Rolling stamps enable you to create one-of-a-kind designs that are not readily available in stores. This adds a special touch to your gifts and makes them truly unique.
- Personalization:You can customize your designs to reflect the recipient’s interests, hobbies, or the occasion. For example, you can create a stamp with a birthday cake design for a birthday present or a snowflake design for a Christmas gift.
- Cost-Effectiveness:Homemade rolling stamps are a budget-friendly alternative to purchasing expensive pre-designed wrapping paper. You can create a large quantity of personalized wrapping paper at a fraction of the cost.
- Creativity:Rolling stamps offer a creative outlet for expressing your artistic side. You can experiment with different designs, colors, and patterns to create unique and visually appealing wrapping paper.
- Versatility:Rolling stamps can be used on various surfaces, including paper, fabric, and even wood. This versatility allows you to personalize a wide range of items, from gift tags to greeting cards.
Materials and Tools for Rolling Stamp Wrapping Paper: Homemade Rolling Stamp Wrapping Paper
Creating your own rolling stamp wrapping paper is a fun and rewarding project. It requires minimal supplies, and the results are unique and personalized. This section will cover the essential materials and tools needed for this project. We will also discuss different types of rolling stamps and the best inks for different paper surfaces.
Types of Rolling Stamps
Rolling stamps come in various sizes, shapes, and designs. The type of rolling stamp you choose will depend on your project and personal preference. Here are some common types of rolling stamps:
- Wooden Rolling Stamps:These are typically made of hardwood, like maple or cherry, and are durable and easy to use. They often feature intricate designs, perfect for creating detailed patterns.
- Acrylic Rolling Stamps:Acrylic rolling stamps are lightweight and transparent, allowing you to see the design as you roll. They are also more affordable than wooden stamps.
- Metal Rolling Stamps:Metal rolling stamps are the most durable option and are often used for professional applications. They can be made from various metals, such as steel or brass, and come in various sizes and designs.
Ink Types for Different Paper Surfaces
The type of ink you choose will depend on the paper surface you are using. Here are some common ink types and their suitability for different paper surfaces:
- Water-Based Ink:Water-based ink is the most common type of ink used for rolling stamps. It dries quickly and is available in a wide range of colors. It works well on most paper surfaces, including cardstock and wrapping paper.
- Oil-Based Ink:Oil-based ink is more durable than water-based ink and is often used for stamping on fabrics and other porous surfaces. It is not recommended for use on glossy paper, as it can smudge or bleed.
- StazOn Ink:StazOn ink is a type of archival ink that is permanent and waterproof. It is ideal for stamping on surfaces that will be exposed to water or moisture, such as photographs or scrapbooks.
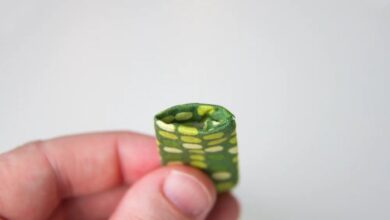
Designing and Creating Your Rolling Stamp

The heart of your homemade wrapping paper lies in the rolling stamp. This is where your creativity truly shines, so let’s dive into designing and creating a stamp that reflects your unique style.
Designing Unique and Visually Appealing Patterns
Start by brainstorming ideas that align with the theme or occasion for your wrapping paper. Consider incorporating elements like:
- Geometric patterns: These are easy to carve and offer a clean, modern aesthetic. Think stripes, zigzags, or repeating shapes like triangles or squares.
- Floral motifs: Flowers, leaves, and vines add a touch of elegance and natural beauty. Choose designs with simple, bold Artikels for easier carving.
- Abstract shapes: Let your imagination run wild with free-flowing lines, swirls, or organic forms. Experiment with different textures and negative space.
- Personalized designs: Add a personal touch by incorporating initials, names, or special symbols. You can also use existing logos or emblems.
Once you have a design in mind, sketch it out on paper to refine the details and proportions. Remember to consider the size of your rolling stamp and the overall look you want to achieve.
Transferring a Design onto a Rolling Stamp
Once you’ve finalized your design, it’s time to transfer it onto the rolling stamp. Here are some methods:
- Tracing: Place your design template under the rolling stamp and trace the Artikel using a pencil or a fine-tipped marker.
- Carbon paper: Place a sheet of carbon paper face down on the rolling stamp, then position your design template on top and trace the Artikel.
- Printing: Print your design onto a thin sheet of paper, then carefully tape it to the rolling stamp. Use a sharp tool to trace the Artikel and transfer the design.
Choose the method that best suits your design and the materials you’re using for your rolling stamp.
Carving or Etching a Design into the Stamp
Now comes the fun part: bringing your design to life by carving or etching it into the rolling stamp.
- Carving: Use a sharp carving tool or a craft knife to carefully remove the material around your design, leaving the raised areas intact. This technique works well with materials like wood, foam, or linoleum.
- Etching: For materials like metal or acrylic, you can use a rotary tool with etching tips or a Dremel to carve out the design. Be sure to wear safety goggles and use light pressure to avoid damaging the stamp.
Take your time and work carefully, gradually removing material until your design is fully etched or carved.
Homemade rolling stamp wrapping paper is a fun and unique way to add a personal touch to your gifts. I love experimenting with different patterns and colors, and I recently discovered a new way to create a watermelon design. If you’re interested in learning more about creating your own watermelon patterns, you can check out this great guide on how to make a watermelon.
Once you’ve mastered the watermelon design, you can incorporate it into your homemade rolling stamp wrapping paper for a truly eye-catching and summery look!
Techniques for Using Rolling Stamps on Wrapping Paper
Using a rolling stamp to create unique designs on wrapping paper is a fun and rewarding process. It’s a great way to personalize gifts and add a touch of handmade charm. This section will guide you through the proper techniques for applying ink to your rolling stamp and rolling it onto paper, ensuring consistent patterns and avoiding smudging.
Homemade rolling stamp wrapping paper is a fun and creative way to personalize gifts, but sometimes the process can be a bit chaotic. If you’re planning a dinner out with kids, consider bringing along some coloring books or crayons to keep them occupied.
For more ideas on how to keep kids entertained at a restaurant, check out this helpful article: 5 ideas to keep kids entertained at a restaurant. Once you’ve got the kids settled, you can return to your masterpiece of a homemade rolling stamp wrapping paper design!
Applying Ink to the Rolling Stamp
Applying ink to the rolling stamp is a crucial step that directly affects the final design. It’s important to use the right type of ink and apply it evenly for a clean and crisp pattern.
Homemade rolling stamp wrapping paper is a fun and personal way to show appreciation for teachers. It’s a great way to add a unique touch to your gift, and you can even personalize it with their favorite colors or patterns.
If you’re looking for a free teacher appreciation gift, there are plenty of ideas available online, like the ones listed on this free teacher appreciation gift website. Once you’ve chosen your gift, wrap it in your homemade rolling stamp paper for an extra special touch.
- Choose the Right Ink:Use an ink specifically designed for rubber stamps. Water-based inks are generally easier to clean and work well on most papers. Acrylic inks are also a good choice, offering vibrant colors and quick drying times. Avoid using oil-based inks, as they can be difficult to clean and may bleed through the paper.
- Apply Ink Evenly:Use an ink pad or a small amount of ink on a non-porous surface. Lightly press the rolling stamp onto the ink pad, ensuring that the entire surface of the stamp is covered with ink. Avoid applying too much ink, as this can lead to smudging and uneven patterns.
- Wipe Excess Ink:After inking the stamp, use a clean, dry cloth or paper towel to wipe away any excess ink from the edges of the stamp. This helps to prevent smudging and ensures a clean transfer of the design onto the paper.
Rolling the Stamp onto Paper
Once the rolling stamp is inked, it’s time to roll it onto the paper. This process requires a gentle touch and a steady hand to achieve a consistent pattern.
- Practice on a Scrap Piece of Paper:Before rolling the stamp onto your wrapping paper, practice on a scrap piece of paper. This allows you to get a feel for the rolling motion and adjust the amount of pressure you apply.
- Roll in a Straight Line:Start by rolling the stamp in a straight line, applying even pressure. Keep the stamp at a consistent angle to the paper to ensure that the design is transferred evenly.
- Avoid Lifting the Stamp:When rolling the stamp, avoid lifting it off the paper. Keep the stamp in contact with the paper at all times, using a smooth and continuous motion. This helps to prevent gaps or uneven lines in the pattern.
- Overlapping Patterns:To create a continuous pattern, slightly overlap each roll of the stamp. This helps to ensure that the design flows seamlessly across the paper.
Avoiding Smudging
Smudging is a common problem when using rolling stamps, especially if the ink is not dry. To prevent smudging, it’s essential to handle the paper carefully and allow the ink to dry completely before handling the wrapped gift.
- Allow Ink to Dry:After rolling the stamp, allow the ink to dry completely before handling the paper. This can take a few minutes, depending on the type of ink used.
- Handle with Care:Once the ink is dry, handle the paper carefully to avoid smudging. Avoid touching the inked areas with your fingers or other objects.
- Use a Drying Rack:If you are using a lot of rolling stamps or need to speed up the drying process, consider using a drying rack. This helps to ensure that the paper is flat and allows the ink to dry evenly.
Inspiration and Ideas for Rolling Stamp Designs
The beauty of homemade rolling stamps lies in the endless possibilities for design. From classic holiday motifs to whimsical nature scenes, the options are limited only by your imagination. To help spark your creativity, let’s explore some popular design categories and get inspired!
Design Categories and Examples
This table showcases popular design categories for rolling stamps and provides examples for each:
| Design Category | Examples |
|---|---|
| Holiday | Snowflakes, Christmas trees, reindeer, Santa Claus, Hanukkah menorahs, Easter eggs, pumpkins, autumn leaves |
| Nature | Flowers, leaves, birds, butterflies, animals, insects, seashells, stars, moons |
| Geometric | Stripes, dots, squares, triangles, circles, zigzags, chevrons, diamonds |
| Abstract | Swirls, waves, organic shapes, abstract patterns, doodles |
| Personalized | Initials, names, dates, quotes, special symbols, family crests |
Incorporating Personal Touches and Themes
- Reflect your personality:Do you love animals? Use a playful animal design. Are you a minimalist? Opt for simple geometric shapes. Let your stamp reflect your style!
- Celebrate special occasions:Create a rolling stamp with a unique design for birthdays, anniversaries, weddings, or graduations. This adds a personal touch to your gift wrapping.
- Embrace seasonal themes:Design stamps for specific holidays like Halloween, Thanksgiving, or Valentine’s Day. Use festive colors and patterns to create a memorable wrapping experience.
- Create a cohesive theme:If you’re wrapping multiple gifts, consider designing stamps with a common theme or color palette. This creates a unified and visually appealing presentation.
“Don’t be afraid to experiment and have fun! The possibilities are endless when it comes to designing your own rolling stamps.”
Variations and Applications of Rolling Stamp Wrapping Paper
The possibilities for customizing your wrapping paper with a rolling stamp are endless! Let’s explore some creative ways to expand beyond traditional paper and ink.
Alternative Materials for Wrapping Paper
You don’t have to stick to traditional wrapping paper. Experiment with different materials to create unique and memorable gifts.
- Fabric:Use fabric scraps or repurposed clothing to create reusable wrapping. A rolling stamp can be used to add a decorative touch to fabric gift bags or pouches.
- Kraft Paper:This eco-friendly option is perfect for a rustic or minimalist look. Rolling stamps can add a personalized touch to kraft paper gift bags or boxes.
- Brown Paper Bags:Repurpose brown paper bags into festive wrapping by using your rolling stamp to create a design. You can even add a personal touch with a handwritten message.
- Newspaper:For a vintage and unique touch, wrap gifts in newspaper. Rolling stamps can help to elevate the look and make it more festive.
Different Ink Colors and Effects
Beyond basic colors, explore a world of ink options to create unique effects.
- Metallic Inks:Gold, silver, and copper inks add a touch of elegance and sparkle to your designs.
- Glitter Inks:For a whimsical touch, try glitter inks in various colors to create shimmering patterns.
- Neon Inks:Bright neon inks create a fun and eye-catching effect, perfect for birthday or party gifts.
- Embossing Inks:These inks create raised designs, adding texture and dimension to your rolling stamp creations.
Creative Uses Beyond Wrapping Paper, Homemade rolling stamp wrapping paper
Your rolling stamp isn’t just for wrapping paper! Think outside the box and explore these creative applications.
- Gift Tags:Create personalized gift tags with your rolling stamp on cardstock or paper.
- Personalized Stationery:Add a unique touch to your letters and notes with custom-designed stationery.
- Fabric Projects:Use your rolling stamp to create patterns on fabric for tote bags, pillowcases, or even clothing.
- Home Decor:Decorate walls, furniture, or even create custom tiles with your rolling stamp designs.