Brilliant D I Y Magnetic Curtain 2
The Ultimate Guide to Brilliant DIY Magnetic Curtain Solutions for Modern Homes
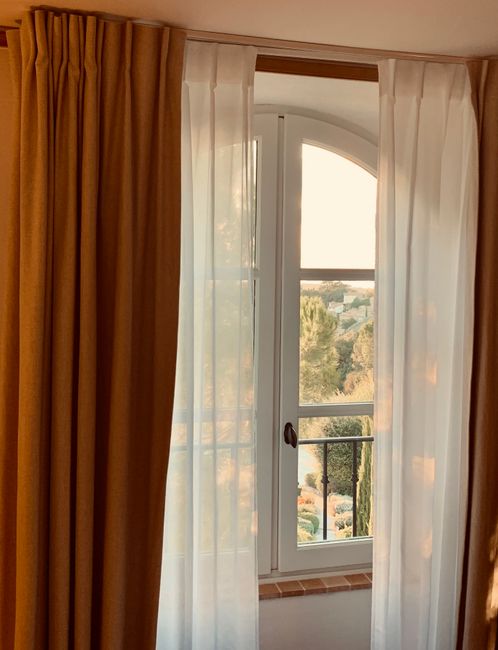
Magnetic curtains have revolutionized window treatments by offering a seamless, tool-free installation process and an elegant finish that traditional rods simply cannot match. For homeowners looking to elevate their interior aesthetics while maintaining functionality, DIY magnetic curtain projects provide a customizable, cost-effective, and sophisticated alternative to standard hardware. Whether you are dealing with awkward steel door frames, minimalist window casings, or simply desire a quick change-up for your seasonal decor, mastering the art of magnetic hanging systems allows for professional-level results without the need for drills, anchors, or expensive contractors.
The Mechanics of Magnetic Curtain Systems
At its core, a magnetic curtain system relies on the powerful attraction between neodymium magnets and ferrous metal surfaces. Unlike traditional tension rods that rely on friction—often causing damage to drywall—magnetic systems utilize high-grade magnets integrated into the curtain header or attached directly to the frame. The most "brilliant" DIY iterations involve embedding these magnets within custom-sewn fabric pockets or using magnetic tape that adheres securely to both the curtain panel and the window perimeter.
When choosing magnets for these projects, strength is the primary consideration. Neodymium magnets (specifically N42 or N52 grades) are essential. They provide high magnetic flux density, ensuring the curtain remains securely in place even when subjected to drafts or daily movement. These magnets are typically small, lightweight, and can be encased in silicone or fabric to prevent scratching the window frame.
Project One: The Seamless Magnetic Valance
The most popular DIY magnetic application is the valance. Because valances do not require the structural support of heavy panels, they are the perfect candidate for magnetic mounting. To begin, you will need high-tensile magnetic tape, a strip of ferrous metal (if your window frame is non-magnetic), fabric of your choice, and a hot glue gun or sewing machine.
- Measure and Cut: Determine the precise width of your window frame. Cut your fabric to size, adding two inches on all sides for hems.
- Fabric Preparation: Hem the edges to ensure a clean look. Along the top header of the valance, create a small sleeve or fold.
- Magnet Integration: Adhere the magnetic tape to the back of the curtain header. If you are sewing, create individual pockets for small neodymium button magnets rather than using tape, as this provides a more refined aesthetic.
- Frame Prep: If your window frame is aluminum or wood, adhere a thin, self-adhesive ferrous steel strip along the top edge of the window. These strips are virtually invisible and provide the necessary magnetic attraction.
- Installation: Simply press the curtain header against the metal strip. The magnetic bond will hold the valance perfectly taut against the frame, creating a "built-in" custom look.
Project Two: The Magnetic Tie-Back Innovation
Beyond mounting, magnets are brilliant for curtain management. Traditional tie-backs often require wall-mounted hooks, which necessitate drilling holes and potentially damaging plaster. A DIY magnetic tie-back system solves this by using fabric-covered magnets.
To construct these, source two strong neodymium disc magnets. Wrap them in a coordinating fabric that matches your drapes. You can create a decorative knot or a rosette using the fabric. Once the magnets are encased, they will snap together around the curtain panel, holding it in a sophisticated drape. This system allows you to adjust the "break" of the curtain, pulling it tighter or looser depending on the light requirements of the room. Because there is no fixed hook, you can move the tie-back position up or down the panel effortlessly to change the aesthetic of the room instantly.
Project Three: The Magnetic Blackout Liner
For those struggling with light leakage around the edges of blackout curtains, a DIY magnetic seal is the gold standard. Even the best curtains often gap at the sides, allowing light to seep in. By attaching small magnetic discs to the edge of the curtain panel and corresponding magnets (or metal stickers) to the window frame, you can create a "light-tight" seal.
This project requires careful alignment. Once the curtain is hung, mark the points where the fabric meets the window frame. Sew or glue your magnetic discs onto the back edge of the curtain. Apply the corresponding magnetic tape to the side of the window frame. When the curtain is closed, the magnetic force pulls the fabric edges firmly against the window frame, blocking virtually all stray light. This is an essential hack for media rooms or bedrooms where total darkness is required.
Material Selection: Choosing the Right Components
The success of any magnetic curtain project depends heavily on the materials used.
- Magnets: Always opt for neodymium (rare-earth) magnets. Ferrite magnets are typically too weak to hold fabric through a hem or thick material. Ensure they are nickel-plated to prevent rust, especially in humid environments like kitchens or bathrooms.
- Adhesives: If you are not sewing, you will need high-bond mounting tape (like 3M VHB). This is critical for keeping your metal strips or magnets attached to the window frame.
- Fabric Weight: While magnetic systems are strong, they are not infinite. Avoid heavy, thick velvet or lined drapes for top-mounted magnetic systems. Instead, focus on linen, cotton, or light synthetic blends for the best performance.
Troubleshooting Common Issues
One of the most common complaints with DIY magnetic curtains is the magnets slipping or not being strong enough. If you find your curtain falling, it is usually due to one of three things:
- Gap Distance: Magnetic strength drops exponentially with distance. Ensure your magnets are as close to the metal surface as possible. Avoid thick decorative fabric covers that place too much space between the magnet and the frame.
- Surface Texture: If you are adhering metal strips to a textured wall or frame, the adhesive will fail. Use a smoothing primer or a high-quality silicone adhesive to create a flat bonding surface first.
- Magnet Alignment: If using individual button magnets, ensure that the North/South poles are facing the correct way. If you accidentally face two "North" poles together, they will repel rather than attract. Test your magnets by labeling them with a marker before sewing them into the final project.
Aesthetic Advantages of Magnetic Hardware
Traditional curtain rods are visually intrusive. They often dictate the style of the room, forcing you into industrial, traditional, or rustic aesthetics. Magnetic systems are "invisible hardware." Because the mechanism is hidden behind the fabric, the window appears to be framed by the curtains themselves. This minimalism is a hallmark of modern interior design. It allows the fabric texture, pattern, and color to take center stage, unobstructed by brass rings, finials, or clunky metal rods.
Furthermore, these systems are highly modular. You can change your curtains for the holidays or seasons in seconds. Because there is no hardware to unscrew or rods to slide, you can swap out panels as easily as you change a pillowcase. This versatility makes it a favorite for renters who want to personalize their living space without violating lease agreements regarding wall damage.
Sustainable and Rental-Friendly Benefits
Sustainability in home improvement is often about longevity and non-destructive modification. By utilizing magnetic systems, you preserve the structural integrity of your window frames. You are not putting holes into wood, vinyl, or aluminum. When you move, you simply peel off the magnetic adhesive strips—leaving no trace behind.
For the environmentally conscious DIYer, magnetic curtain systems also allow for "upcycling." Old curtains that have lost their grommets or have damaged headings can be salvaged by sewing in new magnetic strips. This prevents textiles from reaching landfills and extends the life of your home decor through simple, effective retrofitting.
Safety Considerations for Magnetic Systems
While powerful, neodymium magnets can be dangerous if handled incorrectly. If you are working on a project with children or pets, ensure that the magnets are completely sealed inside fabric pockets. Swallowing magnets can cause severe internal injuries. Always double-stitch your fabric pockets to ensure the magnets cannot slip out.
Furthermore, keep magnets away from electronic devices, credit cards, and pacemakers. While the small discs used in curtains are generally low-risk, they can still interfere with the magnetic stripe on a credit card if kept in close proximity for an extended period.
Future-Proofing Your Design
As you finalize your magnetic curtain project, consider the future. If you plan to upgrade to heavier fabrics in the winter, install a longer strip of magnetic tape rather than individual magnets. A continuous strip of metal offers more surface area and greater holding power, allowing for heavier fabric weights. If you are using adhesive metal strips, opt for powder-coated options that match your window frame color. This ensures that even when the curtains are open, the hardware remains subtle and professional.
By integrating these magnetic solutions, you are not just hanging fabric; you are installing a functional system that improves light control, visual cleanliness, and installation speed. Whether you are a minimalist looking to clear out visual clutter or a renter seeking a non-invasive decor solution, the DIY magnetic curtain path offers a sophisticated answer that modern hardware simply cannot match. With careful planning, precise measurements, and the right grade of neodymium magnets, your windows can become the focal point of a truly polished home interior.