Mod Podge shoes are a fun and creative way to personalize your footwear, turning plain sneakers into unique works of art. Mod Podge, a versatile adhesive and sealant, has been a staple in the crafting world for decades, and its use in shoe customization has exploded in recent years.
The popularity of customizing shoes stems from the desire to express individuality and create one-of-a-kind pieces that reflect personal style. Whether you’re a seasoned crafter or a beginner, Mod Podge shoes offer a rewarding and accessible way to unleash your creativity and transform your footwear.
Examples of Mod Podge Shoe Designs: Mod Podge Shoes
Mod Podge is a versatile crafting medium that can be used to create a wide range of projects, including stunning shoe designs. The possibilities are endless when it comes to Mod Podge shoes, and you can easily personalize your footwear to reflect your unique style.
Mod Podge Shoe Designs, Mod podge shoes
This section provides a comprehensive overview of various Mod Podge shoe designs, showcasing the versatility and creativity that this technique offers. Each example includes a detailed description, materials used, and step-by-step instructions, making it easy for you to replicate these designs or use them as inspiration for your own creations.
Design
Description
Materials
Steps
Floral Design
This design features a beautiful floral pattern on a pair of white canvas shoes. The flowers are created using Mod Podge and various colors of acrylic paint.
White canvas shoes
Mod Podge
Acrylic paint in various colors
Paintbrushes
Scissors
Optional: stencils or stamps for floral designs
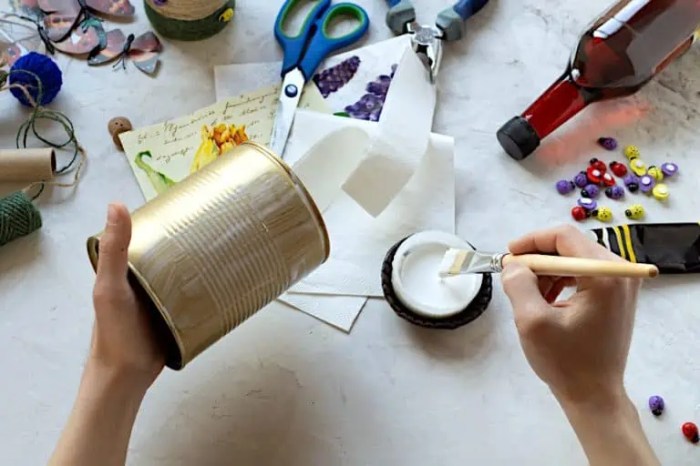
Clean and prepare the shoes by removing any dirt or debris.
Apply a thin layer of Mod Podge to the entire shoe surface.
Using acrylic paint and paintbrushes, create your desired floral designs. You can use stencils or stamps for a more precise design.
Allow the paint to dry completely.
Apply a final coat of Mod Podge to seal the design and protect it from wear and tear.
Geometric Pattern
This design features a bold and modern geometric pattern on a pair of black leather shoes. The pattern is created using Mod Podge and gold leaf.
Black leather shoes
Mod Podge
Gold leaf
Paintbrushes
Scissors
Optional: stencils for geometric shapes
Clean and prepare the shoes by removing any dirt or debris.
Apply a thin layer of Mod Podge to the areas where you want to apply the gold leaf.
Carefully apply the gold leaf to the Mod Podge, using a paintbrush or your fingers to smooth it out.
Allow the gold leaf to dry completely.
Apply a final coat of Mod Podge to seal the design and protect it from wear and tear.
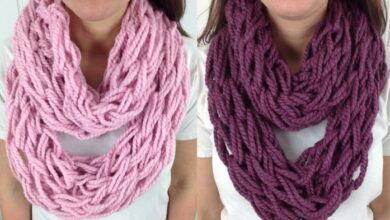
Ombre Effect
This design features a smooth and stylish ombre effect on a pair of white sneakers. The ombre effect is created using Mod Podge and various shades of pink acrylic paint.
White sneakers
Mod Podge
Acrylic paint in various shades of pink
Paintbrushes
Sponge
Optional: painter’s tape for creating clean lines
Clean and prepare the shoes by removing any dirt or debris.
Apply a thin layer of Mod Podge to the entire shoe surface.
Using a sponge and acrylic paint, create an ombre effect by blending different shades of pink together.
Allow the paint to dry completely.
Apply a final coat of Mod Podge to seal the design and protect it from wear and tear.
Glitter Design
This design features a sparkling and glamorous glitter design on a pair of black pumps. The glitter is applied using Mod Podge and various colors of glitter.
Black pumps
Mod Podge
Glitter in various colors
Paintbrushes
Scissors
Optional: stencils for creating glitter patterns
Clean and prepare the shoes by removing any dirt or debris.
Apply a thin layer of Mod Podge to the areas where you want to apply the glitter.
Sprinkle glitter over the Mod Podge, using a paintbrush to help distribute it evenly.
Allow the glitter to dry completely.
Apply a final coat of Mod Podge to seal the design and protect it from wear and tear.
This website uses cookies so that we can provide you with the best user experience possible. Cookie information is stored in your browser and performs functions such as recognising you when you return to our website and helping our team to understand which sections of the website you find most interesting and useful.
Strictly Necessary Cookies
Strictly Necessary Cookie should be enabled at all times so that we can save your preferences for cookie settings.
If you disable this cookie, we will not be able to save your preferences. This means that every time you visit this website you will need to enable or disable cookies again.