
Cover Me Baby: DIY Car Seat Canopy
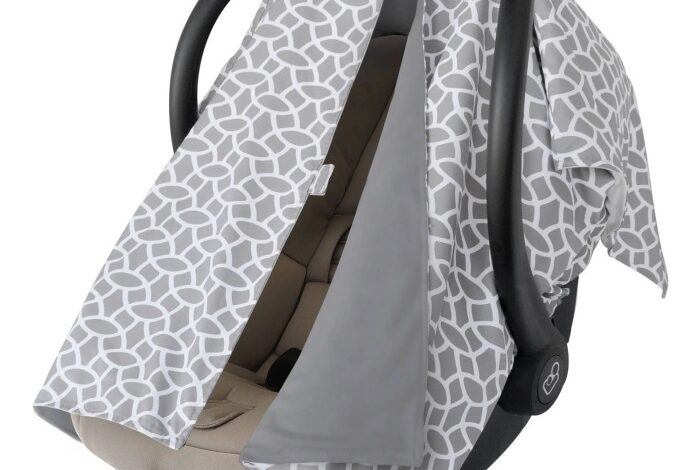
Cover me baby diy car seat canopy – Cover Me Baby: DIY Car Seat Canopy – Ever wished you could shield your little one from the harsh sun, wind, or curious eyes while they’re safely nestled in their car seat? A DIY car seat canopy is the perfect solution! It’s a simple and affordable way to create a cozy and protective haven for your precious cargo, all while adding a touch of personal style to your stroller or car seat.
This trend has taken the parenting world by storm, and for good reason. Not only does a canopy provide shade and privacy, but it also helps to regulate temperature, block out distractions, and even create a sense of security for your little one.
Whether you’re a seasoned DIY pro or a beginner, this guide will walk you through every step, from choosing the right materials to crafting a custom-fit canopy that’s both functional and fashionable.
DIY Car Seat Canopy Designs
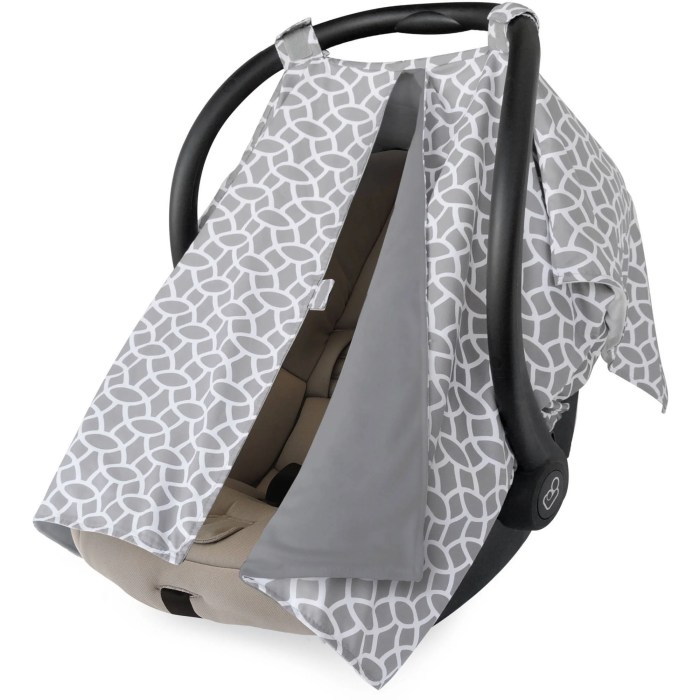
Creating a DIY car seat canopy is a fantastic way to protect your little one from the sun, wind, and curious onlookers. It’s a simple project that can be tailored to your specific needs and style. Let’s explore some DIY car seat canopy designs.
A DIY car seat canopy is a lifesaver for keeping your little one cool and protected from the sun’s harsh rays. While you’re busy creating the perfect canopy, don’t forget to protect your own skin! Check out this awesome giveaway for a chance to win a $100 gift card to Swim Zip protect your skin this summer win 100 gift card to swim zip , a company that makes super cute and stylish rash guards for the whole family.
With your own skin protected, you can focus on creating a safe and stylish canopy for your little one.
Basic Car Seat Canopy Design, Cover me baby diy car seat canopy
A basic car seat canopy design involves a simple rectangular piece of fabric that drapes over the car seat. This design is easy to make and can be customized with different fabrics and embellishments. Here’s a step-by-step guide to creating a basic car seat canopy:
- Choose your fabric:Select a lightweight, breathable fabric that is easy to wash. Cotton, muslin, or voile are good options. Consider the season and climate you live in when choosing fabric. For example, if you live in a hot climate, a lighter fabric like cotton voile would be a better choice.
Making a DIY car seat canopy for your little one is a great way to personalize their ride and offer them a little extra shade and privacy. You can find tons of tutorials online, but if you’re looking for inspiration, check out this list of 28 neighbor Christmas gift ideas wrapping paper for some unique patterns and colors.
Just remember to choose fabrics that are breathable and safe for your baby.
- Measure your car seat:Measure the width and depth of your car seat. Add a few inches to each measurement for seam allowance and to ensure a generous fit.
- Cut the fabric:Cut a rectangle of fabric using the measurements you took in the previous step. For a basic canopy, you’ll need two pieces of fabric
one for the top and one for the bottom.
- Sew the sides:Pin and sew the sides of the fabric pieces together, leaving the top and bottom open. You can use a sewing machine or hand-sew the fabric together.
- Create the opening:Cut a small opening in the center of the top fabric piece. This opening will allow you to see your baby while they are in the car seat.
- Add embellishments (optional):You can add embellishments to your canopy, such as ribbons, lace, or embroidery. These details can add a personal touch to your creation.
Design Options for Car Seat Canopies
Different design options can enhance the functionality and aesthetics of your car seat canopy. Here are some examples:
- Single-layer canopy:A single-layer canopy provides basic sun and wind protection. This design is simple to make and lightweight.
- Double-layer canopy:A double-layer canopy offers more sun protection and can also provide privacy for your baby. You can use different fabrics for each layer, such as a cotton outer layer and a muslin inner layer.
- Hooded canopy:A hooded canopy provides extra head and neck protection for your baby. This design is ideal for babies who are particularly sensitive to the sun or wind. You can create a hood by sewing a triangular piece of fabric to the top of the canopy.
Making a DIY car seat canopy for my little one has been a fun project, but let me tell you, it’s a lot less stressful than trying to teach a bird how to talk! Check out this cockatoo is hilarious – it’s seriously worth the laugh.
Anyway, back to the canopy, I’m using breathable fabric and a simple design, so I can easily pop it on and off when needed.
Creating a Canopy with Adjustable Straps
Adjustable straps allow you to fit the canopy to different car seat models. Here’s how to create a canopy with adjustable straps:
- Choose your straps:Select strong, adjustable straps, such as webbing or grosgrain ribbon. Consider using straps that are at least 1 inch wide for added durability.
- Attach the straps:Sew the straps to the corners of the canopy. You can use a sewing machine or hand-sew the straps to the fabric. Ensure the straps are securely attached and will hold the canopy in place.
- Adjust the straps:Once the straps are attached, adjust them to fit your car seat. You can use a buckle or a tie to secure the straps.
Car Seat Canopy Safety Considerations
DIY car seat canopies can be a stylish and practical addition to your baby gear, but it’s crucial to prioritize safety when creating and using them. Ensuring proper installation, addressing potential hazards, and prioritizing ventilation are essential to guarantee a safe and comfortable experience for your little one.
Proper Installation and Fit
The proper installation and fit of your DIY car seat canopy are paramount for safety. A poorly fitted canopy can obstruct your view of your child, potentially hindering your ability to respond to their needs. Additionally, a loose canopy could become a choking hazard or pose a risk of entanglement.
- Secure Attachment:The canopy should be securely attached to the car seat, using strong, durable materials that won’t easily tear or break. Avoid using loose ties or straps that could come undone.
- Proper Fit:The canopy should fit snugly around the car seat, without any loose fabric that could drape over your child’s face or obstruct their breathing.
- Clear Visibility:Ensure that the canopy doesn’t block your view of your child’s face and that they can easily see out. Avoid using thick or opaque materials that could obscure their vision.
Potential Safety Hazards
DIY car seat canopies can pose several safety hazards if not constructed and used correctly. Understanding these risks is crucial for ensuring the safety of your child.
- Choking Hazard:Loose fabric or straps can become a choking hazard for infants and toddlers. Ensure all materials are securely attached and free of any dangling pieces.
- Entanglement:A canopy that is not properly secured can become entangled around your child, potentially restricting their movement or breathing. Avoid using any materials that could easily snag or tangle.
- Fire Hazard:Some materials used in DIY canopies, such as flammable fabrics, could pose a fire hazard. Choose flame-retardant materials and avoid using any materials that could ignite easily.
Ventilation and Airflow
Proper ventilation is crucial for maintaining a safe and comfortable environment for your child. A canopy that traps heat and moisture can create a stuffy and potentially dangerous situation.
- Mesh Panels:Incorporate mesh panels into the canopy design to allow for airflow and prevent overheating. Mesh panels also provide visibility, allowing you to easily check on your child.
- Openings:Create openings at the top or sides of the canopy to promote air circulation. These openings can be covered with a breathable fabric or mesh to protect your child from the sun and elements.
- Avoid Overheating:Never use a canopy in a hot car or in direct sunlight. Always ensure that your child is properly ventilated and that the canopy is not trapping heat.
Car Seat Canopy Maintenance and Care: Cover Me Baby Diy Car Seat Canopy
A DIY car seat canopy, like any other fabric item, requires regular care to ensure its longevity and effectiveness. Proper maintenance involves cleaning, storage, and repair to keep your canopy looking its best and protecting your little one.
Cleaning and Washing
Regular cleaning is essential to maintain the canopy’s hygiene and remove dirt, stains, and allergens. Here’s how to clean your DIY car seat canopy:
- Machine Wash:Most fabrics used for car seat canopies are machine washable. Refer to the fabric care label for specific washing instructions. Use a mild detergent and cold water for delicate fabrics. Avoid harsh chemicals or bleach, as they can damage the fabric and potentially harm your baby.
- Hand Wash:If the fabric is delicate or you prefer a gentler approach, hand washing is a good option. Fill a sink or basin with cold water and mild detergent. Gently agitate the canopy in the water, then rinse thoroughly. Avoid twisting or wringing the canopy, as this can damage the fabric.
- Drying:After washing, gently squeeze out excess water from the canopy. Avoid wringing or twisting, which can stretch the fabric. Lay it flat on a clean towel to air dry. Avoid direct sunlight, as it can fade the fabric. You can also use a low heat setting on your dryer if the fabric allows it.
Storage and Maintenance
Proper storage can help extend the life of your car seat canopy. Here’s how to store it:
- Fold or Roll:Fold the canopy neatly or roll it up for storage. Avoid folding it in the same place repeatedly, as this can create creases. Store it in a cool, dry place away from direct sunlight.
- Use a Storage Bag:A breathable storage bag can protect the canopy from dust and dirt. You can find reusable bags specifically designed for storing baby items.
Repairing and Replacing Damaged Parts
While DIY car seat canopies are durable, they can sometimes get damaged. Here’s how to repair or replace damaged parts:
- Small Tears or Holes:Small tears or holes can be repaired with fabric glue or a sewing needle and thread. Match the thread color to the canopy’s fabric for a seamless repair. If the damage is extensive, consider replacing the canopy.
- Broken Straps or Clips:Replace broken straps or clips with new ones. Ensure they are compatible with the canopy’s design and secure enough to hold the canopy in place. Look for high-quality replacements to ensure safety.