DIY Frozen Cake Pops: All the Disney Characters!
Diy frozen cake pops all the disney frozen characters as cake – DIY Frozen cake pops: All the Disney characters as cake! Let’s dive into the magical world of Frozen and bring your favorite characters to life in edible form. Frozen fever is still going strong, and what better way to celebrate than with adorable, personalized cake pops?
From the icy elegance of Elsa to the playful charm of Olaf, we’ll guide you through creating a Frozen cake pop wonderland.
This guide will take you step-by-step through creating the perfect Frozen cake pops, from choosing your favorite characters to mastering the art of decorating. We’ll explore a variety of design ideas, from classic representations to unique interpretations. So gather your ingredients, unleash your creativity, and let’s get started!
Frozen Cake Pop Inspiration
Frozen-themed cake pops have become incredibly popular, and for good reason! The movie’s enchanting story, memorable characters, and stunning visuals have captured the hearts of people worldwide. Creating Frozen-themed cake pops is a fun way to celebrate the movie’s magic and bring a touch of winter wonderland to any occasion.Frozen cake pops appeal to a wide audience, from children who adore the movie’s characters to adults who appreciate the movie’s themes of sisterhood, courage, and self-discovery.
They also offer a creative outlet for bakers to express their love for Frozen by transforming their favorite characters and scenes into edible delights.
Frozen Characters for Cake Pops, Diy frozen cake pops all the disney frozen characters as cake
The popularity of Frozen has made its characters instantly recognizable and perfect for cake pop creations. Here are some iconic characters you can represent:
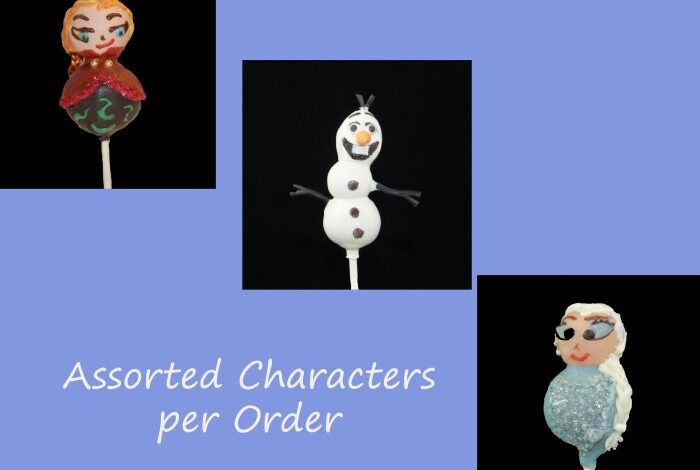
- Elsa: The Snow Queen, with her flowing silver hair and icy blue dress, is a popular choice for cake pops. You can even create a shimmering effect on the cake pop by using edible glitter or a white chocolate glaze.
I’m dreaming of a DIY Frozen cake pop party with all the characters! Elsa, Anna, Olaf, Kristoff, Sven, and even the grumpy Duke of Weselton, each a delicious little treat. I’m thinking of making the castle as a centerpiece, maybe even adding a little painted chandelier for a touch of royal elegance.
Then, I’ll arrange the cake pops around the castle, creating a scene straight out of Arendelle.
- Anna: The brave and kindhearted princess, known for her bright red hair and adventurous spirit, is another beloved character. Her cake pop can be adorned with a red dress and a cheerful expression.
- Olaf: The lovable snowman, with his quirky personality and infectious optimism, is a crowd-pleaser. You can create a simple but charming Olaf cake pop using white chocolate and a few black and orange candies.
- Kristoff: The rugged mountain man, with his brown hair and warm brown coat, is a loyal and supportive friend. His cake pop can be made with brown chocolate and topped with a simple beard and a friendly smile.
- Sven: The reindeer, known for his gentle nature and loyalty to Kristoff, is a charming addition to any Frozen cake pop collection. You can create a Sven cake pop using brown chocolate and adding some antlers and a friendly expression.
Frozen Elements in Cake Pop Designs
To enhance the Frozen theme of your cake pops, consider incorporating these iconic elements:
- Snowflakes: You can create intricate snowflake designs on the cake pops using white chocolate or fondant. You can also use edible silver or white glitter to add sparkle and dimension.
- Ice Castles: Create a miniature ice castle on a cake pop using white chocolate or fondant. You can add details like towers, windows, and gates for a realistic look.
- Winter Scenes: Incorporate winter-themed scenes like snowy mountains, frozen lakes, or a winter forest into your cake pop designs. You can use edible paints, fondant, or sprinkles to create these scenes.
DIY Cake Pop Recipe
Now that you have a visual idea of what you want to create, let’s dive into the recipe for making basic cake pops. This recipe is the foundation for your Frozen-themed cake pops, and you can easily customize it to create different flavors.
Making DIY Frozen cake pops with all the Disney Frozen characters is a fun project for any occasion. You can find inspiration for your creations in all momsense today 15 mothers day ideas which includes a great roundup of Mother’s Day ideas.
Once you’ve got your cake pops decorated, you can arrange them in a cute Frozen-themed display for a special treat.
Basic Cake Pop Recipe
The basic cake pop recipe provides a neutral flavor base that can be adapted to your desired Frozen character.
I’m dreaming up a Frozen cake pop party for my daughter’s birthday, and I’m already brainstorming all the fun characters to make! I’m thinking Elsa, Anna, Olaf, Kristoff, and even Sven. I’m even considering making a few extra to share with her teacher, who’s been a real rockstar this year.
Maybe I’ll even use this teacher appreciation guide for some inspiration! I’m sure she’ll love the Frozen-themed treats as much as my daughter will.
Ingredients:
- 1 box (15.25 ounces) yellow cake mix
- 1/2 cup (1 stick) unsalted butter, softened
- 3 large eggs
- 1/2 cup milk
- 1 teaspoon vanilla extract
- 1 cup confectioners’ sugar
- 1/2 cup shortening
- 1 teaspoon vanilla extract
- 1/2 cup milk
- 1 pound (about 4 cups) candy melts, your choice of colors
- Sprinkles, edible glitter, or other decorations, as desired
Instructions:
- Preheat oven to 350 degrees F (175 degrees C). Grease and flour a 9×13 inch baking pan.
- In a large bowl, combine cake mix, butter, eggs, milk, and vanilla extract. Beat with an electric mixer on low speed until combined, then beat on medium speed for 2 minutes.
- Pour batter into the prepared pan and bake for 25-30 minutes, or until a toothpick inserted into the center comes out clean.
- Let the cake cool completely in the pan before crumbling it into a large bowl.
- In a separate bowl, combine confectioners’ sugar, shortening, and vanilla extract. Beat with an electric mixer on low speed until combined, then beat on medium speed for 2 minutes.
- Gradually add the crumbled cake to the confectioners’ sugar mixture, mixing until well combined. The mixture should be moist and pliable.
- Roll the cake mixture into 1-inch balls. Place the balls on a baking sheet lined with parchment paper and refrigerate for at least 30 minutes.
- Melt the candy melts according to package directions. Dip each cake pop ball into the melted candy, using a toothpick or lollipop stick to hold it.
- Place the dipped cake pops on a parchment paper-lined baking sheet and allow the candy to set completely. You can use a fork to create a swirl pattern in the candy or sprinkle the cake pops with decorations while the candy is still wet.
- Once the candy has set, enjoy your Frozen-themed cake pops!
Customizing Cake Batter Flavors
You can easily customize the cake batter to create different flavors. Here are a few examples:
Vanilla Cake Pops
Use a vanilla cake mix instead of a yellow cake mix.
Chocolate Cake Pops
Use a chocolate cake mix instead of a yellow cake mix.
Blue Raspberry Cake Pops
Use a blue raspberry cake mix or add blue food coloring to the yellow cake batter.
Tips for Achieving a Smooth and Consistent Cake Pop Texture
- Use a good quality cake mix. This will ensure a cake that is moist and crumbly, which is essential for making delicious cake pops.
- Don’t overmix the batter. Overmixing can make the cake tough. Just mix until the ingredients are combined.
- Let the cake cool completely before crumbling it. This will prevent the cake from being too warm and sticky, making it easier to roll into balls.
- Refrigerate the cake pops for at least 30 minutes before dipping them in candy melts. This will help them to hold their shape and prevent them from melting too quickly.
- Dip the cake pops in the candy melts one at a time. This will help to ensure that they are evenly coated and that the candy sets properly.
Frozen Character Cake Pop Designs: Diy Frozen Cake Pops All The Disney Frozen Characters As Cake

Now that you have your cake pops ready, it’s time to transform them into beloved Frozen characters! This section will provide inspiration for designing your cake pops, showcasing various character ideas and detailing the process of shaping and decorating them.
Frozen Character Cake Pop Designs
Here’s a table outlining some Frozen character cake pop designs:
| Character | Design | Explanation |
|---|---|---|
| Elsa | Ice blue cake pop with a white swirl for her dress, a blue fondant crown, and a white frosting face with blue eyes and pink cheeks. | This design captures Elsa’s elegant and icy personality. The blue and white colors represent her powers and her dress, while the crown adds a regal touch. |
| Anna | Red cake pop with a white bodice, a red and brown hair, and a white frosting face with brown eyes and pink cheeks. | Anna’s design reflects her warm and adventurous spirit. The red and white colors symbolize her dress, while the brown hair and brown eyes complete her look. |
| Olaf | Orange cake pop with a round shape, white fondant buttons, a carrot nose, and black eyes. | Olaf’s design is simple yet adorable. The orange color represents his cheerful nature, while the round shape and carrot nose make him instantly recognizable. |
| Sven | Brown cake pop with a round shape, a brown fondant nose, and black eyes. | Sven’s design is simple and captures his loyal and gentle nature. The brown color represents his fur, while the black eyes and nose add detail. |
Shaping and Decorating Frozen Cake Pops
To create your Frozen character cake pops, you’ll need to shape the cake pop dough and then decorate it with frosting, fondant, and other edible decorations.
Shaping Cake Pops
Round Cake Pops
Use a round cookie cutter to shape your cake pop dough into a ball.
Oval Cake Pops
Use a small oval cookie cutter to create a slightly elongated shape.
Character-Specific Shapes
For characters like Olaf, you’ll need to use your hands to shape the cake pop dough into a more specific form.
Decorating Cake Pops
Frosting
Use different colored frosting to create the base color of your cake pops. For example, use blue frosting for Elsa, red frosting for Anna, and orange frosting for Olaf.
Fondant
Fondant is perfect for creating details like hair, crowns, and clothing. You can use fondant cutters to create shapes, or you can roll out fondant and cut it by hand.
Edible Decorations
Edible decorations, such as sprinkles, edible glitter, and candy melts, can add extra flair to your cake pops.
Using Frosting Colors and Techniques
Color Mixing
Use food coloring to achieve the desired shades of blue, red, orange, and brown.
Frosting Techniques
Use a piping bag to create intricate details on your cake pops. You can also use a toothpick to blend colors and create subtle shading.
Piping Tips
Use different piping tips to create various effects. For example, a round tip can be used to create a smooth finish, while a star tip can be used to create a textured effect.
Cake Pop Presentation
Your Frozen cake pops are ready, and now it’s time to showcase their frosty charm! A captivating presentation can elevate your cake pops from delicious treats to a true Frozen wonderland.
Frozen-Themed Backdrop and Props
A Frozen-themed backdrop and props create a cohesive and immersive experience. Think about the iconic Frozen elements that will transport your guests to Arendelle.
- Arendelle Castle Silhouette:Create a simple yet striking backdrop by cutting out a castle silhouette from cardboard or poster board and painting it in shades of blue and white. You can even add twinkling lights for a magical effect.
- Snowflakes and Ice Crystals:Scatter faux snowflakes and ice crystals around the display to create a wintry ambiance. You can find these at craft stores or even make your own using paper or glitter.
- Frozen Characters:Include Frozen character figurines or cutouts to add a touch of personality to the display. You can find these at party supply stores or online.
- Frozen-Themed Banner:A simple banner with a Frozen theme, such as “Let It Go” or “Frozen Fun,” adds a festive touch to the presentation.
Cake Pop Display Ideas
There are several creative ways to display your Frozen cake pops, adding visual appeal and making them even more tempting.
- Tiered Stand:A tiered stand allows you to showcase a variety of Frozen cake pop designs. Use a stand with different levels to create visual interest and highlight different cake pops.
- Cake Pop Tree:Create a unique and whimsical display by inserting cake pops into a styrofoam cone or a small tree branch. Decorate the base with faux snow or glitter for a Frozen touch.
- Ice Bucket:For a cool and refreshing display, place your cake pops in a decorative ice bucket filled with crushed ice. This adds a touch of Frozen magic and keeps the cake pops chilled.
- Clear Jars:Fill clear jars with decorative sand or sugar and insert your cake pops for a charming and elegant display.
Packaging Cake Pops for Gifting or Party Favors
Make your Frozen cake pops even more special by packaging them for gifting or party favors.
- Clear Cellophane Bags:Clear cellophane bags allow guests to see the beautiful cake pops. Tie the bags with ribbon in Frozen colors (blue, white, silver) and add a Frozen-themed tag or sticker.
- Frozen-Themed Boxes:Consider using small, decorated boxes with a Frozen theme. These boxes can be found at party supply stores or online.
- Personalized Labels:Create personalized labels with a Frozen theme and attach them to your cake pops. You can include a message like “Let It Go” or “Happy Birthday.” This adds a personal touch to your gifts.