DIY Makeup Removal Pads: A Guide to Eco-Friendly Beauty
DIY makeup removal pads are a fantastic way to ditch store-bought options and create a personalized beauty routine. They’re not only cost-effective but also environmentally friendly, allowing you to reduce your waste and create a sustainable approach to skincare. You can customize your DIY pads to suit your specific skin type and sensitivities, ensuring a gentle and effective cleansing experience.
Whether you’re looking to reduce your environmental footprint, save money, or simply want to try something new, DIY makeup removal pads are a worthwhile endeavor. This guide will explore the benefits of using DIY pads, provide you with several easy-to-follow recipes, and guide you through the process of creating your own perfect makeup remover.
DIY Makeup Removal Pad Recipes: Diy Makeup Removal Pads
Creating your own makeup removal pads is a fun and cost-effective way to pamper your skin. These DIY pads are gentle on your skin, free from harsh chemicals, and customizable to your skin type.
Recipes for DIY Makeup Removal Pads
Here are a few DIY makeup removal pad recipes that you can try:
- Oil-Based Makeup Remover Pads: This recipe is great for removing heavy makeup, including waterproof mascara and eyeliner.
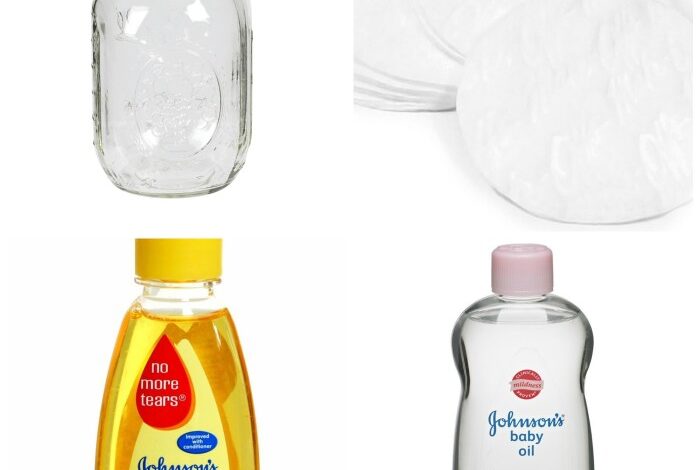
Mix equal parts of your favorite oil (such as olive oil, coconut oil, or jojoba oil) and a gentle cleanser (such as baby wash or a mild facial cleanser). Soak cotton rounds in the mixture and store in an airtight container.
- Micellar Water Pads: Micellar water is a gentle and effective makeup remover.
Combine 1/2 cup distilled water, 1/4 cup witch hazel, and 1 tablespoon of your favorite oil (such as olive oil or almond oil). Soak cotton rounds in the mixture and store in an airtight container.
- Rosewater Pads: Rosewater is known for its soothing and calming properties.
Mix 1/2 cup rosewater, 1/4 cup distilled water, and 1 tablespoon of glycerin. Soak cotton rounds in the mixture and store in an airtight container.
Making DIY makeup removal pads is a fun and eco-friendly way to pamper yourself. While I’m whipping up a batch, I often find myself pondering conversation starters for family dinners. If you’re looking for some inspiration, check out this website for family dinner questions – it’s full of great prompts! After a delicious meal and some stimulating conversation, there’s nothing better than a relaxing skincare routine with my homemade makeup remover pads.
- Green Tea Pads: Green tea is rich in antioxidants and can help to soothe and calm irritated skin.
Brew a strong cup of green tea and let it cool completely. Soak cotton rounds in the green tea and store in an airtight container.
Effectiveness of Different Recipes
The effectiveness of each recipe depends on the type of makeup you are trying to remove.
- Oil-based makeup remover padsare best for removing heavy makeup, including waterproof mascara and eyeliner. The oil helps to break down the makeup and make it easier to remove.
- Micellar water padsare effective for removing most types of makeup, including light makeup and eye makeup. The micelles in the water attract and lift away makeup and dirt.
- Rosewater padsare gentle and effective for removing light makeup and refreshing the skin. The rosewater helps to soothe and calm the skin.
- Green tea padsare effective for removing light makeup and calming irritated skin. The green tea helps to soothe and refresh the skin.
Storage Methods for DIY Makeup Removal Pads
It is important to store your DIY makeup removal pads properly to prevent them from spoiling.
- Airtight container: Store your makeup removal pads in an airtight container to prevent them from drying out or becoming contaminated.
- Refrigerator: If you are using oil-based makeup remover pads, you can store them in the refrigerator to help them last longer.
- Replace regularly: Replace your DIY makeup removal pads every 2-3 weeks to ensure they are fresh and effective.
Using DIY Makeup Removal Pads
Now that you’ve crafted your own makeup removal pads, let’s explore the best ways to use them for a clean and gentle experience. We’ll cover the proper technique, tips for sensitive skin, and how to determine if your DIY recipe is suitable for your skin type.
Using DIY Makeup Removal Pads
Start by soaking a DIY makeup removal pad in your chosen cleansing solution, whether it’s micellar water, oil, or a gentle cleanser. Gently press the soaked pad onto your closed eyes for a few seconds, then sweep it across your eyelids and lashes to remove any eye makeup.
Repeat this process for the rest of your face, using gentle circular motions to remove makeup and cleanse your skin. Remember to avoid harsh scrubbing, as this can irritate the skin.
Tips for Sensitive Skin
If you have sensitive skin, it’s essential to choose a gentle cleansing solution for your DIY makeup removal pads. Avoid harsh ingredients like alcohol, fragrances, and sulfates, which can trigger irritation. Instead, opt for natural oils like coconut oil, olive oil, or jojoba oil, or a mild micellar water.
When using your DIY pads, apply them gently to avoid any unnecessary friction. If you experience any redness or irritation, discontinue use and consult a dermatologist.
Determining Suitability for Your Skin Type
The key to choosing the right DIY makeup removal pad recipe is understanding your skin type. If you have oily skin, a recipe with ingredients like witch hazel or tea tree oil can help control oil production. For dry skin, opt for recipes that include hydrating ingredients like aloe vera or honey.
If you have sensitive skin, prioritize gentle ingredients like chamomile or calendula. Always patch test a new recipe on a small area of skin before applying it to your entire face.
DIY makeup removal pads are a great way to save money and reduce waste, and they’re surprisingly easy to make. You can use old t-shirts, flannel scraps, or even cut up some of those adorable hand towels you find in gift baskets, like the ones listed in this awesome article on 41 neighbor Christmas gift idea towel ! Just be sure to use a gentle fabric and avoid anything too abrasive on your skin.
Once you’ve got your pads, you can soak them in your favorite makeup remover and store them in a jar for easy access.
Advantages and Disadvantages of DIY Makeup Removal Pads
DIY makeup removal pads offer a budget-friendly and customizable alternative to commercially available options. They allow you to tailor your skincare routine and reduce your environmental impact. However, it’s essential to weigh the pros and cons before making the switch.
Cost-Effectiveness
DIY makeup removal pads are significantly cheaper than store-bought options. You can create a large batch of pads using readily available ingredients, often for a fraction of the cost of commercial products. For example, a simple DIY recipe using cotton rounds, water, and a mild oil can cost less than $5, compared to a comparable commercial makeup remover that could cost $10 or more.
Customization
DIY makeup removal pads offer unparalleled customization. You can adjust the ingredients to suit your specific skin type and concerns. For instance, if you have sensitive skin, you can opt for gentle ingredients like chamomile tea or aloe vera. For oily skin, you can add ingredients like witch hazel or tea tree oil.
This level of personalization allows you to create a makeup remover that perfectly addresses your individual needs.
Environmental Benefits
DIY makeup removal pads can be a more sustainable option compared to disposable commercial wipes. By using reusable materials like cotton rounds or old t-shirts, you can reduce waste and contribute to a greener lifestyle. You can also choose biodegradable or compostable materials for your DIY pads, further minimizing your environmental footprint.
Potential for Irritation
One of the main disadvantages of DIY makeup removal pads is the potential for irritation. Some ingredients, even natural ones, can cause reactions in sensitive skin. It’s crucial to patch test any new DIY recipe before applying it to your entire face.
Shelf Life, Diy makeup removal pads
DIY makeup removal pads typically have a shorter shelf life than commercial products. This is because they are not formulated with preservatives, which help to extend the product’s lifespan. You’ll need to be mindful of storage conditions and use your DIY pads within a reasonable timeframe to prevent spoilage.
Storage Considerations
Storing DIY makeup removal pads requires careful attention. They should be kept in a cool, dry place to prevent the growth of bacteria. It’s best to store them in airtight containers to maintain their freshness and prevent contamination.
Comparison to Commercial Options
DIY makeup removal pads offer several advantages over commercially available options, particularly in terms of cost-effectiveness and customization. However, commercial products often have a longer shelf life, are formulated with preservatives to prevent spoilage, and may offer more convenient packaging.
Ultimately, the best choice depends on your individual needs and preferences.
DIY makeup removal pads are a great way to save money and reduce waste. I love making my own with reusable cotton rounds and a simple blend of oil and water. After a long day of wearing makeup, I find it’s always a good idea to remove everything completely, even if you’ve used a long-lasting lip color.
To keep your lips looking their best, check out this get stained homemade lip stain balm recipe. You can easily create your own lip stain balm at home, and it’s a great way to add a touch of color without worrying about staining your clothes or makeup removal pads.
DIY Makeup Removal Pad Variations

The beauty of DIY makeup removal pads lies in their versatility. You can tailor them to your specific needs and preferences, choosing from various fabric types, sizes, and even adding unique features. This allows you to create a custom makeup removal solution that perfectly suits your skin and budget.
Types of DIY Makeup Removal Pads
The first step in creating your DIY makeup removal pads is to decide on the type of pad you want. There are two main categories: reusable pads and single-use pads.
| Type | Description | Examples |
|---|---|---|
| Reusable Pads | These pads are designed to be washed and reused multiple times, making them a more eco-friendly and cost-effective option. | Cotton rounds, flannel squares, microfiber cloths |
| Single-Use Pads | These pads are meant for a single use and then discarded. They are often made from biodegradable materials. | Cotton balls, gauze pads, paper towels |
Fabric Choices for DIY Makeup Removal Pads
The fabric you choose for your DIY makeup removal pads plays a crucial role in their effectiveness and longevity. Here’s a table comparing the pros and cons of different fabric types:
| Fabric Type | Pros | Cons |
|---|---|---|
| Cotton | Soft and gentle on the skin, readily available, absorbent | Can leave lint behind, may require multiple washes to remove makeup thoroughly |
| Flannel | Soft and absorbent, durable, can be washed repeatedly | May be slightly less absorbent than cotton, can be more expensive |
| Microfiber | Highly absorbent, effective at removing makeup and dirt, durable | Can be less gentle on sensitive skin, may require a gentle detergent for washing |
| Bamboo | Soft and absorbent, naturally antibacterial, eco-friendly | Can be more expensive than cotton, may require special care for washing |
| Silk | Gentle on sensitive skin, luxurious feel, naturally hypoallergenic | Not as absorbent as other fabrics, can be delicate and require special care |
Effectiveness of Different Fabric Types for Makeup Removal
The effectiveness of different fabric types for removing makeup depends on factors such as the type of makeup, the fabric’s absorbency, and the amount of friction applied. In general, microfiber and flannel are considered more effective at removing makeup than cotton, due to their higher absorbency and ability to trap makeup particles.
However, the best fabric for you will depend on your individual needs and preferences.
Safety Considerations for DIY Makeup Removal Pads

While DIY makeup removal pads offer a cost-effective and customizable solution, it’s crucial to prioritize safety. Using the wrong ingredients or failing to follow proper procedures can lead to skin irritation, allergic reactions, or even infections.
Potential Allergens and Irritants
It’s essential to be aware of potential allergens and irritants commonly found in DIY makeup removal pad recipes. Some common ingredients to watch out for include:
- Essential Oils:While they offer pleasant scents, essential oils like tea tree oil, lavender oil, and peppermint oil can be irritating to sensitive skin.
- Alcohol:Although effective for removing makeup, alcohol can dry out the skin, especially for those with dry or sensitive skin.
- Citrus Fruits:Lemon juice and grapefruit juice are natural astringents, but their acidity can irritate sensitive skin.
- Baking Soda:While a popular DIY ingredient, baking soda can be abrasive and potentially irritating to the skin, especially when used frequently.
Patch Testing Before Application
Before applying any DIY makeup removal pad to your entire face, it’s crucial to perform a patch test. This involves applying a small amount of the mixture to a discreet area of skin, like the inside of your elbow or behind your ear.
Wait for 24-48 hours to observe any reactions, such as redness, itching, or burning. If you experience any adverse reactions, discontinue use and consult a dermatologist.