DIY Picture Wall: Shhh, Secret Sale!
DIY picture wall shhh secret sale – sounds like a dream, right? Imagine transforming a blank wall into a personal art gallery, showcasing your favorite memories and style, all without breaking the bank. Secret sales are the key to unlocking your picture wall dreams, offering incredible deals on frames, prints, and more.
Creating a picture wall is a fantastic way to personalize your space and add a touch of personality. But finding the right pictures, frames, and supplies can be expensive. That’s where secret sales come in. These hidden gems offer amazing discounts on everything you need to create a stunning DIY picture wall, making your creative vision a reality without the hefty price tag.
Hanging Your Picture Wall
Now that you’ve carefully planned and curated your picture wall, it’s time to put it all together. This is the exciting part where your vision starts to come to life! Hanging a picture wall might seem daunting, but with the right tools, techniques, and a little patience, you can create a stunning focal point in your space.
Tools and Supplies
Before you begin, gather the necessary tools and supplies. You’ll need:
- A level
- A tape measure
- A pencil
- A hammer or drill (depending on your wall type)
- Picture hanging hardware (hooks, nails, or wire)
- A ladder or step stool
- A stud finder (optional, but recommended for heavier pieces)
Understanding Wall Types, Diy picture wall shhh secret sale
The type of wall you have will determine the hanging hardware you need. Here’s a quick guide:
- Drywall:The most common wall type, drywall is relatively easy to hang pictures on. Use drywall anchors for heavier pieces.
- Plaster:Plaster walls are harder than drywall, requiring stronger nails or screws. Consider using plaster anchors for heavier pieces.
- Concrete:Concrete walls are the most challenging to hang pictures on.
You’ll need specialized anchors designed for concrete.
Choosing the Right Hanging Hardware
Selecting the right hanging hardware is crucial for ensuring your pictures are securely hung. Here are some common options:
- Nails:Best for lightweight pictures and frames.
- Hooks:Available in various sizes and weight capacities, hooks are ideal for hanging a variety of items.
- Wire:Often used for heavier pieces, wire allows for adjustable hanging height.
- D-rings:Used in conjunction with wire, D-rings provide a secure attachment point.
Hanging Your Pictures
Here’s a step-by-step guide to hanging your picture wall:
- Plan your layout:Use masking tape or painter’s tape to create a temporary Artikel of your picture wall arrangement on the wall. This allows you to visualize the final look and make adjustments before committing to any holes.
- Mark the hanging points:Once you’re happy with the layout, use a pencil to mark the exact hanging points for each picture on the wall.
- Check for studs:If you’re hanging heavy pictures, use a stud finder to locate wall studs for extra support.
- Install hanging hardware:Use a hammer or drill to install the appropriate hanging hardware at each marked point. Make sure the hardware is securely installed.
- Hang your pictures:Carefully hang your pictures onto the installed hardware, ensuring they are level and centered.
- Step back and admire:Once all the pictures are hung, step back and admire your beautiful picture wall. Make any necessary adjustments to achieve the desired balance and visual appeal.
Tips for Achieving Balance and Visual Appeal
- Vary picture sizes:Mixing different sizes creates visual interest and prevents monotony.
- Use a grid system:A grid system helps create a structured and balanced arrangement, especially for larger picture walls.
- Create focal points:Highlight certain pictures by placing them in prominent positions.
- Consider color and theme:Choose pictures that complement each other in terms of color and theme.
- Play with spacing:Experiment with different spacing between pictures to achieve the desired effect.
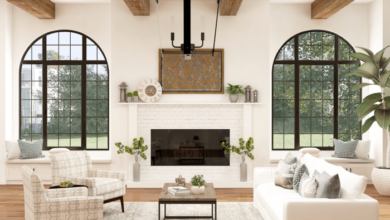
Adding Finishing Touches: Diy Picture Wall Shhh Secret Sale

Your DIY picture wall is looking great, but it’s time to add those final touches that will truly make it pop. This is where you get to infuse your personal style and create a space that’s uniquely yours. Think of these finishing touches as the accessories that complete your outfit, adding personality and flair.
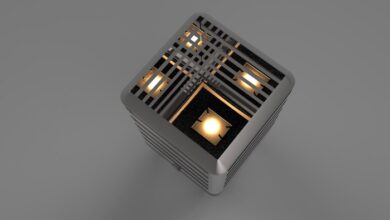
Lighting
Lighting plays a crucial role in enhancing the visual impact of your picture wall. It can create a dramatic effect, highlight certain pieces, and even change the overall mood of the room.
- Accent lighting: Consider adding spotlights or track lighting to focus attention on specific artworks or photos. This technique is particularly effective for showcasing larger pieces or those with intricate details.
- Ambient lighting: Soft, ambient lighting, such as string lights or fairy lights, can create a cozy and inviting atmosphere. These lights can be draped around the edges of the picture wall or used to highlight the space between frames.
- Pendant lights: A stylish pendant light hung above the picture wall can serve as a focal point and add a touch of sophistication. Choose a pendant that complements the style of your artwork and the overall decor of the room.
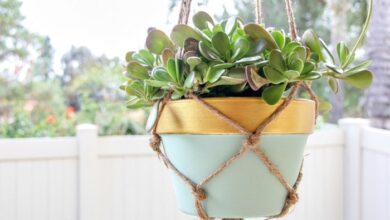
Plants
Adding greenery to your picture wall is a simple yet effective way to inject life and vibrancy. Plants can soften the edges of the wall, create visual interest, and even purify the air.
- Hanging plants: Choose trailing plants, such as pothos or spider plants, that can be hung from the ceiling or placed on shelves above the picture wall. Their cascading foliage will create a natural and organic look.
- Small potted plants: Place small potted plants on shelves or ledges around the picture wall. Choose plants that complement the colors and textures of your artwork.
- Wall-mounted planters: Consider using wall-mounted planters to display plants directly on the picture wall. This is a great way to add vertical greenery and create a unique visual element.
Wall Accents
Wall accents can add personality and depth to your picture wall. They can be anything from decorative mirrors to sculptures to wall tapestries.
- Mirrors: Mirrors can create the illusion of more space and reflect light, making the room feel brighter. Choose a mirror that complements the style of your artwork and the overall decor of the room.
- Sculptures: Sculptures can add a touch of artistry and dimension to your picture wall. Choose sculptures that complement the style of your artwork and the overall decor of the room.
- Wall tapestries: Wall tapestries can add color, texture, and pattern to your picture wall. Choose a tapestry that complements the style of your artwork and the overall decor of the room.
Personal Touches
The most important finishing touches are the ones that reflect your personal style and create a space that feels uniquely yours. Here are some ideas:
- Incorporate family photos: Include photos of loved ones to add a personal touch and create a warm and inviting atmosphere.
- Display travel souvenirs: Show off your travel memories by incorporating souvenirs from your adventures. This can be anything from postcards to maps to small trinkets.
- Add meaningful quotes: Frame inspirational quotes or lyrics that resonate with you. This is a great way to add a personal touch and create a space that reflects your values.
Okay, so you’re thinking about that DIY picture wall project, and maybe you’re even eyeing those frames on sale – but don’t forget about the magic of making memories! Creating a family tradition, like the ones described in this article on frugal fun family traditions and magical moments under the Christmas tree , can be just as rewarding as a perfectly curated wall.
After all, those photos will be filled with the joy of shared experiences, and that’s something no sale can beat!
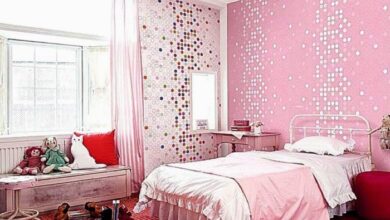
You know how I love a good DIY project, especially when it comes to decorating my son’s room. I’m planning a picture wall for him, but I’m waiting for the perfect sale! While I’m waiting, I’ve been browsing for some other fun ideas, and I found a great gift guide for little boys that has some awesome inspiration.
Now I’m thinking about adding a few of those gifts to his picture wall too, wouldn’t that be cute? Back to my picture wall, I’m hoping to find a deal on frames soon, so I can get started on this fun project!
Okay, so you’re thinking about a DIY picture wall, but you’re also craving something sweet and gooey, right? Well, maybe you should check out this recipe for an ooey gooey mud pie before you get started. Once you’ve satisfied that craving, you can get back to your picture wall project with renewed energy and a clear head!