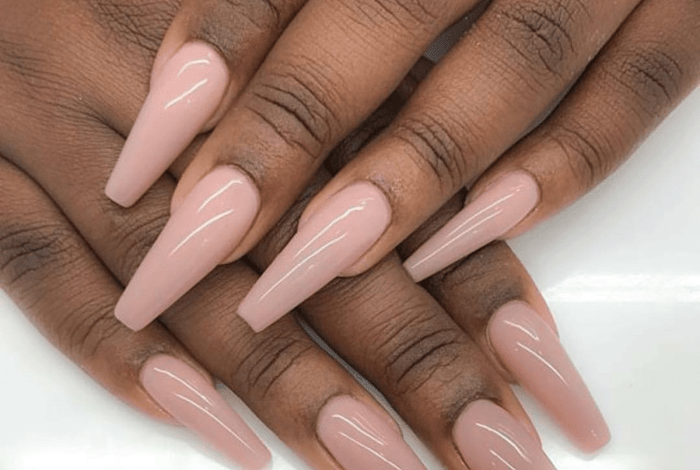
Perfectly Manicured Nails Under 10 Minutes
Perfectly manicured nails under 10 minutes? It sounds like a dream, but it’s totally achievable! With a few essential tools and some practice, you can transform your nails from drab to fab in no time. Whether you’re a seasoned nail art enthusiast or a beginner looking to try something new, this guide will equip you with the knowledge and techniques to achieve salon-worthy results at home.
From prepping your nails to applying polish with precision, we’ll explore every step of the process, sharing tips and tricks along the way. We’ll also delve into nail art inspiration, providing ideas for simple and stunning designs that can be achieved in a flash.
Get ready to unleash your inner nail artist and discover the joy of a quick and easy manicure!
The Art of Manicuring at Home
Achieving salon-worthy nails from the comfort of your own home is easier than you might think. With a little patience and the right tools, you can transform your nails into a masterpiece. This guide will equip you with the knowledge and techniques to master the art of home manicuring.
Preparing Nails for Manicuring
Before embarking on the manicure process, it’s crucial to prepare your nails properly. This ensures a smooth and even application of polish, resulting in a longer-lasting and polished look.
Let’s face it, perfectly manicured nails can instantly elevate your look, but who has time for expensive salon visits? Luckily, there are tons of amazing tools and products out there that can help you achieve that salon-worthy polish at home.
And if you’re looking for some great deals on those tools, check out hsn faves for getting you back – they have everything from nail lamps to cuticle trimmers, all at incredible prices. So ditch the expensive appointments and get ready to flaunt those flawless nails!
- Remove Existing Polish:Start by removing any existing nail polish using a gentle, acetone-based remover. Avoid harsh removers that can dry out your nails.
- Soak Nails:Soak your nails in warm, soapy water for a few minutes. This softens the cuticles and makes them easier to push back.
- Push Back Cuticles:Using a cuticle pusher, gently push back your cuticles, avoiding excessive pressure. Pushing back cuticles helps prevent hangnails and promotes nail growth.
- Trim and File Nails:Trim your nails to your desired length using a nail clipper. File them into your preferred shape using a nail file, ensuring smooth edges.
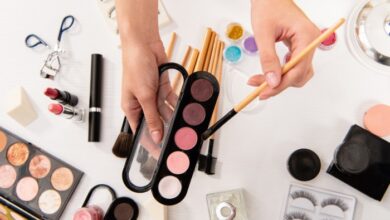
Essential Tools and Products
A well-equipped manicure kit is crucial for achieving salon-quality results at home. The right tools and products ensure a smooth, polished, and long-lasting manicure.
Okay, so you’ve got your perfectly manicured nails under 10, looking sharp and ready for fall. Now, what about keeping the little ones entertained? I’ve been loving the idea of creating some fall-themed quiet books with my kids, and found some amazing inspiration online, like these fall quiet book patterns.
They’re super cute and educational, plus they’ll keep my kids busy while I finish up my own nail art!
Essential Tools for a Home Manicure
A basic manicure kit should include the following essential tools:
- Nail clippers:Used to trim nails to the desired length.
- Nail file:Used to shape nails into a desired form, such as square, oval, or almond.
- Cuticle pusher:Used to gently push back cuticles, promoting nail growth and preventing hangnails.
- Cuticle nippers:Used to trim excess cuticles, but use caution to avoid cutting the skin.
- Nail buffer:Used to smooth out nail ridges and create a polished finish.
- Cotton balls:Used for applying nail polish remover and cleaning up spills.
- Orangewood sticks:Used for cleaning under the nails and pushing back cuticles.
- Nail polish remover:Used to remove old nail polish before applying a new coat.
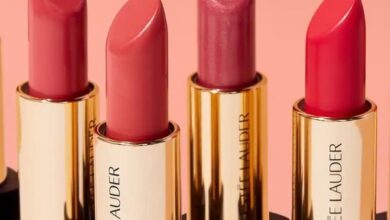
Types of Nail Polish
Nail polish comes in various formulations, each with its own unique characteristics:
- Traditional nail polish:The most common type, it’s typically a quick-drying formula with a wide range of colors and finishes.
- Gel polish:Requires a UV lamp for curing and offers a longer-lasting, chip-resistant finish compared to traditional polish.
- Shellac polish:A hybrid of gel and traditional polish, offering a long-lasting, chip-resistant finish without the need for a UV lamp.
- Matte nail polish:Creates a flat, non-shiny finish, adding a sophisticated and minimalist touch to the nails.
- Glitter nail polish:Adds sparkle and glamour to nails, available in various glitter sizes and colors.
- Metallic nail polish:Offers a shimmery, reflective finish, creating a glamorous and eye-catching look.
- Magnetic nail polish:Contains magnetic particles that respond to a magnet, creating unique patterns and designs on the nails.
Recommended Nail Polish Brands and Price Ranges
| Brand | Price Range |
|---|---|
| Essie | $8
|
| OPI | $9
You know how they say, “a little bit of polish goes a long way?” Well, I’m here to tell you that’s absolutely true when it comes to perfectly manicured nails under 10 bucks. A fresh coat of color can instantly elevate your look, and let’s be honest, it’s way more affordable than a complete wardrobe overhaul! Speaking of which, if you’re looking to refresh your fall wardrobe without breaking the bank, check out these 12 fall wardrobe ideas that won’t break the bank. You’ll be surprised how much you can do with a few clever pieces and a little bit of creativity! Now back to those nails… I’m thinking a deep burgundy this week!
|
| Orly | $10
|
| Chanel | $27
|
| Dior | $28
|
Nail Art Inspirations

Nail art is a fun and creative way to express yourself and enhance your manicure. Whether you’re a beginner or a seasoned pro, there are endless possibilities to explore.
Simple and Easy Nail Art Designs
There are many simple and easy nail art designs that can be achieved even with limited skills and tools. These designs can be done using just a few colors of nail polish and a dotting tool or toothpick. Here are some ideas:
- Dots:Use a dotting tool or toothpick to create dots of different sizes and colors on your nails. You can create simple polka dots, or get more creative with patterns like stripes, hearts, or flowers.
- Stripes:Use thin nail polish brushes or tape to create stripes of different colors or widths. You can create horizontal, vertical, or diagonal stripes.
- Geometric Designs:Create simple geometric shapes on your nails, such as squares, triangles, or circles. You can use different colors and patterns to create unique and eye-catching designs.
- Negative Space:Leave a portion of your nail bare, while painting the rest with a solid color or design. This creates a modern and minimalist look.
Creating Different Nail Art Patterns
Here are some tips for creating different nail art patterns:
- Practice:Practice your designs on a piece of paper or a clear nail polish before applying them to your nails.
- Use a steady hand:Use a steady hand and apply thin coats of nail polish. This will help prevent smudging and bleeding.
- Clean up:Use a cotton swab dipped in nail polish remover to clean up any mistakes.
- Use a top coat:Apply a top coat to seal in your design and make it last longer.
Nail Art Styles and Tools
Here is a table that Artikels some common nail art styles and the tools that are typically used to create them:
| Nail Art Style | Tools |
|---|---|
| Dots | Dotting tool, toothpick |
| Stripes | Thin nail polish brush, tape |
| Geometric Designs | Thin nail polish brush, tape |
| Negative Space | Tape, thin nail polish brush |
| Ombre | Sponge, thin nail polish brush |
| Marble | Toothpick, water |
| Glitter | Glitter, top coat |
| Gems | Gems, nail glue |
Incorporating Accessories into Nail Art
Accessories like stickers, gems, and glitter can add a touch of sparkle and personality to your nail art.
- Stickers:Nail stickers are a great way to add a quick and easy design to your nails. They come in a variety of shapes, sizes, and colors.
- Gems:Gems can be applied to your nails using nail glue. They come in a variety of shapes, sizes, and colors, and can be used to create everything from simple accents to elaborate designs.
- Glitter:Glitter can be applied to your nails using a top coat or nail glue. It comes in a variety of colors, sizes, and finishes, and can be used to create everything from subtle shimmer to full-on sparkle.
Nail Care and Maintenance
Maintaining healthy nails goes beyond just painting them. It’s about caring for them from the inside out, ensuring they are strong, hydrated, and free from damage. This involves taking care of your cuticles, moisturizing your nails, and practicing safe nail polish removal techniques.
Cuticle Care, Perfectly manicured nails under 10
The cuticles are the thin skin that surrounds the base of your nails. They protect the nail matrix, which is responsible for nail growth. Keeping your cuticles healthy is crucial for maintaining strong and healthy nails.
- Hydrate:Dry cuticles can lead to hangnails and tears. Apply cuticle oil regularly to keep them moisturized.
- Push Back Gently:Pushing back your cuticles helps to prevent them from growing over the nail plate, which can hinder nail growth. Use a cuticle pusher or a wooden orange stick to gently push them back after soaking your fingers in warm water.
- Avoid Cutting:Cutting cuticles can increase the risk of infection. It’s best to avoid cutting them and instead focus on pushing them back gently.
Moisturizing and Protecting Nails
Nails are made of keratin, a protein that also makes up hair and skin. Just like our skin, nails need moisture to stay healthy and strong.
- Apply Nail Oil:Apply nail oil daily to nourish and protect your nails. It helps to prevent dryness and brittleness.
- Use a Nail Strengthener:If your nails are prone to breakage, consider using a nail strengthener. These products typically contain ingredients that help to strengthen the nail plate and reduce breakage.
- Wear Gloves:Protect your nails from harsh chemicals and detergents by wearing gloves when cleaning or doing chores.
Removing Nail Polish Without Damaging Nails
Removing nail polish regularly is important, but it’s crucial to do so without damaging your nails.
- Choose a Gentle Remover:Opt for a nail polish remover that is acetone-free, as acetone can dry out and damage nails.
- Soak Cotton Balls:Soak cotton balls in nail polish remover and gently wipe away the polish. Avoid scrubbing or rubbing too hard, as this can weaken the nail plate.
- Use a Remover Pad:Consider using pre-soaked remover pads for a more convenient and mess-free application.
Weekly Nail Care Routine
A regular nail care routine is essential for maintaining healthy and strong nails. Here’s a sample routine you can follow:
- Soak:Soak your nails in warm water for a few minutes to soften the cuticles.
- Push Back Cuticles:Gently push back your cuticles using a cuticle pusher or a wooden orange stick.
- Exfoliate:Use a nail brush or a gentle scrub to remove any dirt or debris from under your nails.
- Moisturize:Apply cuticle oil and hand cream to keep your nails and cuticles hydrated.
- Trim and File:Trim your nails to your desired length and file them into your preferred shape.
- Apply Base Coat:Apply a base coat to protect your nails from staining and to help the polish adhere better.
- Apply Polish:Apply two coats of your favorite nail polish.
- Seal with Top Coat:Finish with a top coat to seal in the color and add shine.
Nail Polish Removal and Storage: Perfectly Manicured Nails Under 10
Removing nail polish is an essential part of maintaining healthy nails and preparing for a fresh manicure. Proper storage of nail polish and tools is crucial for preserving their quality and extending their lifespan.
Methods for Removing Nail Polish
There are several methods for removing nail polish, each with its own advantages and disadvantages.
- Acetone-Based Nail Polish Remover: This is the most common and effective method, quickly dissolving most nail polishes. However, it can be harsh on nails and skin, leading to dryness and damage over time.
- Acetone-Free Nail Polish Remover: This gentler option is ideal for sensitive skin and nails. It may take longer to remove polish and might not be as effective for dark or glitter polishes.
- Non-Acetone Nail Polish Remover: This alternative uses ingredients like ethyl acetate or isopropyl alcohol, making it a safer choice for individuals with allergies or sensitivities to acetone. It’s often preferred for removing gel or acrylic nails.
Storing Nail Polish
Storing nail polish properly is essential for preserving its quality and preventing it from thickening or separating.
- Store in a Cool, Dark Place: Exposure to heat and sunlight can cause nail polish to thicken, change color, or become unusable. Storing it in a cool, dark place, like a drawer or a cabinet, helps maintain its consistency and color.
- Avoid Extreme Temperatures: Extreme temperatures, both hot and cold, can affect nail polish quality. Keep it away from direct sunlight, heaters, or refrigerators.
- Tightly Close the Bottle: Air exposure can cause nail polish to thicken and dry out. Always ensure the bottle is tightly closed after each use to prevent evaporation and maintain its quality.
Cleaning and Maintaining Nail Polish Brushes
Clean nail polish brushes regularly to prevent them from becoming hard and unusable.
- Clean After Each Use: Wipe the brush with a lint-free cloth or tissue to remove excess polish. This prevents the polish from drying on the brush and making it difficult to clean later.
- Deep Clean with Nail Polish Remover: Once a week or more frequently if you use dark or glitter polishes, soak the brush in acetone-based nail polish remover for a few minutes. Gently swirl the brush to loosen any remaining polish. Rinse the brush thoroughly with clean water and allow it to air dry completely.
- Store Brushes Properly: Store brushes upright in a container or jar to prevent them from bending or becoming misshapen.
Storing Nail Polish Tools
Storing nail polish tools properly helps maintain their cleanliness and longevity.
- Clean Tools After Each Use: Wash tools like nail clippers, cuticle pushers, and files with soap and water after each use. This prevents the buildup of bacteria and debris.
- Store in a Clean, Dry Place: Store tools in a clean, dry container or drawer to prevent them from becoming damaged or contaminated.