3 Quick Ways to Repurpose Old Christmas Lights
3 Quick Ways to Repurpose Old Christmas Lights – Ever wonder what to do with those tangled strands of Christmas lights after the holiday season? Don’t toss them out! These twinkling treasures can be transformed into charming decorations that add a touch of festive cheer to your home year-round.
From festive garlands to whimsical luminaries, we’ll explore three simple ways to give your old Christmas lights a new life.
Repurposing old Christmas lights is a fun and eco-friendly way to add personality to your home décor. Whether you’re a crafty enthusiast or a beginner, these projects are easy to follow and require minimal materials. Get ready to unleash your creativity and turn those forgotten lights into delightful accents for any occasion.
Craft Whimsical Luminaries

Transform those twinkling Christmas lights into enchanting luminaries that will add a touch of magic to your home or garden. With a little creativity and some readily available materials, you can turn old Christmas lights into captivating light sources that will illuminate your space with a unique charm.
Constructing Luminaries
Luminaries are essentially light sources enclosed within a protective casing. They can be created using various materials, including glass jars, paper lanterns, or even repurposed containers. The key is to choose a material that complements the style you’re aiming for and provides a safe and durable enclosure for the lights.
Using Glass Jars
Glass jars, often found in the kitchen, are a popular choice for creating luminaries. Their transparent nature allows the light to shine through beautifully, while their sturdy construction ensures durability. Here’s how to create a glass jar luminary:
- Clean and dry the glass jar thoroughly. Ensure there are no residues or dirt that could affect the final look.
- Wrap the Christmas lights around the jar, securing them with tape or wire. Be sure to leave enough space for the lights to be easily removed later.
- Add decorative elements, such as fabric scraps, ribbons, or beads, to personalize the jar. You can also paint the jar with acrylic paint for a unique touch.
- Place a candle or LED tea light inside the jar. This will provide the light source for the luminary.
Using Paper Lanterns
Paper lanterns offer a more delicate and whimsical alternative to glass jars. They come in a variety of shapes, sizes, and colors, allowing you to create luminaries that match your personal style.Here’s how to create a paper lantern luminary:
- Choose a paper lantern that complements the size and style of your Christmas lights.
- Carefully cut a small hole in the bottom of the lantern. This will allow you to insert the Christmas lights.
- Thread the lights through the hole and arrange them inside the lantern. Secure them with tape or wire to prevent them from falling out.
- Add embellishments to the lantern, such as paper flowers, glitter, or ribbons. You can also paint the lantern with acrylic paint for a unique touch.
- Place a battery-operated LED tea light inside the lantern. This will provide a safe and reliable light source for your luminary.
Personalizing Your Luminaries
Once you have your basic luminary structure, the fun part begins: personalizing it to reflect your unique style.
Painting
A simple coat of paint can transform your luminaries into eye-catching pieces. You can use acrylic paints, spray paints, or even chalkboard paint to create different effects.
Consider using stencils to create intricate patterns or designs. You can also use a sponge to create a textured finish.
Decorating with Fabric
Fabric scraps can add a touch of warmth and texture to your luminaries. You can wrap the jars or lanterns with fabric, tie ribbons around them, or create fabric flowers to embellish them.
For a rustic look, use burlap or linen fabric. For a more elegant look, choose silk or velvet.
Adding Embellishments
There are endless possibilities when it comes to embellishing your luminaries. You can use beads, sequins, buttons, feathers, or even dried flowers to add a personal touch.
Be creative and experiment with different materials to create unique and eye-catching luminaries.
Examples of Creative Luminary Designs
Here are a few examples of creative luminary designs that can inspire your own creations:
Outdoor Luminaries
Rustic Mason Jar Luminaries
Create a rustic ambiance by wrapping mason jars with burlap fabric and adding twine accents.
Fairy Light Lanterns
Use paper lanterns in various sizes and colors to create a magical display.
Glow-in-the-Dark Luminaries
Use glow-in-the-dark paint to create luminaries that will continue to shine even after the lights are turned off.
Indoor Luminaries
Vintage Glass Jar Luminaries
Use vintage glass jars and decorate them with antique lace, ribbons, and beads for a touch of elegance.
Personalized Mason Jar Luminaries
Paint mason jars with names, dates, or special messages for a personalized touch.
Floating Luminaries
Create floating luminaries by placing candles inside glass bowls and adding water.
Upcycle into Decorative String Art: 3 Quick Ways To Repurpose Old Christmas Lights

Transforming your old Christmas lights into string art is a creative and budget-friendly way to give them a new life. It’s a fantastic way to add a touch of festive cheer to your home decor, even after the holidays are over.
Materials and Tools for String Art
String art, using old Christmas lights, requires specific materials and tools for a successful project.
Here’s a list of essential materials:
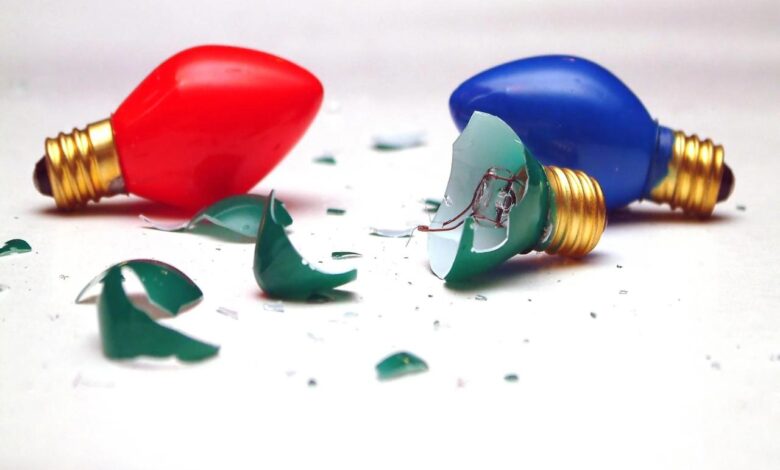
- Old Christmas Lights:Choose lights that are in good working condition, with bulbs that are not cracked or broken. You can use LED lights for a more energy-efficient option.
- Canvas or Wood Panel:A canvas or wood panel provides a sturdy surface for attaching your lights. The size will depend on the scale of your string art design.
- Nails or Thumbtacks:These will be used to secure the Christmas lights to the canvas or panel. Choose sizes that are appropriate for your chosen surface and the thickness of the lights.
- Hammer or Tack Hammer:A hammer or tack hammer will help you drive the nails or thumbtacks into the surface.
- Measuring Tape:This will help you accurately measure and mark the positions of the nails or thumbtacks for your design.
- Pencil:Use a pencil to mark the positions of the nails or thumbtacks on the canvas or panel.
- Wire Cutters:These will be useful for trimming any excess wire from the Christmas lights.
Creating String Art, 3 quick ways to repurpose old christmas lights
The process of creating string art involves carefully planning your design and securely attaching the lights to the surface.
Here’s a step-by-step guide:
- Choose a Design:Start by deciding on a design for your string art. Consider using simple shapes like stars, hearts, or geometric patterns, or explore more intricate designs based on your creativity.
- Mark the Design:Using a pencil and measuring tape, carefully mark the positions of the nails or thumbtacks on your canvas or panel. These marks will guide the placement of your Christmas lights.
- Secure the Nails or Thumbtacks:Hammer or tack the nails or thumbtacks into the surface, following the markings you’ve made. Ensure they are securely fixed to avoid any loose or shifting lights.
- Attach the Christmas Lights:Carefully wrap the Christmas lights around the nails or thumbtacks, following the design you’ve created. Adjust the placement of the lights as needed to achieve the desired effect.
- Trim Excess Wire:Use wire cutters to trim any excess wire from the Christmas lights, creating a clean and polished look.
- Plug in the Lights:Finally, plug in the Christmas lights and admire your completed string art piece. You can also add other decorative elements to your string art, such as ribbons, beads, or glitter, to enhance its visual appeal.
String Art Design Ideas
You can experiment with different shapes, patterns, and colors to create visually appealing string art pieces.
Here are a few design ideas:
- Geometric Patterns:Create simple yet striking string art by using geometric shapes like squares, triangles, or circles. You can combine different colors and sizes to create a visually dynamic piece.
- Abstract Designs:Let your imagination run wild and create abstract string art by using free-flowing lines and curves. This allows for a more organic and expressive approach to your design.
- Nature-Inspired Designs:Draw inspiration from nature to create string art that features leaves, flowers, or trees. These designs can add a touch of tranquility and beauty to your space.
- Personalized Designs:Create a string art piece that reflects your personal style or interests. For example, you could create a string art portrait of a loved one or a design that features your favorite animal or hobby.
From crafting twinkling fairy lights to weaving them into festive wreaths, there are tons of ways to repurpose old Christmas lights. But if you’re looking for a fun outdoor activity, consider using them to create a DIY water balloon alternative – play splash ball a fun diy water balloon alternative – for a refreshing twist on summer fun.
Once you’ve finished your watery adventures, those lights can still be used to add a touch of sparkle to your next crafting project.
From turning them into festive fairy lights for your garden to crafting whimsical ornaments for your home, the possibilities are endless! Speaking of endless possibilities, have you read part 2 of the piano man ? It’s a captivating tale that truly highlights the power of music and storytelling.
But back to those Christmas lights, you can also use them to create unique lighting fixtures for your home or even repurpose them into fun, quirky decorations for a themed party.
Tired of those tangled Christmas lights taking up space? Don’t toss them out! There are tons of creative ways to give them new life. You could weave them into a whimsical garland for your porch or even create a cozy reading nook with a string of twinkling lights draped around a comfy chair.
For a more dramatic look, consider incorporating them into a DIY project like turning a plain coffee table into something fabulous, as detailed in this article on how to transform a coffee table. The possibilities are endless when it comes to repurposing those old Christmas lights, so get creative and let your imagination run wild!