DIY Pie Slice Boxes: Easy & Creative Packaging
DIY pie slice boxes are a delightful way to package and present your homemade pies, adding a touch of charm and personalization to your baking creations. These boxes are not only practical but also a fantastic opportunity to showcase your creativity.
Whether you’re a seasoned baker or just starting out, crafting your own pie slice boxes can be a fun and rewarding experience.
The history of pie slice boxes dates back to the early days of pie baking, when families would often use simple cardboard boxes to store and transport their homemade treats. Over time, these boxes have evolved into more elaborate designs, incorporating various materials and decorative elements.
Today, DIY pie slice boxes are gaining popularity as a way to add a personal touch to homemade gifts and special occasions.
Introduction to DIY Pie Slice Boxes
DIY pie slice boxes are a fantastic way to package and present your homemade pies, offering a practical and visually appealing solution for transporting and serving your delicious creations. These boxes are not only convenient but also add a touch of elegance to your culinary endeavors, making them perfect for special occasions, potlucks, or simply enjoying a slice of pie at home.
DIY pie slice boxes are a fun and easy way to package up homemade treats. You can personalize them with different colors, patterns, and even add little details like bows or ribbons. For a little extra inspiration, check out some cute little boys hairstyles for ideas on adding a touch of whimsy to your boxes.
After all, presentation is everything, and these boxes are sure to make your pies look even more delicious!
The History and Popularity of DIY Pie Slice Boxes
The concept of pie slice boxes has been around for a long time, dating back to the early days of pie baking. Historically, bakers would often use simple cardboard boxes or even repurposed containers to package and transport their pies.
However, the advent of pre-made pie slice boxes has revolutionized the way we present and enjoy our favorite desserts. These pre-made boxes, often available in various sizes and designs, offer a convenient and professional way to package and serve pie slices.
The popularity of DIY pie slice boxes has surged in recent years, driven by the growing trend of homemade baking and the desire for personalized touches. Many bakers find that creating their own pie slice boxes allows them to express their creativity and customize the packaging to match the occasion or theme of their pie.
Furthermore, the ease of assembly and the availability of various materials and designs make DIY pie slice boxes a popular choice for both amateur and professional bakers.
Materials and Supplies: Diy Pie Slice Boxes
Crafting your own pie slice boxes requires a selection of materials and tools. This section provides a comprehensive overview of the essential components needed for this DIY project.
Cardboard
Cardboard is the foundation of your pie slice boxes. It provides the structural integrity and rigidity needed to hold the slices. There are different types of cardboard available, each with its own advantages and disadvantages.
- Corrugated Cardboard:This type of cardboard is widely available and commonly used for packaging. Its wavy structure adds strength and durability. However, it can be more challenging to cut and score precisely.
- Chipboard:Chipboard is a smoother and denser cardboard, often used for crafting projects. It’s easier to cut and score, offering cleaner edges. However, it may not be as sturdy as corrugated cardboard.
- Cardstock:Cardstock is a thinner type of cardboard, ideal for creating decorative elements like box lids or accents. It offers a smooth surface for printing or embellishments.
Cutting and Scoring Tools
Precise cutting and scoring are crucial for creating well-defined pie slice boxes.
- Utility Knife:A utility knife with a sharp blade is essential for cutting through cardboard. Be sure to use a cutting mat to protect your work surface.
- Scoring Tool:A scoring tool, such as a bone folder or a ruler with a scoring edge, helps create clean creases in the cardboard for folding. This prevents the cardboard from cracking when bent.
- Scissors:Scissors are useful for cutting out smaller shapes or intricate details.
Adhesive
Adhesive is necessary to secure the various parts of your pie slice boxes.
- Hot Glue Gun:A hot glue gun provides a fast and strong bond for assembling cardboard pieces. However, it requires caution as the glue can be hot.
- Glue Stick:Glue sticks are a safer alternative to hot glue, offering a less messy application. However, they may not provide the same level of strength as hot glue.
- Double-Sided Tape:Double-sided tape can be used to secure delicate pieces or for creating a clean, invisible bond. It’s particularly useful for attaching decorative elements.
Optional Supplies
These additional supplies can enhance the appearance and functionality of your pie slice boxes.
- Decorative Paper:Use decorative paper to wrap the outside of your boxes, adding a touch of color and pattern.
- Washi Tape:Washi tape is a decorative tape that can be used to add accents or create patterns on the boxes.
- Ribbons or Twine:Ribbons or twine can be used to tie the boxes together or add a finishing touch.
Sourcing Materials
Most of the materials listed above can be found at craft stores, online retailers, or even your local supermarket.
- Craft Stores:Craft stores like Michaels, Joann Fabrics, and Hobby Lobby offer a wide variety of cardboard, cutting tools, adhesives, and decorative supplies.
- Online Retailers:Online retailers like Amazon, Etsy, and eBay provide convenient access to a vast selection of materials.
- Supermarkets:Many supermarkets carry cardboard boxes that can be repurposed for crafting projects. Look for cereal boxes, shoeboxes, or other sturdy cardboard containers.
Design and Construction
Now that you have your materials ready, let’s dive into the fun part: building your pie slice boxes. We’ll explore different design options and guide you through the construction process.
Creating the Base
The base of your pie slice box is the foundation. We’ll use cardstock for this, as it’s sturdy and easy to work with.
- Measure and Cut:Begin by measuring the diameter of your pie. This will determine the size of your base. Cut a circle from your cardstock using a compass or a plate as a template. You can use a ruler and pencil to mark the circle and then carefully cut it out with scissors or a craft knife.
- Adding the Sides:Next, you’ll create the sides of your box. These will be rectangles that you’ll attach to the circular base. Measure the height you want for your box. Multiply this height by 3.14 (pi) and then add the diameter of your base.
DIY pie slice boxes are the perfect way to package up your homemade treats for friends and family. Whether you’re making a classic apple pie or a decadent chocolate cream pie, these boxes will keep your slices safe and sound.
For inspiration on other ways to make your life easier and more fun, check out hsn faves for getting you back , where you can find all sorts of kitchen gadgets and tools to make baking a breeze. And once you’ve got your pies baked and boxed, you’ll be ready to share the love with everyone!
This will give you the length of your rectangle. The width of the rectangle will be the same as the diameter of your base. You’ll need two of these rectangles for the sides.
- Attaching the Sides:Once you have your rectangles cut out, use glue or tape to attach them to the circular base. Start by attaching one rectangle to the base, aligning the edges carefully. Then, attach the second rectangle to the opposite side of the base.
Make sure the sides are joined seamlessly, creating a smooth, cylindrical shape.
Creating the Lid
The lid is the finishing touch, ensuring your pie slices stay protected. We’ll use cardstock for this as well, following similar steps as the base.
- Measuring and Cutting:Measure the diameter of your pie. This will determine the size of your lid. Cut a circle from your cardstock using a compass or a plate as a template. You can use a ruler and pencil to mark the circle and then carefully cut it out with scissors or a craft knife.
- Adding the Flaps:To create a secure lid, we’ll add flaps that will fold over the sides of the box. Cut out four rectangles from your cardstock. The length of each rectangle should be slightly longer than the diameter of your pie, and the width should be about 1 inch.
These flaps will provide a snug fit and prevent the lid from slipping off.
- Attaching the Flaps:Attach the flaps to the circular lid using glue or tape. Place the flaps evenly around the edge of the lid, leaving about a quarter inch of space between each flap. Fold the flaps inwards, creating a secure closure for your box.
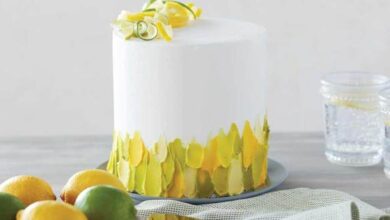
Customization and Decoration

The blank canvas of your DIY pie slice boxes is ripe for creativity. These boxes can be much more than simple containers; they can be personalized works of art, reflecting your unique style or the occasion they celebrate. Let’s dive into the world of customization and decoration, exploring ways to transform these boxes into eye-catching masterpieces.
Adding Unique Touches
Adding unique touches to your pie slice boxes elevates them from ordinary to extraordinary. Here are some creative ideas to personalize your boxes:
- Embellishments:Add embellishments like ribbons, bows, buttons, or even small charms to create a more intricate and whimsical look. These details can be chosen to match the theme or color scheme of the pie itself.
- Personalized Labels:Create personalized labels with names, dates, or special messages. You can use printable labels or create your own designs using a computer and a printer. These labels add a personal touch and can even be used to mark different pie flavors.
- Embossed Designs:Use a craft embossing tool to create intricate patterns and designs on the boxes. This technique adds a touch of elegance and sophistication. Consider using stencils to create specific designs.
- Painted Accents:Use acrylic paints to add accents, patterns, or even entire designs to your boxes. You can use stencils, freehand drawing, or even create a unique design by stamping with sponges.
- Paper Decoupage:Add layers of paper, like patterned tissue paper or scrapbooking paper, to create a textured and colorful look. This technique allows for limitless design possibilities.
Design Styles and Themes
The beauty of DIY pie slice boxes lies in their adaptability. They can be tailored to fit any occasion or theme. Let’s explore some examples:
- Rustic Charm:Use natural materials like burlap, twine, and wood accents. Consider adding a touch of vintage flair with antique-looking labels or a distressed paint finish. This style is perfect for a casual gathering or a farm-to-table event.
- Elegant Simplicity:Choose sleek, minimalist designs. Use a neutral color palette with touches of metallic accents. Consider adding a delicate ribbon or a simple, elegant label. This style is ideal for formal occasions or special celebrations.
- Holiday Cheer:Decorate your boxes with holiday-themed colors, patterns, and embellishments. For example, use red and green for Christmas, orange and black for Halloween, or pink and red for Valentine’s Day. Consider adding festive ribbons, bows, or even small holiday-themed figurines.
- Personalized Celebrations:Tailor your boxes to specific events like birthdays, weddings, or graduations. Use colors, patterns, and embellishments that reflect the occasion. For example, use a favorite color or a meaningful symbol to personalize the boxes.
Applications and Uses

These DIY pie slice boxes are incredibly versatile and can be used for a variety of purposes beyond just storing and serving pie. Their compact size and attractive design make them perfect for packaging, gifting, and even creative crafting projects.
Packaging
These boxes offer a practical and aesthetically pleasing way to package a variety of items. They can be used to package small gifts, baked goods, snacks, or even crafts.
- Food Packaging:These boxes are ideal for packaging individual slices of pie, cakes, cookies, or other baked goods. They can also be used to package sandwiches, salads, or other lunch items.
- Gift Packaging:These boxes can be used to package small gifts such as jewelry, candles, or other small trinkets. They can also be used to package gift cards or money.
- Craft Packaging:These boxes can be used to package small crafts, such as jewelry, ornaments, or other small items. They can also be used to package homemade soaps or other bath products.
Gifting
These boxes are perfect for gifting because they are both practical and visually appealing. They can be used to present a variety of gifts, such as baked goods, small trinkets, or even gift cards.
- Baked Goods:These boxes are a great way to present homemade pies, cakes, or other baked goods as gifts. They can be decorated with ribbons, bows, or other embellishments to make them even more special.
- Small Gifts:These boxes can be used to package small gifts, such as jewelry, candles, or other small trinkets. They can be filled with decorative tissue paper or other materials to make them even more presentable.
- Gift Cards:These boxes can be used to present gift cards in a more creative and unique way. They can be decorated with ribbons, bows, or other embellishments to make them more festive.
Serving
These boxes can be used to serve a variety of food items, such as pie, cake, or other desserts. They are also perfect for serving appetizers or snacks at parties or gatherings.
- Individual Serving:These boxes are perfect for serving individual slices of pie, cake, or other desserts. They can be used at parties, potlucks, or even at home.
- Appetizers:These boxes can be used to serve appetizers, such as mini quiches, spring rolls, or other small snacks. They are perfect for parties or gatherings.
- Snack Boxes:These boxes can be used to package snacks, such as cookies, chips, or other treats. They are perfect for taking snacks on the go or for serving at parties.
Safety and Durability
When crafting your own pie slice boxes, safety and durability are paramount. You want to ensure that your creations are not only visually appealing but also sturdy and safe for handling and storing your delicious treats.
Materials Selection
The choice of materials significantly influences the safety and longevity of your pie slice boxes. It is crucial to select materials that are both food-safe and robust enough to withstand the weight and potential moisture of the pie filling.
- Food-Grade Cardboard:This is a common and readily available option. It is relatively inexpensive, lightweight, and easy to work with. However, it may not be the most durable choice for heavier pies. Consider using thicker cardboard or multiple layers for added strength.
- Plastic:Clear plastic sheets or containers can be used for a more modern and transparent look. They are generally waterproof and can be cleaned easily. However, ensure the plastic you choose is food-grade and free of harmful chemicals.
- Wood:For a more rustic and elegant feel, wood can be used to construct pie slice boxes. It is durable and can be stained or painted to match your desired aesthetic. However, ensure you use food-safe finishes and avoid using wood that may release harmful chemicals into your food.
Construction Techniques
The construction methods you employ will also impact the durability and stability of your pie slice boxes. Proper assembly and reinforcement are essential to prevent the boxes from collapsing or breaking under the weight of the pie.
DIY pie slice boxes are a great way to add a personal touch to your holiday baking. Whether you’re making a classic apple pie or a more adventurous pumpkin spice creation, these boxes will keep your slices safe and sound for gifting or transporting.
Speaking of keeping things safe and sound, don’t forget to check out this great article on winter ready with hotter shoes to keep your feet warm and dry all season long. Once you’ve got your winter footwear sorted, you can get back to making those delicious pies and presenting them beautifully in your DIY boxes!
- Reinforced Corners:Use strong adhesives or corner brackets to secure the corners of your boxes. This will help to prevent them from tearing or becoming weak over time.
- Secure Joints:If you are using wood, use strong glue and screws to create secure joints. For cardboard, consider using reinforced tape or multiple layers of cardboard to create a more robust structure.
- Proper Sizing:Ensure your boxes are sized appropriately for the pie slices you are making. Oversized boxes may be flimsy, while undersized boxes may be difficult to assemble or may not hold the pie slice securely.
Longevity and Stability
To ensure the longevity and stability of your pie slice boxes, consider these additional tips:
- Handle with Care:Avoid rough handling of the boxes, especially when they are filled with pie. This can lead to damage and compromise the structure.
- Storage Considerations:Store the boxes in a cool, dry place to prevent warping or damage. Avoid stacking heavy items on top of them.
- Proper Sealing:If using cardboard, consider sealing the boxes with a food-safe sealant to make them more resistant to moisture and grease. This can help to prolong their lifespan.
Safety Considerations
Always prioritize safety when crafting and using your DIY pie slice boxes. Consider the following:
- Sharp Edges:If using wood or other materials with sharp edges, ensure they are sanded smooth to prevent injuries.
- Food Safety:Only use materials that are certified food-safe. Avoid using materials that may release harmful chemicals into your food.
- Proper Cleaning:Clean your boxes thoroughly before and after use, especially if using reusable materials like plastic or wood. Follow the manufacturer’s instructions for cleaning and care.
Cost-Effectiveness and Sustainability
Crafting your own pie slice boxes can be a cost-effective and eco-friendly alternative to commercially available options. By taking control of the materials and design, you can create personalized boxes that meet your specific needs while minimizing environmental impact.
Cost Comparison
The cost of DIY pie slice boxes can vary depending on the materials used and the complexity of the design. However, in general, DIY boxes tend to be more affordable than store-bought options. For instance, a set of 10 disposable pie slice boxes from a major retailer might cost around $10, whereas a similar quantity of DIY boxes made from recycled cardboard could be created for less than $5, depending on the cost of the materials.
The cost savings become even more significant when you consider the potential for reusing or repurposing materials like old boxes or leftover packaging.
Environmental Impact, Diy pie slice boxes
Using DIY pie slice boxes can have a positive impact on the environment.
- Firstly, you can reduce waste by using recycled or upcycled materials. Instead of contributing to landfill waste, you can give new life to old cardboard boxes, newspapers, or even fabric scraps.
- Secondly, DIY boxes allow for greater control over the materials used. You can choose eco-friendly options like biodegradable cardboard, compostable paper, or even reusable fabric. This helps minimize the use of plastic and other non-biodegradable materials.
- Thirdly, DIY boxes eliminate the need for packaging and shipping from manufacturers. This reduces the carbon footprint associated with production and transportation.
Sustainable Box Making
There are many ways to make your pie slice boxes more sustainable.
- Consider using recycled or upcycled materials like cardboard boxes, newspaper, or even fabric scraps.
- Choose eco-friendly materials like biodegradable cardboard, compostable paper, or even reusable fabric.
- Explore using natural adhesives like glue made from cornstarch or wheat flour.
- Minimize waste by using scraps to create smaller boxes or by repurposing leftover materials for other crafts.
Inspiration and Resources
The beauty of DIY projects lies in the boundless possibilities for creativity. You can draw inspiration from existing pie slice boxes, explore online communities, or even create your own unique designs. This section will guide you through various sources of inspiration and resources to fuel your DIY journey.
Examples of DIY Pie Slice Boxes
There are countless ways to design and build pie slice boxes, each with its own charm and functionality. Here are a few examples that can ignite your creative spark:
- Simple Cardboard Boxes:These boxes are easy to construct using readily available cardboard and can be decorated with paint, markers, or decoupage.
- Upcycled Materials:Repurpose old boxes, wooden crates, or even tin cans to create unique and sustainable pie slice boxes.
- Decorative Boxes:Incorporate decorative elements like ribbons, lace, buttons, or stencils to add a touch of elegance and personality.
- Personalized Boxes:Add a personal touch by customizing the boxes with names, dates, or special messages.
Online Resources and Tutorials
The internet is a treasure trove of DIY inspiration and guidance. Numerous websites, blogs, and video platforms offer step-by-step tutorials and creative ideas for crafting pie slice boxes.
- Pinterest:A visual search engine with a vast collection of DIY projects, including pie slice box designs.
- YouTube:Find video tutorials demonstrating different construction techniques and decorative styles.
- DIY Blogs:Explore blogs dedicated to crafting, upcycling, and home decor for inspiration and practical tips.
Online Communities
Connect with other DIY enthusiasts and share your creations, ideas, and challenges in online communities. These platforms offer a supportive environment for learning and exchanging knowledge.
- Reddit:Subreddits dedicated to crafting, woodworking, and upcycling provide a space for discussions and sharing projects.
- Facebook Groups:Join Facebook groups focused on DIY projects, baking, or home decor to engage with like-minded individuals.
- Instagram:Follow accounts showcasing creative DIY projects, including pie slice box designs, for inspiration and ideas.