DIY Christmas Coat Rack: A Festive DIY Project
DIY Christmas coat rack – it’s a project that brings a festive touch to your home and lets you personalize your holiday decor. Imagine stepping into your home and being greeted by a beautifully crafted coat rack adorned with twinkling lights and cheerful ornaments, adding a touch of warmth and holiday cheer.
Creating a DIY Christmas coat rack is a fun and rewarding project, allowing you to express your creativity and create a unique piece that reflects your personal style.
This project can be tailored to any skill level, from beginners to seasoned crafters. You can choose from a wide range of materials, from rustic wood to repurposed items, and explore different designs, from simple and elegant to whimsical and festive.
With a little creativity and effort, you can create a DIY Christmas coat rack that will be the envy of your neighbors and a cherished part of your holiday traditions for years to come.
DIY Christmas Coat Racks: Adding Festive Charm to Your Home

Transforming your home for the holidays doesn’t have to be a daunting task. A simple DIY Christmas coat rack can add a touch of festive charm and create a welcoming atmosphere for guests. Creating your own coat rack allows you to personalize it with your unique style and add a personal touch to your holiday décor.
I love the idea of a DIY Christmas coat rack, especially one that reflects my personal style. I’m thinking of adding some festive touches with bold hand-stamped details, like the kind you see on those awesome bold hand-stamped leggings I saw recently.
Maybe I’ll use some festive stencils to create a unique design on the rack itself, adding a touch of personality and holiday cheer to my entryway.
The Appeal of Personalized Christmas Coat Racks
A personalized Christmas coat rack offers a delightful opportunity to showcase your creativity and bring your holiday vision to life. It allows you to incorporate elements that reflect your personal style and preferences, making it a truly unique and cherished piece.
- Unique Design:You can create a coat rack that perfectly complements your existing holiday decorations or complements the theme of your Christmas tree. You can choose from a variety of materials, colors, and designs to match your personal aesthetic.
- Festive Touch:A DIY Christmas coat rack can be adorned with festive embellishments like ribbons, bows, snowflakes, or even miniature ornaments, adding a touch of whimsy and holiday cheer to your entryway.
- Personalized Gift:A handcrafted coat rack makes a thoughtful and unique gift for friends and family. It’s a perfect way to express your love and appreciation while adding a special touch to their holiday celebrations.
Materials and Tools
Creating a DIY Christmas coat rack involves selecting the right materials and tools to ensure a sturdy and festive structure. The choice of materials depends on the design, desired look, and your budget.
Materials
Choosing the right materials is crucial for the structural integrity and aesthetic appeal of your coat rack.
- Wood: A classic and versatile choice, wood offers a natural look and can be easily customized. Popular options include pine, oak, or cedar.
- Metal: Metal provides a modern and durable option, offering a range of finishes like chrome, brass, or black. Pipes, rebar, or wire are commonly used.
- PVC Pipes: PVC pipes are lightweight, affordable, and readily available. They can be easily cut and assembled using glue or connectors.
- Recycled Materials: Embrace sustainability by using recycled materials like pallets, crates, or old ladders.
Essential Tools
Having the right tools makes the construction process smoother and safer.
- Saw: For cutting wood or PVC pipes, a handsaw, circular saw, or jigsaw is necessary.
- Screwdriver: Use a screwdriver or drill with various bits to assemble the coat rack.
- Measuring Tape: Accurate measurements are essential for a well-proportioned coat rack.
- Level: Ensure the coat rack is level for stability and a professional look.
- Hammer: Use a hammer to secure nails or brackets for attaching hooks or shelves.
- Safety Glasses: Protect your eyes from flying debris while cutting or hammering.
- Gloves: Protect your hands from splinters or sharp edges.
- Sandpaper: Smooth any rough edges on the wood for a polished finish.
Material and Tool Breakdown
| Material | Description | Uses | Alternatives |
|---|---|---|---|
| Wood | Natural, versatile, and easily customizable. | Framing, shelves, hooks. | Metal, PVC pipes, recycled materials. |
| Metal | Durable, modern, and available in various finishes. | Pipes, rebar, wire for structural elements. | Wood, PVC pipes. |
| PVC Pipes | Lightweight, affordable, and easy to assemble. | Framing, hooks, decorative elements. | Wood, metal. |
| Recycled Materials | Sustainable and unique options. | Pallet wood for shelves, crates for storage. | New materials, but with higher environmental impact. |
| Saw | For cutting wood or PVC pipes. | Cutting materials to size. | Hand saw, circular saw, jigsaw. |
| Screwdriver | For assembling the coat rack. | Securing screws and fasteners. | Drill with various bits. |
| Measuring Tape | For accurate measurements. | Ensuring proper dimensions and proportions. | Ruler, tape measure. |
| Level | For ensuring stability and a professional look. | Verifying horizontal and vertical alignment. | Spirit level, laser level. |
| Hammer | For securing nails or brackets. | Attaching hooks or shelves. | Nail gun, staple gun. |
| Safety Glasses | Protect eyes from flying debris. | Essential for cutting and hammering. | Goggles, face shield. |
| Gloves | Protect hands from splinters and sharp edges. | Improve safety and comfort during construction. | Work gloves, leather gloves. |
| Sandpaper | Smooth rough edges for a polished finish. | Creating a smooth surface for paint or stain. | Sanding block, sanding machine. |
Design Inspiration
When crafting your DIY Christmas coat rack, let your creativity soar! You can embrace a wide range of styles to perfectly complement your home’s decor. From rustic charm to modern minimalism, there’s a design waiting to be brought to life.
Building a DIY Christmas coat rack is a fun way to get into the holiday spirit. It’s a great project for the whole family to work on together, and you can personalize it to match your home’s style. While I was browsing for inspiration, I stumbled upon a hilarious video of this sea lion gets a little worried about a giant inflatable Santa, and it totally brightened my day.
After that, I was ready to tackle my coat rack project with renewed enthusiasm, and I can’t wait to show off my creation this Christmas!
Rustic Christmas Coat Racks
Rustic Christmas coat racks exude warmth and holiday cheer. They often feature natural materials like wood and branches, creating a cozy and inviting atmosphere.
- Reclaimed Wood:Use weathered wood planks or salvaged barnwood to build a sturdy and unique coat rack. You can add a touch of rustic charm by leaving the wood in its natural state or staining it with a warm wood tone.
- Branch Coat Rack:Gather branches from your yard or a local park. Clean and dry them thoroughly before assembling them into a coat rack. You can arrange the branches in a whimsical pattern or create a more structured design.
- Wooden Pallet Coat Rack:Repurpose an old pallet into a functional and stylish coat rack. Remove the slats and use them to create a rustic framework. Add hooks or pegs for hanging coats and other items.
Modern Christmas Coat Racks
Modern Christmas coat racks are characterized by clean lines, minimalist designs, and a focus on functionality.
I’m always looking for creative ways to decorate for Christmas, and this year I decided to try my hand at a DIY coat rack. I found some really cool vintage antlers at a flea market and thought they’d be perfect! The only problem was, they were a bit too small for my vision.
I ended up finding a fantastic tutorial on you cant tell theyre fake for making faux antlers, and they turned out so realistic! Now I have the perfect, rustic-chic coat rack for my holiday guests.
- Geometric Shapes:Create a modern coat rack using geometric shapes like triangles, squares, or circles. You can use metal or wood to construct the framework. Add hooks or pegs in a symmetrical pattern.
- Sleek Metal Design:Opt for a sleek metal coat rack in a polished finish. Look for designs with minimalist details and simple lines. You can choose from a variety of metals, including stainless steel, brass, or iron.
- Wall-Mounted Coat Rack:A wall-mounted coat rack is a space-saving option that can add a modern touch to your entryway. Choose a design with a clean silhouette and a simple color scheme.
Whimsical Christmas Coat Racks
Whimsical Christmas coat racks are perfect for adding a touch of fun and personality to your home. They often incorporate festive elements like snowflakes, reindeer, or Christmas trees.
- Snowflake Coat Rack:Cut out snowflake shapes from plywood or cardboard. Paint them white or add glitter for a festive touch. Attach the snowflakes to a wall or a wooden base to create a whimsical coat rack.
- Reindeer Coat Rack:Build a reindeer coat rack using wood or metal. Create a simple frame for the reindeer’s body and antlers. Attach hooks to the antlers or the body for hanging coats.
- Christmas Tree Coat Rack:Create a festive coat rack in the shape of a Christmas tree. Use wood, metal, or even cardboard to build the tree. Add ornaments, lights, or other decorations to complete the look.
Step-by-Step Guide
Now that you have gathered your materials and chosen a design, let’s dive into the step-by-step guide to building your DIY Christmas coat rack. This guide will walk you through the process, ensuring a fun and successful project.
Preparing the Wood, Diy christmas coat rack
Before assembling your coat rack, it’s essential to prepare the wood pieces. This involves cutting them to the correct size and sanding them for a smooth finish.
- Measure and mark the wood pieces according to your design. Use a measuring tape and a pencil to ensure accuracy.
- Cut the wood pieces using a saw. Choose a saw appropriate for the type of wood you are using. A circular saw or a jigsaw will be suitable for most projects.
- Sand the edges and surfaces of the wood pieces using sandpaper. Start with a coarser grit and gradually move to a finer grit for a smooth finish.
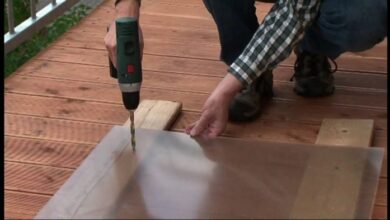
Drilling and Assembling
Once the wood is prepared, you can start drilling holes for attaching the coat hooks and assembling the rack.
- Mark the locations for the coat hooks on the wood pieces. Ensure they are evenly spaced and at a suitable height for hanging coats.
- Use a drill bit slightly smaller than the diameter of the coat hook screws to drill pilot holes. This will prevent the wood from splitting when screwing in the hooks.
- Attach the coat hooks to the wood using screws. Align the hooks and screw them in securely. Use a screwdriver or drill to tighten the screws.
- Assemble the different wood pieces of your coat rack according to your design. Use wood glue and screws to secure the pieces together. Clamp the pieces together while the glue dries for a strong bond.
Finishing Touches
After the coat rack is assembled, you can add the finishing touches to complete your project.
- Sand the entire coat rack again to ensure a smooth surface and remove any rough edges or imperfections. Use a fine-grit sandpaper.
- Apply a stain or paint to the coat rack. Choose a color that complements your holiday decor. Use a brush or a sprayer to apply the stain or paint evenly. Allow the stain or paint to dry completely before moving on.
- Apply a sealant to protect the finish and make it more durable. A polyurethane sealant is a good option for wood projects. Apply the sealant with a brush or a sprayer and let it dry completely.
Decorating Ideas: Diy Christmas Coat Rack
Once you’ve built your DIY Christmas coat rack, it’s time to unleash your creativity and transform it into a festive focal point. The possibilities for decorating are endless, allowing you to personalize the piece to match your home’s style and create a warm, inviting ambiance.
Using Christmas Lights
Christmas lights are a classic and versatile decorating element that can instantly add a touch of magic to your DIY coat rack. You can opt for traditional twinkling lights, modern LED strips, or even colorful fairy lights to create a whimsical atmosphere.
- Wrap the lights around the rack’s frame, creating a shimmering Artikel.
- Hang strings of lights from the rack’s branches, creating a cascading effect.
- Use battery-operated lights for added convenience and flexibility.
Adding Ornaments
Ornaments are a fun and festive way to personalize your DIY coat rack. Choose from a variety of shapes, sizes, and colors to create a visually appealing display.
- Hang ornaments directly from the rack’s branches.
- Create clusters of ornaments by tying them together with ribbon.
- Use ornaments with hooks for easy hanging.
Incorporating Ribbons
Ribbons add a touch of elegance and sophistication to your DIY Christmas coat rack. You can use them to create bows, streamers, or even to tie ornaments together.
- Tie ribbons around the rack’s frame for a simple yet elegant touch.
- Create bows from ribbons and attach them to the rack’s branches.
- Use different colors and textures of ribbons to create a visually interesting display.
Adding Greenery
Greenery adds a touch of nature and freshness to your DIY Christmas coat rack. You can use evergreen branches, holly sprigs, or even artificial greenery to create a festive and welcoming atmosphere.
- Wrap greenery around the rack’s frame for a natural touch.
- Hang sprigs of greenery from the rack’s branches.
- Use greenery to create a garland around the rack.