
15 Easter Crafts Your Kids And You Will Love
15 Egg-cellent Easter Crafts for Unforgettable Family Fun
Easter crafts are a fantastic way to engage children, foster creativity, and create cherished memories. From simple decorations to elaborate projects, there’s something for every age and skill level. This comprehensive guide presents 15 delightful Easter craft ideas that both kids and adults will adore, perfect for adding a handmade touch to your spring celebrations. Each craft is designed to be engaging, visually appealing, and easily adaptable. We’ll explore materials, steps, and tips to make your crafting sessions a resounding success, ensuring your home is adorned with unique, festive creations.
-
Salt Dough Easter Ornaments: These timeless ornaments are a classic for a reason. They are easy to make with just flour, salt, and water, offering endless possibilities for shapes and designs. Mix 2 cups of all-purpose flour with 1 cup of salt. Gradually add water (about ¾ cup, but adjust as needed) until a firm dough forms. Knead for a few minutes. Roll out the dough to about ¼ inch thickness. Use Easter-themed cookie cutters (eggs, bunnies, chicks, crosses) to cut out shapes. Make a small hole at the top of each ornament with a straw or toothpick for hanging. Place on a baking sheet lined with parchment paper. Bake at 250°F (120°C) for 2-3 hours, or until completely dry and hard. Let cool completely. Once cooled, kids can paint them with acrylic paints. Consider sealing with a clear varnish for durability. These can be hung on Easter trees, gifted to loved ones, or used as decorative elements on Easter baskets. The texture of salt dough, once baked, is wonderfully sturdy for painting and decorating. For a more rustic feel, you can opt for natural dyes or even leave them unpainted.
-
Paper Plate Bunny Masks: A quick and engaging craft for younger children, these masks encourage imaginative play. You’ll need paper plates, cotton balls, construction paper (pink, black, white), glue, scissors, and a craft knife (for adult use). Cut out the center of a paper plate, leaving a rim for the bunny’s face. Cut out two large ear shapes from white construction paper and two smaller inner ear shapes from pink construction paper. Glue the pink inner ears onto the white ears. Glue the completed ears to the top of the paper plate mask. Glue cotton balls to the bottom half of the plate for the bunny’s fluffy cheeks. Cut out eyes and a nose from black construction paper and a mouth from pink construction paper. Glue these onto the mask. An adult should carefully cut out eye holes using a craft knife. Attach elastic string or ribbon to the sides of the mask for wearing. These are perfect for an Easter parade or simply for hours of pretend play. Encourage variations with different colored papers for a rainbow bunny or add glitter for extra sparkle.
-
Felt Easter Egg Garland: This craft adds a vibrant and reusable touch to your Easter decor. Materials include felt sheets in various Easter colors (pastels, brights), embroidery floss, a needle, scissors, and a template for egg shapes. Cut out egg shapes from the felt. You can freehand them or use a stencil. For a simple garland, fold each felt egg in half and stitch along the curved edge with a contrasting embroidery floss, leaving the straight top open. Alternatively, cut two egg shapes for each ornament, place a small amount of stuffing (like polyester fiberfill) between them, and stitch around the edges, leaving a small opening to add more stuffing before closing. Once you have a collection of decorated felt eggs, you can either string them together using the holes you created or attach them to a length of ribbon or twine with fabric glue or small stitches. Kids can personalize their eggs with felt shapes, embroidery, or even small beads (under supervision). This garland is durable and can be packed away for use year after year.
-
Pinecone Chicks: Transform humble pinecones into adorable little Easter chicks. You’ll need pinecones, yellow acrylic paint, googly eyes, orange craft foam or cardstock, glue, and a small brush. Paint the pinecones entirely with yellow acrylic paint. Allow them to dry thoroughly. Once dry, glue two googly eyes onto the wider end of the pinecone. Cut a small beak shape from orange craft foam or cardstock and glue it below the eyes. For a festive touch, you can add a tiny bit of red glitter to the beak or paint tiny feet at the base. These charming chicks can be placed in Easter baskets, scattered on tabletops, or even hung as ornaments if you attach a small loop of string before painting. The natural texture of the pinecone adds character to the finished chick.
-
Yarn-Wrapped Easter Eggs: This craft offers a beautiful textured look and can be done with simple materials. You’ll need balloons, yarn in various Easter colors, white craft glue, a bowl, scissors, and glitter (optional). Inflate balloons to the desired egg size. Mix white craft glue with a little water to make it more fluid. Dip lengths of yarn into the glue mixture, ensuring they are well-coated but not dripping excessively. Wrap the glue-covered yarn around the balloon, creating an egg shape. Leave a small opening at the top where the balloon is tied. Continue wrapping until the desired coverage is achieved. For extra sparkle, you can roll the yarn-wrapped balloon in glitter before it dries. Let the eggs dry completely (this can take 24-48 hours). Once dry, pop the balloon and carefully remove it from the inside. You can then add embellishments like ribbon bows, felt flowers, or small painted details. These yarn eggs are visually striking and can be hung, displayed in bowls, or used as decorative accents.
-
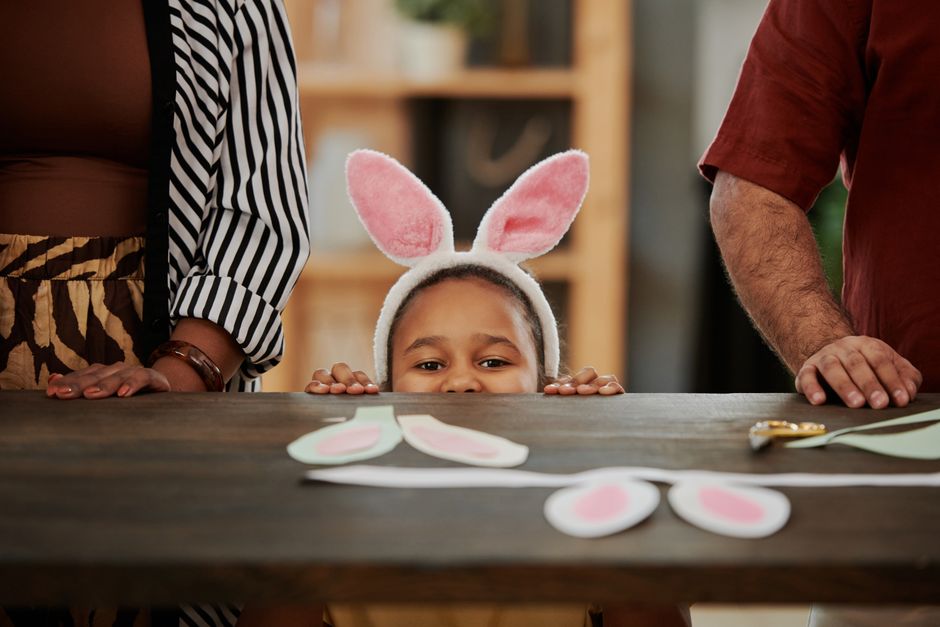
Pipe Cleaner Bunny Ears Headband: A simple yet fun craft that results in a wearable accessory. You’ll need headbands, pipe cleaners in white and pink, scissors, and hot glue or craft glue. For each pair of ears, twist two white pipe cleaners together to create a sturdier base. Bend them into the shape of bunny ears. Cut a smaller piece of pink pipe cleaner and twist it around the middle of the white ears to create the inner ear. You can make the ears pointed or slightly rounded. Once the shape is finalized, use hot glue or craft glue to attach the base of the pipe cleaner ears to the headband. Ensure they are securely fastened. You can also add a fluffy cotton ball tail to the back of the headband for an extra touch. This is a quick craft that kids can often complete independently with minimal supervision.
-
Egg Carton Caterpillar/Bunny: Repurpose old egg cartons into charming Easter creatures. You’ll need egg cartons, paint, googly eyes, pipe cleaners (for antennae or legs), glue, scissors, and craft paper. Cut individual cups from the egg carton. Paint them your desired colors. For a caterpillar, connect several cups together with glue and let them dry. Once dry, glue on googly eyes. Cut pipe cleaners into small lengths and glue them to the underside of the carton cups for legs. For a bunny, use one or two carton cups. Paint them white. Glue on googly eyes and a small pink pom-pom or cut-out for the nose. Cut out two long ear shapes from cardstock or felt and glue them to the top of the carton cup. This is an excellent way to teach children about recycling and gives new life to everyday materials.
-
Cereal Box Easter Baskets: A fantastic and budget-friendly alternative to store-bought baskets. You’ll need empty cereal boxes, scissors, glue, decorative paper (scrapbook paper, construction paper), ribbon, fabric scraps, and embellishments like stickers or glitter. Cut the top flaps off the cereal box. Cut a handle from a sturdy piece of cardboard (from another box or the cereal box itself) and attach it securely to the sides of the box using strong glue or staples. Cover the entire outside of the box with decorative paper, securing it with glue. You can wrap it like a gift or cut pieces to fit each side. Decorate the inside with matching paper as well. Add ribbon, fabric scraps, or other embellishments to personalize the basket. This is a great project for older kids to manage with some adult help on the cutting and gluing of structural elements.
-
Handprint & Footprint Easter Art: These personalized crafts are perfect keepsakes. You’ll need cardstock or canvas, washable paints in Easter colors, brushes, and a wet cloth for easy cleanup. For a bunny, dip your child’s hand in white paint and press it onto the paper, with the fingers pointing upwards to form the ears. Once dry, use a paintbrush to add a pink nose, black eyes, and whiskers. For a chick, dip your child’s foot in yellow paint and press it onto the paper, with the heel being the body and the toes as the feet. Once dry, paint on a beak and eyes. You can also create a bouquet of "tulips" by using your child’s thumbprint as the flower head and their finger as the stem. These simple prints can be transformed into numerous Easter-themed images with a little imagination and paint.
-
Decorated Easter Eggs (Beyond Dyeing): While traditional dyeing is fun, explore other ways to decorate eggs. You’ll need hard-boiled or blown-out eggs, acrylic paints, permanent markers, glitter glue, stickers, washi tape, and even natural materials like dried flowers or leaves. Use permanent markers to draw intricate patterns, faces, or scenes on the eggs. Apply glitter glue for sparkly accents or cover sections with colorful washi tape for a modern look. For a more organic aesthetic, adhere small dried flowers or leaves with a thin layer of mod podge. Another creative option is to use rubber cement to create resist patterns: apply rubber cement in desired shapes, let it dry completely, paint over the egg, and then peel off the rubber cement to reveal the unpainted design.
-
Easter Egg Sun Catchers: These beautiful decorations will brighten up your windows. You’ll need clear contact paper, tissue paper in various Easter colors, scissors, and a craft knife. Cut out an egg shape from the contact paper. Then, cut out the inside of the egg, leaving a border. Cut a second, identical egg shape from the plain contact paper. Lay one egg shape sticky-side up on your work surface. Have kids tear or cut small pieces of tissue paper and arrange them within the egg outline. Once the egg is filled with tissue paper, carefully place the second egg shape (also sticky-side up) over the top, pressing them together to seal the tissue paper inside. Trim any excess tissue paper around the edges. You can also create different Easter shapes like bunnies or crosses. Hang them in sunny windows for a magical effect.
-
Cardboard Tube Easter Bunny Village: Create a charming miniature village using cardboard tubes. You’ll need toilet paper or paper towel tubes, paint, construction paper, glue, scissors, and embellishments. Cut the tubes to various heights if desired. Paint each tube in pastel or bright Easter colors. Once dry, kids can cut out windows and doors from construction paper and glue them onto the tubes. Add roofs made from rolled construction paper or cardstock. Decorate the tubes with cotton ball clouds, glittery paths, or small paper flowers. You can also add pipe cleaner antennae for bunny characters. This craft encourages creativity in building and decorating miniature structures, perfect for a tabletop display.
-
Bunny Bowling Pins: Turn a simple game into an Easter-themed activity. You’ll need empty plastic bottles or cardboard tubes, white paint, black permanent marker, pink construction paper or paint, and a small ball. Paint the bottles or tubes white. Once dry, draw black eyes and a nose on the top portion of each "pin" to resemble a bunny face. Cut out long ear shapes from pink construction paper or paint them on with pink paint and attach them to the top. For a more secure attachment of paper ears, use hot glue. Arrange the bunny bowling pins and let the fun begin with a soft ball! This is a great way to incorporate active play with a craft.
-
Popsicle Stick Easter Crosses: A meaningful craft that can be used for decoration or as a symbol of the holiday. You’ll need popsicle sticks, glue, paint, and embellishments like glitter, beads, or ribbon. For a basic cross, glue two popsicle sticks together in a cross shape. For a more elaborate design, use multiple sticks to create a frame or a basket weave pattern behind the cross. Once the glue is dry, kids can paint the crosses in their favorite colors. They can then decorate them with glitter, glue on small beads along the edges, or tie a ribbon bow at the intersection. These crosses can be displayed on shelves, hung as ornaments, or even used as thoughtful gifts.
-
No-Sew Fleece Easter Basket Liners: Give existing Easter baskets a quick and festive makeover with these no-sew liners. You’ll need fleece fabric in Easter colors or patterns, scissors, and a basket. Measure the inside of your Easter basket to determine the size of the fabric liner needed. Cut a piece of fleece fabric that is slightly larger than the basket’s interior. Fold the top edge of the fleece over by about an inch and secure it with fabric glue or a few stitches to create a finished hem. You can then cut fringe along the bottom edge of the fleece to allow it to drape nicely within the basket. Alternatively, you can cut a circular piece of fleece to fit the bottom and a long rectangular strip to line the sides, attaching them with fabric glue. Embellish with ribbon or felt shapes for added charm. This is a practical and visually appealing craft that requires no sewing skills.
