
Easy Clothing Zipper Tips: Unlocking Sewing Success
Easy clothing zipper tips can transform your sewing journey from frustrating to fantastic. Zippers are a common feature on clothing, but they can also be a source of frustration for sewists of all levels. From understanding the different types of zippers to mastering the art of insertion, this guide provides a comprehensive overview of all things zipper-related, making your sewing projects smoother and more enjoyable.
Whether you’re a seasoned seamstress or a curious beginner, this guide will empower you to tackle zippers with confidence. We’ll explore the basics of zipper anatomy, delve into various insertion techniques, and equip you with the knowledge to troubleshoot common zipper problems.
Get ready to unlock a world of sewing possibilities with easy clothing zipper tips!
Understanding Zipper Basics
Zippers are ubiquitous in our daily lives, seamlessly securing our clothing, bags, and countless other items. Understanding the fundamental components and types of zippers can make them less daunting and empower you to confidently handle any zipper-related task.
Types of Zippers, Easy clothing zipper tips
Zippers come in a variety of styles, each designed for specific applications.
- Standard Zippers:The most common type, these zippers are found on clothing, bags, and other everyday items. They are typically made of metal or plastic teeth and are available in various colors and finishes.
- Invisible Zippers:These zippers are designed to be hidden, typically used on garments where a smooth, seamless finish is desired. The teeth are concealed within the zipper tape, creating a clean and discreet closure.
- Separating Zippers:These zippers have two sliders that can be moved independently, allowing the zipper to be opened from either end. They are commonly used on jackets and other garments that require a two-way opening.
- Heavy-Duty Zippers:These zippers are designed for heavy-duty applications, such as luggage, tents, and backpacks. They typically have larger teeth and stronger tape to withstand wear and tear.
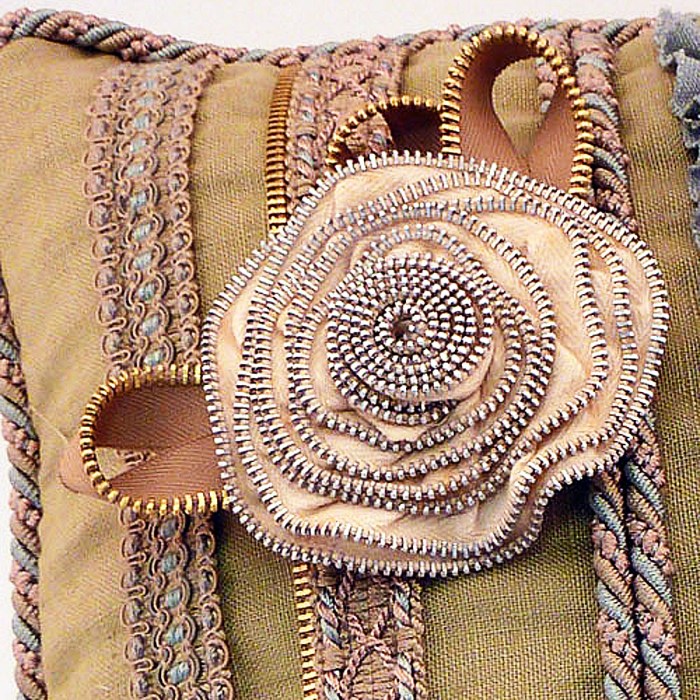
- Specialty Zippers:This category encompasses a wide range of unique zippers, including those with decorative elements, self-healing teeth, and unique closures. They are often used in fashion and design applications.
Anatomy of a Zipper
Every zipper, regardless of its type, consists of several essential components.
- Slider:The slider is the movable part of the zipper that allows you to open and close the zipper. It is typically made of metal or plastic and has a hook or a pull tab that you use to manipulate it.
- Teeth:The teeth are the interlocking elements that form the zipper closure. They are typically made of metal or plastic and are arranged in a continuous row along the zipper tape.
- Tape:The tape is the fabric or plastic strip that runs along the zipper and holds the teeth in place. It is often available in a variety of colors and materials.
- Stop:The stop is a small piece of material that prevents the slider from moving beyond the end of the zipper. It is typically located at the top and bottom of the zipper tape.
Identifying Zipper Direction
Determining the direction of a zipper (up or down) is crucial for proper operation.
- Pull Tab Position:The pull tab on the slider is usually positioned at the bottom of the zipper when it is closed. If the pull tab is at the top, the zipper is open. This is a simple visual indicator.
- Teeth Alignment:Observe the teeth of the zipper when it is closed. If the teeth are aligned vertically, the zipper is designed to be pulled up. If the teeth are aligned horizontally, the zipper is designed to be pulled down.
- Zipper Placement:Consider the placement of the zipper on the garment or item. Zippers on clothing are usually positioned at the bottom or side, suggesting they are designed to be pulled up. Zippers on bags or backpacks are often placed at the top, indicating a downward pull.
Inserting a Zipper: Easy Clothing Zipper Tips

Inserting a zipper into a garment can seem daunting, but with the right tools and techniques, it’s a manageable task. Whether you’re adding a center-front zipper to a dress or an invisible zipper to a skirt, the process involves several key steps.
Inserting a Center-Front Zipper
Center-front zippers are commonly used on jackets, dresses, and skirts. They are visible and often feature a decorative pull tab. Here’s a step-by-step guide:
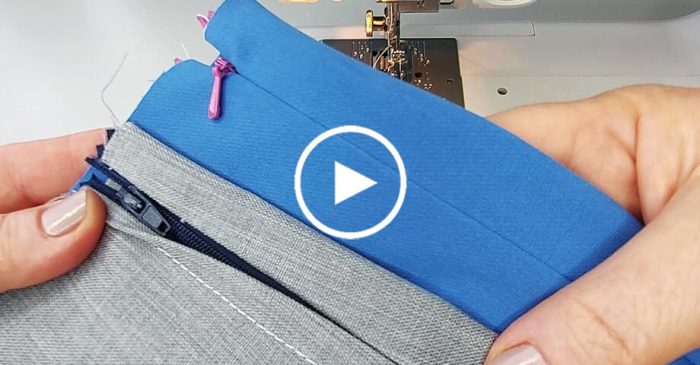
- Prepare the Zipper and Fabric:Begin by aligning the zipper tape with the right side of the garment, ensuring the zipper teeth face the fabric. Pin the zipper in place, leaving a small gap at the top and bottom for seam allowance.
- Stitch the Zipper:Use a zipper foot on your sewing machine to stitch the zipper tape to the garment. Begin stitching at the bottom of the zipper, moving upwards. It’s essential to keep the stitches close to the zipper teeth for a secure attachment.
- Finish the Edges:Once the zipper is attached, finish the raw edges of the fabric. This can be done using a serger or by folding and stitching the edges.
- Attach the Zipper Pull:After the zipper is inserted, attach the zipper pull to the top of the zipper tape. This allows you to easily open and close the zipper.
Inserting an Invisible Zipper
Invisible zippers are designed to blend seamlessly into the garment, creating a clean and professional finish. They are often used on skirts, dresses, and pants.
- Prepare the Zipper and Fabric:Begin by aligning the zipper tape with the wrong side of the garment, ensuring the zipper teeth are hidden within the seam allowance. Pin the zipper in place, leaving a small gap at the top and bottom for seam allowance.
- Stitch the Zipper:Use a zipper foot on your sewing machine to stitch the zipper tape to the garment. Begin stitching at the bottom of the zipper, moving upwards. The zipper foot will guide the needle close to the zipper teeth, creating a hidden seam.
- Finish the Edges:Once the zipper is attached, finish the raw edges of the fabric. This can be done using a serger or by folding and stitching the edges.
- Attach the Zipper Pull:After the zipper is inserted, attach the zipper pull to the top of the zipper tape. This allows you to easily open and close the zipper.
Tips for Smooth and Even Zipper Insertion
- Use the Right Zipper Foot:Using the correct zipper foot for your sewing machine is crucial for accurate and smooth zipper insertion. Zipper feet are designed to guide the needle close to the zipper teeth, ensuring a clean and even stitch.
- Pin Carefully:Pinning the zipper tape to the fabric before stitching helps prevent the zipper from shifting during the stitching process. Use plenty of pins to secure the zipper in place.
- Test the Zipper:Before finishing the zipper insertion, test the zipper to ensure it opens and closes smoothly. If you encounter any issues, adjust the zipper placement or stitching before continuing.
Sometimes the simplest things can be the most frustrating, like a stuck zipper on your favorite jacket. But before you start pulling at it in a panic, take a deep breath and remember that a little bit of patience and the right technique can often do the trick.
If you’re looking for some inspiration for festive treats, check out this 13 neighbor christmas gift treat countdown for some sweet ideas. Once you’ve got your holiday baking done, you can return to tackling that zipper with a fresh perspective!
Sometimes, the simplest clothing hacks can make a big difference. For example, learning how to sew in a zipper can be a lifesaver when you’re dealing with a broken one. And if you’re feeling ambitious, you can even take it a step further and redesign time how to make a dress perfect for you , adding your own custom zipper details.
Whether you’re fixing an old favorite or creating something new, mastering those basic zipper skills will definitely come in handy!
Sometimes, the simplest things can be the most frustrating, like a stubborn zipper. But just like learning how to prevent those pesky popcorn kernels from getting stuck in your teeth, no more popcorn kernels , there are easy tricks to make zippers behave.
A little bit of soap or a pencil lead can often do the trick, making your zipper glide smoothly and saving you from those frustrating wardrobe malfunctions.