Easy Pennant Banner in 20 Minutes: A DIY Celebration
Easy pennant banner in 20 minutes – who knew creating a festive centerpiece for any celebration could be so simple? I’m all about quick and easy DIY projects, and this one definitely fits the bill. Forget the hours spent struggling with complicated patterns and tedious sewing, this project is designed for even the most novice crafter.
Let’s dive into how you can whip up a vibrant and cheerful pennant banner in just 20 minutes.
This project is perfect for birthday parties, graduation celebrations, baby showers, or even just adding a touch of whimsy to your home decor. With a few basic supplies and a little creativity, you can customize your banner to match any theme or occasion.
So, grab your scissors, fabric, and a whole lot of enthusiasm, because we’re about to embark on a fun and rewarding crafting journey!
Pennant Banners: A Quick and Easy Celebration Decoration
Pennant banners are a classic and beloved way to add festive cheer to any celebration. Whether it’s a birthday party, a graduation ceremony, a sporting event, or a holiday gathering, these colorful and eye-catching decorations instantly create a sense of excitement and joy.
Creating an easy pennant banner in just 20 minutes is a great way to add a festive touch to your home for the holidays. It’s a simple DIY project that the whole family can enjoy, and it’s a fun way to get into the spirit of the season.
For more ideas on how to make your Christmas celebrations special without breaking the bank, check out this list of 12 fun frugal family Christmas traditions. Once you’ve got your decorations up, you can enjoy the festive atmosphere and create some cherished memories.
Creating your own pennant banners can be a fun and rewarding DIY project, especially when you’re looking for a quick and easy way to add a personal touch to your event. The beauty of pennant banners lies in their simplicity – they can be made with minimal materials and effort, allowing you to focus on enjoying the celebration itself.
Creating an easy pennant banner in 20 minutes is a breeze, especially if you’re looking for a quick and festive way to decorate for a party or special occasion. Sometimes, however, you need to get organized first, and that’s where 6 brilliant organizing ideas come in handy.
Once you’ve got your supplies and workspace in order, you can focus on crafting those adorable pennants and creating a joyful atmosphere with your DIY banner.
This guide will walk you through the process of creating a stunning pennant banner in just 20 minutes.
Making a pennant banner in just 20 minutes is a breeze! You can even whip up some homemade treats to go with your party, like how to make homemade twinkies. Once your treats are ready, hang up your banner and get ready to celebrate!
Materials Needed for a Quick Pennant Banner
Creating a pennant banner in a short timeframe requires careful planning and the right materials. The following list Artikels essential supplies:
- Fabric:Choose a fabric that is lightweight, durable, and easy to work with. Cotton, felt, or even paper are good options.
- Scissors:A pair of sharp scissors is essential for precise cutting.
- String or Ribbon:Use a sturdy string or ribbon to connect the pennants.
- Sewing Machine or Needle and Thread:You’ll need a sewing machine or needle and thread to sew the pennants together.
- Optional:Iron, fabric glue, embellishments (buttons, sequins, etc.)
Creating a Pennant Banner in 20 Minutes: A Step-by-Step Guide
The key to creating a pennant banner quickly is to streamline the process and avoid unnecessary steps. Here’s a step-by-step guide:
- Prepare the Fabric:Cut the fabric into rectangular strips. The size of the strips will determine the size of your pennants.
- Create the Pennants:Fold each fabric strip in half lengthwise and sew or glue the edges together.
- Assemble the Pennants:Sew or glue the pennants together, leaving a space at the top for the string or ribbon.
- Attach the String or Ribbon:Thread the string or ribbon through the top of the pennants.
- Add Embellishments (Optional):Embellish your pennant banner with buttons, sequins, or other decorative elements.
Tips for a Successful Quick Pennant Banner Project
Here are some helpful tips to ensure your pennant banner project is a success:
“Keep it simple and focus on the key elements of the project.”
- Pre-cut the fabric:Cut all the fabric strips to the desired size before you start sewing or gluing.
- Use a sewing machine:A sewing machine can significantly speed up the process of sewing the pennants together.
- Choose a simple design:Keep the design of your pennants simple and avoid intricate patterns that require a lot of time.
- Work in a well-lit area:Good lighting will make it easier to see what you’re doing and avoid mistakes.
- Have fun!Remember that the most important thing is to enjoy the process of creating your own pennant banner.
Materials Needed

Pennant banners are a versatile and affordable way to add a festive touch to any occasion. You can create them for birthdays, holidays, sporting events, or just to brighten up your home. The beauty of pennant banners is that you can personalize them to match your theme and color scheme.
Before you get started, gather the necessary materials to ensure a smooth and enjoyable crafting experience.
Fabric
The fabric you choose will determine the look and feel of your pennant banner. Consider the occasion and the overall aesthetic you want to achieve.
- Common Fabric Choices:
- Felt: Felt is a popular choice for pennant banners due to its durability, vibrant colors, and ease of cutting. It’s also relatively inexpensive, making it a budget-friendly option.
- Cotton Fabric: Cotton is a versatile and widely available fabric that comes in a vast array of colors and patterns. It’s easy to work with and can be machine-washed and dried, making it a practical choice.
- Burlap: Burlap adds a rustic and earthy touch to pennant banners. It’s a durable and textured fabric that can be left natural or dyed to achieve different colors.
- Alternative Fabric Options:
- Paper: Paper is a lightweight and readily available option for creating pennant banners. You can use construction paper, cardstock, or even patterned scrapbook paper.
- Plastic: Plastic is a durable and weather-resistant material that’s ideal for outdoor use. You can find plastic sheets in various colors and patterns at craft stores.
String/Twine, Easy pennant banner in 20 minutes
The string or twine you use will connect the pennants and determine the overall length of your banner.
- Common String Choices:
- Twine: Twine is a strong and versatile string that comes in various colors and textures. It’s a popular choice for pennant banners due to its rustic and natural look.
- Ribbon: Ribbon is a decorative string that comes in various widths, colors, and patterns. It’s a great choice for adding a touch of elegance to your banner.
- Yarn: Yarn is a soft and flexible string that’s available in a wide range of colors and textures. It’s a great option for creating a whimsical and colorful banner.
- Alternative String Options:
- Fishing Line: Fishing line is a strong and nearly invisible string that’s ideal for hanging banners in a discreet manner.
- Wire: Wire is a sturdy and flexible material that can be used to create a unique and modern banner.
Scissors
A pair of sharp scissors is essential for cutting out the pennant shapes from your chosen fabric.
Markers/Paints
You’ll need markers or paints to decorate your pennants. The type you choose will depend on the fabric and the desired effect.
- For Fabric:
- Fabric Markers: Fabric markers are specifically designed for use on fabric and come in a variety of colors and tip sizes.
- Acrylic Paints: Acrylic paints are versatile and durable paints that can be used on fabric. They come in a wide range of colors and can be diluted with water to create different effects.
- For Paper or Plastic:
- Markers: Markers are a convenient and readily available option for decorating paper or plastic pennants. They come in a wide range of colors and tip sizes.
- Crayons: Crayons are a fun and easy-to-use option for decorating paper or plastic pennants. They come in a variety of colors and can be blended to create different effects.
Optional Embellishments
Embellishments can add a personalized touch to your pennant banner.
- Common Embellishments:
- Sequins: Sequins add a touch of sparkle and glamour to pennant banners.
- Buttons: Buttons can be used to add color, texture, and dimension to your pennant banners.
- Ribbons: Ribbons can be used to create bows, streamers, or other decorative elements.
- Alternative Embellishments:
- Pom-Poms: Pom-poms add a playful and whimsical touch to pennant banners.
- Beads: Beads can be used to create a unique and eye-catching design.
Design & Preparation: Easy Pennant Banner In 20 Minutes

The design process for your pennant banner is where you bring your celebration vision to life. It’s about choosing a theme, selecting colors that match the occasion, and deciding on the shapes that will best represent your message.
Here’s a step-by-step guide to help you create a pennant banner that’s both eye-catching and meaningful.
Choosing a Theme
A theme helps unify the design elements of your banner and makes it easier to choose colors, shapes, and even the wording for your pennants. For example, a birthday banner might feature a whimsical theme with colorful balloons and playful fonts, while a graduation banner could incorporate a more formal theme with elegant colors and sophisticated fonts.
Selecting Colors
The colors you choose should reflect the theme and the overall mood you want to create. Bright, bold colors are great for celebrations, while softer pastels can create a more subdued ambiance. You can use a color wheel to help you choose complementary colors or use a single color scheme for a more unified look.
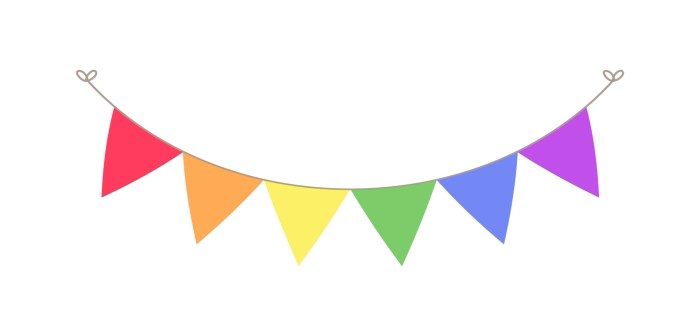
Deciding on Shapes
The classic pennant shape is a triangle, but you can get creative with other shapes like squares, circles, or even custom shapes that reflect your theme. For example, you could use star-shaped pennants for a patriotic celebration or heart-shaped pennants for a romantic occasion.
Creating a Template
Creating a template for your pennants ensures consistency in size and shape. You can use a simple piece of paper or a digital design program like Adobe Illustrator or Canva to create your template.
Here’s how to create a simple pennant template:
- Decide on the dimensions:Measure the length and width of the pennant you want to create. For a standard pennant, the length is usually about twice the width.
- Draw the shape:Draw the Artikel of the pennant shape on your paper or using a design program. You can use a ruler or protractor to ensure accuracy.
- Cut out the template:Carefully cut out the template along the lines you drew.
Measuring and Cutting the Fabric
Once you have your template, you can use it to measure and cut the fabric for your pennants.
Here are some tips for accurate measuring and cutting:
- Use a ruler or measuring tape:Make sure your ruler or measuring tape is accurate and that you’re measuring from the correct starting point.
- Use a sharp pair of scissors:Sharp scissors will make clean cuts and prevent fraying. You can also use a rotary cutter and cutting mat for precise cuts.
- Pin the template to the fabric:Use pins to secure the template to the fabric before cutting. This will help prevent the fabric from shifting and ensure that your cuts are accurate.
- Cut carefully:Cut along the edge of the template, making sure to cut through all layers of fabric.