How to Easy Spring Braid Tutorial: A Step-by-Step Guide
How to easy spring braid tutorial is a great way to add a touch of style to your hair. Whether you’re looking for a casual everyday look or something more intricate for a special occasion, spring braiding offers endless possibilities.
This tutorial will guide you through the process of creating a beautiful spring braid, from preparing your hair to styling and finishing touches.
Spring braiding is a versatile technique that can be adapted to different hair types and lengths. It involves using a braiding tool to create a series of tight, spring-like coils that are then joined together to form a braid. This method is perfect for achieving a variety of looks, from sleek and polished to textured and bohemian.
Introduction to Spring Braiding

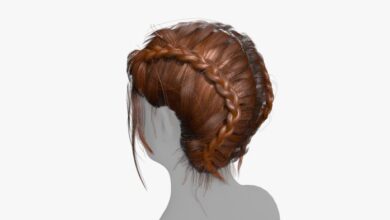
Spring braiding is a popular hairstyling technique that involves using a special tool called a spring braiding tool to create intricate and durable braids. These braids are often referred to as “spring twists” or “spring locs” and are known for their unique texture and versatility.
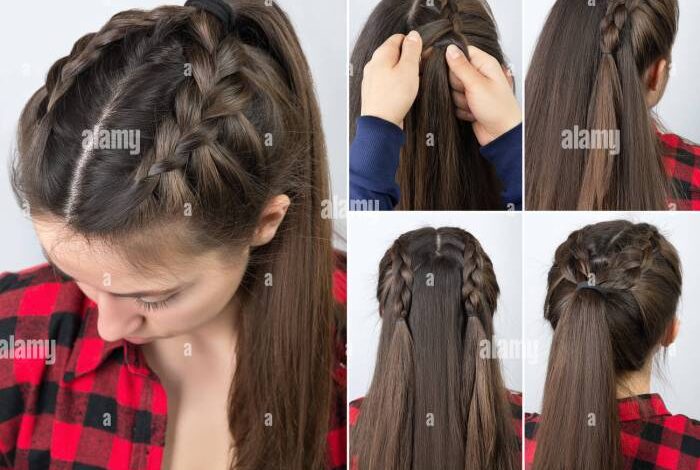
Okay, so you’ve mastered the basic braid and you’re ready for something a little more springy. Maybe a Dutch braid or a fishtail? Whatever your style, don’t forget to fuel up with a batch of chocolate ginger freezer cookies – the perfect treat for a busy braiding afternoon! Once you’ve got the hang of the braid, you can try some fun variations like adding ribbons or beads.
Happy braiding!
Spring braiding offers a protective hairstyle that minimizes manipulation and heat damage to the hair, making it an excellent option for individuals seeking low-maintenance and stylish options. It is also a popular choice for people who want to add volume and texture to their hair.
Learning how to do a simple spring braid is a great way to add a touch of elegance to your look, especially when you’re feeling a bit lazy about styling your hair. And if you need an excuse to indulge in a scoop or two of your favorite ice cream, check out this handy guide for some inspiration – you deserve it! After all, a little treat can make even the simplest braid feel like a glamorous affair.
Types of Spring Braids
The type of spring braid you choose will depend on your hair type, length, and desired look. Here are some popular types of spring braids:
- Traditional Spring Braids:These braids are created using a spring braiding tool to coil the hair into tight, spring-like coils. They are often used to create a voluminous and textured look.
- Spring Twists:Similar to traditional spring braids, spring twists are created using a spring braiding tool to coil the hair, but they are typically left looser and more relaxed.
- Spring Locs:Spring locs are a type of spring braid that is created by coiling the hair into locs. These locs can be left loose or tightened over time to create a more defined look.
History of Spring Braiding
Spring braiding is a relatively new hairstyle that originated in the early 2000s. It gained popularity as a protective and stylish option for women of African descent. The technique is believed to have evolved from traditional African braiding styles, where hair is often coiled and twisted into intricate patterns.
Spring braiding has become a popular hairstyle worldwide, offering a unique and versatile way to style and protect natural hair.
Essential Tools and Materials: How To Easy Spring Braid Tutorial
Spring braiding is a versatile and fun hair styling technique that requires minimal tools and materials. Having the right equipment will make the process smoother and ensure you achieve the desired results.
Essential Tools and Materials
| Tool/Material | Description | Purpose | Alternatives |
|---|---|---|---|
| Spring Braiding Tool | A specialized tool with a spring-loaded mechanism that helps to create tight and secure braids. | To create consistent and neat braids by holding the hair strands in place while braiding. | Small rubber bands, bobby pins, or even your fingers can be used as alternatives, but they may not provide the same level of control and security as a spring braiding tool. |
| Hair Comb | A comb with fine teeth for detangling hair and creating neat parts. | To detangle knots and create clean sections for braiding. | A wide-toothed comb or even your fingers can be used for detangling, but a fine-toothed comb is ideal for creating precise parts. |
| Hair Elastics | Small, elastic bands used to secure the ends of braids. | To keep the braids in place and prevent them from unraveling. | Hair ties, ribbons, or even pieces of fabric can be used as alternatives. |
| Hairspray | A hair product that helps to hold the style in place. | To set the braids and prevent them from becoming loose. | Styling gels or mousse can be used as alternatives, but hairspray is typically more effective for holding braids. |
Choosing high-quality tools and materials is crucial for achieving professional-looking results. Invest in a spring braiding tool that is made from durable materials and has a smooth, comfortable grip. Opt for hair combs with fine teeth that are not too sharp and hair elastics that are strong enough to hold the braids without breaking.
Look for hairspray that provides strong hold without leaving a sticky residue.
Preparing Your Hair

A clean and well-prepared canvas is essential for any art project, and spring braiding is no exception. Before you start braiding, take the time to properly wash, condition, and detangle your hair. This will make the braiding process smoother, prevent breakage, and ensure your braids look their best.
Washing and Conditioning
Washing your hair before braiding is crucial for removing dirt, product buildup, and excess oil that can weigh down your hair and make it difficult to braid. Choose a shampoo and conditioner suitable for your hair type. For example, if you have dry hair, opt for a moisturizing shampoo and conditioner.
After shampooing, apply conditioner to the lengths of your hair, avoiding the scalp, and leave it in for a few minutes before rinsing thoroughly.
Detangling Your Hair
Detangling your hair is essential to prevent breakage and ensure a smooth braiding experience. Start by using a wide-tooth comb or detangling brush to work through any knots gently. Begin at the ends of your hair and work your way up towards the scalp.
If you encounter a knot, gently pull on the hair above the knot to loosen it before working through it with the comb.
Applying Hair Products, How to easy spring braid tutorial
Once your hair is clean and detangled, you can apply hair products to enhance the braiding process and give your braids a polished look. Consider using a leave-in conditioner to add moisture and shine. You can also apply a styling cream or gel to provide hold and definition.
“Remember to apply hair products sparingly to avoid weighing down your hair and making it difficult to braid.”
I was determined to finish my spring braid tutorial video, but then I stumbled upon a captivating article about distracted my quest to restoring media balance in my home. It was so thought-provoking that I had to take a break from filming and delve into the article’s insights.
Now, back to the braids! I’m ready to tackle those loose ends and create a beautiful, easy spring braid.