How to Make a Flag: A Step-by-Step Guide
How to make a flag? It’s a question that’s sparked curiosity and creativity for centuries. Flags are more than just pieces of fabric; they’re symbols of identity, history, and pride. From the iconic stars and stripes of the American flag to the vibrant colors of a local sports team’s banner, flags have a powerful way of bringing people together.
In this guide, we’ll delve into the world of flag making, exploring the history, design principles, materials, and techniques involved in creating your own unique flag.
Whether you’re a seasoned crafter or a complete beginner, this comprehensive guide will equip you with the knowledge and skills to design, construct, and display your very own flag. We’ll cover everything from selecting the right fabric and tools to mastering the art of sewing and finishing.
So, grab your supplies, unleash your creativity, and let’s embark on this exciting journey of flag making!
Creating the Flag
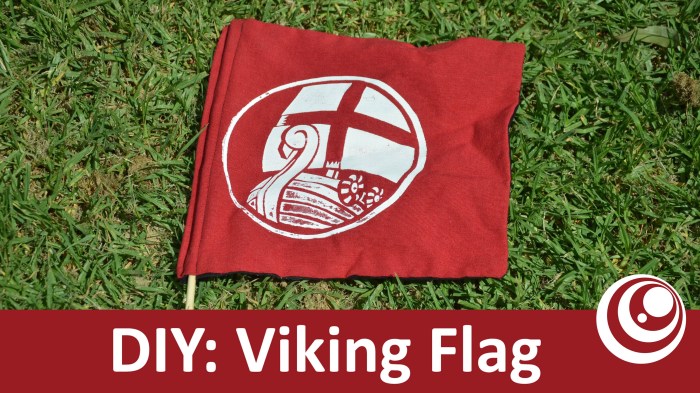
Now that you have your design, it’s time to bring your flag to life! The process of creating a flag can be as simple or as complex as you like, depending on your desired level of detail and the materials you choose.
This section will guide you through the essential steps, offering tips and techniques to ensure a beautiful and durable final product.
Choosing Materials
The materials you choose will significantly impact the look and feel of your flag. Consider the following:
- Fabric:Nylon, polyester, and cotton are popular choices for flags. Nylon is lightweight and durable, while polyester is water-resistant and fade-resistant. Cotton is a softer and more affordable option. The choice depends on the intended use of the flag, whether it will be flown outdoors or indoors, and the desired aesthetic.
- Thread:Choose a thread that matches the fabric and is strong enough to hold the seams together. Polyester thread is a good choice for most flags.
- Embroidery floss:If you plan to embroider your flag, select high-quality embroidery floss that won’t fade or fray easily.
- Hardware:For outdoor flags, you’ll need a flagpole and flagpole hardware, such as grommets or sleeves, to attach the flag securely.
Cutting the Fabric
Once you’ve chosen your materials, it’s time to cut the fabric to the desired size.
- Measure and mark:Using a ruler and fabric marker, carefully measure and mark the fabric according to your design. Remember to account for seam allowances when cutting.
- Cutting tools:Use sharp fabric scissors for precise cuts. Rotary cutters with a cutting mat are also useful for larger projects.
- Templates:For complex designs, consider creating templates from cardboard or paper to ensure accurate cutting.
Sewing Techniques
There are several sewing techniques you can use to create your flag.
- Hand sewing:This is a traditional and versatile method, suitable for smaller flags or detailed embroidery. Use a backstitch or a running stitch for durable seams.
- Machine sewing:For larger flags or faster construction, machine sewing is a convenient option. Choose a straight stitch or a zigzag stitch for added strength.
- Embroidery:Embroidery adds intricate details and visual appeal to flags. You can use hand embroidery techniques or a sewing machine with an embroidery attachment.
Finishing Touches, How to make a flag
Once your flag is sewn, there are a few finishing touches that will enhance its durability and appearance.
- Hemming:Hem the edges of the flag to prevent fraying. Use a simple hem or a double-fold hem for added strength.
- Grommets:For outdoor flags, install grommets at the top corners for attaching to the flagpole. Grommets are metal rings that reinforce the fabric and prevent tearing.
- Sleeves:Alternatively, you can sew a sleeve along the top edge of the flag to slip over the flagpole. Sleeves can be made from fabric or purchased pre-made.
Displaying and Caring for Your Flag: How To Make A Flag
Once you have created your flag, it’s time to display it with pride and ensure its longevity. Proper display and care will help your flag remain vibrant and symbolize your values for years to come.
Flag Display Etiquette
Flag etiquette is a set of guidelines for properly displaying the flag. Following these practices demonstrates respect for the flag and the values it represents.
- Hoisting and Lowering:The flag should be hoisted briskly and lowered ceremoniously. It should be raised before sunrise and lowered after sunset, or at least before dark.
- Position and Orientation:When displayed horizontally, the union (the part of the flag with stars or other insignia) should be on the left, facing the observer. When displayed vertically, the union should be at the top.
- Flagpole Height:The flag should be flown at a height that allows it to fly freely without touching the ground or any obstacles.
- Weather Conditions:The flag should be lowered during severe weather to prevent damage.
- Respect for Other Flags:When displayed with other flags, the U.S. flag should be flown at the highest point and to the observer’s right.
Flag Care and Maintenance
Proper care will help your flag stay vibrant and in good condition.
- Cleaning:Flags can be cleaned by hand washing in cool water with a mild detergent. Avoid using bleach or harsh chemicals.
- Drying:After washing, the flag should be air-dried, preferably in the shade. Avoid using a dryer, as the heat can damage the fabric.
- Storage:When not in use, the flag should be stored in a cool, dry place, preferably folded properly to prevent creases.
- Repair:If the flag is damaged, it should be repaired or replaced. A torn or faded flag should be respectfully retired, not displayed.
Making a flag is a fun and rewarding project, especially if you’re looking for a personalized touch. You can use fabric scraps, embroidery floss, or even paint to create a unique design. If you’re looking for gift ideas for someone over 16, this resource can help you find something special.
Once you’ve finished your flag, you can display it proudly at home or give it as a thoughtful gift to someone you care about.
Making a flag is a fun and simple project, perfect for a family crafting afternoon. You can use fabric scraps, paint, and even natural materials like twigs and leaves to create your own unique design. If you’re looking for a festive winter activity, try making a frugal family fun tradition 6 reindeer ice wreath with your kids.
Once your flag is finished, it can be proudly displayed on your porch or in your home, adding a personal touch to your space.
Making a flag is a fun and creative way to express yourself or show your support for something you believe in. You can use fabric, paint, markers, or even found objects to create a unique design. If you’re looking for a festive project, try making a thank you plate for Santa, like the one featured in this helpful guide make a thank you plate for santa.
Once you’ve mastered the art of making a thank you plate, you can move on to creating flags for any occasion, from birthdays to sporting events.

