
How To Make Slime
DIY Slime Recipes: A Comprehensive Guide to Creating Oozy, Stretchy Fun
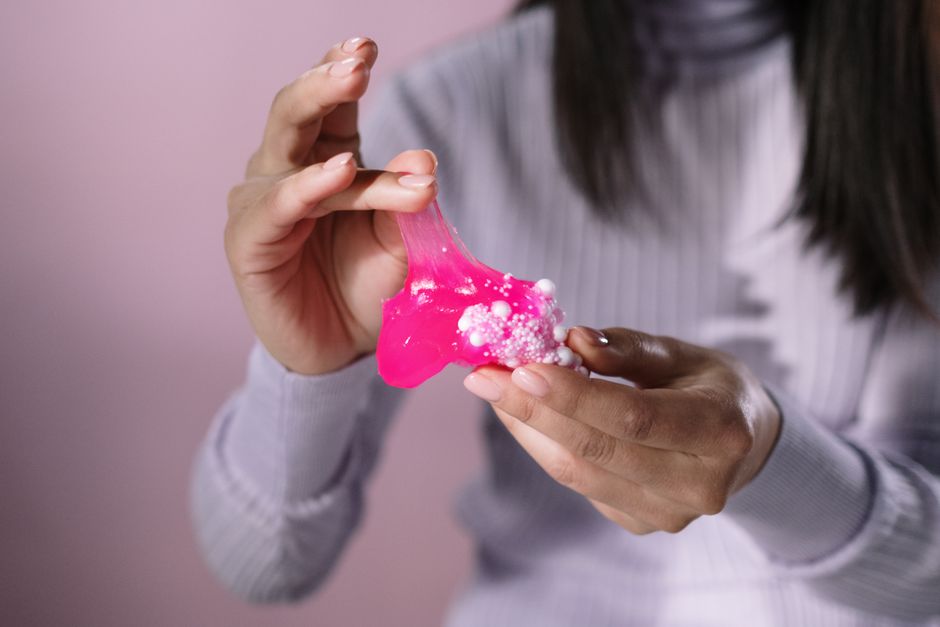
The appeal of slime lies in its tactile, sensory experience. It’s a polymer science experiment disguised as a toy, offering hours of squishy, stretchy, and satisfying entertainment for children and adults alike. Making slime at home is surprisingly simple, requiring only a few common ingredients and a bit of patience. This comprehensive guide will delve into various popular slime recipes, explaining the science behind them, offering tips for success, and addressing common issues. Whether you’re aiming for fluffy, clear, glittery, or even glow-in-the-dark slime, this article will equip you with the knowledge to create your perfect batch.
The Science Behind Slime: Cross-Linking Polymers
At its core, slime is a non-Newtonian fluid, meaning its viscosity changes under stress. The magic happens through a process called cross-linking. Most common slime recipes utilize polyvinyl alcohol (PVA) as the polymer base. PVA is a long chain molecule. The activator, typically a borate ion source like borax, contact lens solution containing boric acid and sodium borate, or liquid starch (which also contains sodium tetraborate), introduces borate ions. These borate ions act as bridges, connecting the long PVA chains together. This creates a three-dimensional network, trapping water molecules and transforming the liquid solution into a semi-solid, elastic gel – slime! The degree of cross-linking determines the slime’s consistency. More cross-linking results in a firmer, less sticky slime, while less cross-linking leads to a more liquid, stringy consistency. Understanding this fundamental principle is key to troubleshooting and customizing your slime creations.
Classic Borax Slime: The Tried and True Method
The most traditional and arguably the most robust slime recipe involves borax as the activator. It’s a reliable method that consistently produces excellent results.
-
Ingredients:
- 1/2 cup (4 oz) white PVA glue (Elmer’s white glue is a popular choice)
- 1/2 cup water
- 1/4 teaspoon borax powder
- 1/2 cup warm water (for dissolving borax)
- Optional: Food coloring, glitter, or other add-ins
-
Instructions:
- Prepare the Borax Solution: In a small bowl, thoroughly dissolve the 1/4 teaspoon of borax powder in 1/2 cup of warm water. Stir until no borax crystals remain visible. This is your activator solution.
- Mix the Glue Base: In a separate larger bowl, combine the 1/2 cup of white PVA glue with the 1/2 cup of water. Stir until well combined and smooth. This creates your polymer base.
- Add Color and Sparkle (Optional): If you wish to add color, stir in a few drops of food coloring at this stage. For glitter or other small add-ins, incorporate them now.
- Activate the Slime: Gradually add the borax solution, a teaspoon at a time, to the glue mixture while stirring continuously. You will notice the mixture begin to thicken and pull away from the sides of the bowl.
- Knead the Slime: Once the slime starts to form a cohesive blob, remove it from the bowl and knead it with your hands. It will be sticky at first, but as you knead, it will become less so and develop its characteristic stretchy texture. Continue kneading for several minutes until it reaches your desired consistency.
- Storage: Store your slime in an airtight container or a zip-top bag at room temperature.
-
Tips for Borax Slime:
- Ensure the borax is completely dissolved in the warm water. Undissolved borax can lead to a gritty texture.
- Add the activator slowly. Adding too much at once can make the slime too stiff and rubbery.
- Don’t over-knead initially. Allow the slime to "rest" for a minute or two if it’s extremely sticky, then continue kneading.
- If the slime is too sticky after kneading, dip your fingers in a little extra borax solution and continue kneading.
Contact Lens Solution Slime: A Borax-Free Alternative
For those who prefer to avoid handling borax powder directly, contact lens solution offers a convenient and readily available alternative. Most contact lens solutions that work for slime contain boric acid and sodium borate, which act as the cross-linking agents.
-
Ingredients:
- 1/2 cup (4 oz) clear or white PVA glue
- 1/2 teaspoon baking soda
- 1 to 2 tablespoons contact lens solution (must contain boric acid and sodium borate)
- Optional: Food coloring, glitter, beads, etc.
-
Instructions:
- Mix Glue and Baking Soda: In a bowl, combine the PVA glue with the baking soda. Stir thoroughly until the baking soda is fully incorporated. Baking soda helps to neutralize the acidity of the glue and provides a better pH balance for the contact lens solution to work effectively.
- Add Color and Sparkle (Optional): Add food coloring, glitter, or any other desired embellishments and mix well.
- Activate with Contact Lens Solution: Begin adding the contact lens solution, starting with one tablespoon, while stirring constantly. The slime will start to form.
- Continue Adding and Kneading: Add more contact lens solution, a teaspoon at a time, as needed, until the slime pulls away from the sides of the bowl and becomes less sticky.
- Knead Thoroughly: Once the slime is mostly formed, take it out of the bowl and knead it with your hands. It will be sticky at first but will become more manageable and stretchy as you knead.
- Storage: Store in an airtight container.
-
Tips for Contact Lens Solution Slime:
- Crucially, check your contact lens solution ingredients. Not all solutions contain the necessary boric acid and sodium borate. Solutions specifically for "saline" or "rinsing" may not work. Look for the ingredients on the bottle.
- Baking soda is essential for this recipe to work. Don’t skip it.
- Be patient with kneading. This slime might take a little more hand-kneading to achieve the desired texture.
- If it’s too sticky, add a tiny bit more contact lens solution. If it’s too stiff, you might have added too much activator. Sometimes, a little bit of water can help to loosen it, but be cautious.
Liquid Starch Slime: A Simpler Approach
Liquid starch is another effective activator that simplifies the slime-making process, as it already contains sodium tetraborate (a form of borax).
-
Ingredients:
- 1/2 cup (4 oz) white or clear PVA glue
- 1/4 cup liquid starch (like Sta-Flo)
- Optional: Food coloring, glitter
-
Instructions:
- Combine Glue and Add-ins: In a bowl, pour the PVA glue. If using, add food coloring and glitter and stir until well combined.
- Gradually Add Liquid Starch: Slowly pour in the liquid starch, about a tablespoon at a time, while stirring continuously. The slime will begin to form almost immediately.
- Knead and Adjust: Once the slime has come together into a cohesive mass, remove it from the bowl and knead it with your hands. It will be sticky at first.
- Achieve Desired Consistency: Continue kneading until the slime is no longer sticking to your hands. If it’s too sticky, add a tiny bit more liquid starch. If it’s too stiff, you may have added too much.
- Storage: Store in an airtight container.
-
Tips for Liquid Starch Slime:
- Start with the recommended amount of liquid starch and add more incrementally.
- This method is generally less forgiving than borax if you add too much activator.
- Ensure you are using genuine liquid starch, not spray starch.
Fluffy Slime: The Cloud-Like Sensation
Fluffy slime gains its characteristic airy texture from the addition of shaving cream.
-
Ingredients:
- 1/2 cup (4 oz) white PVA glue
- 1/4 cup shaving cream (foam, not gel)
- 1/4 teaspoon borax powder dissolved in 1/4 cup warm water (or contact lens solution with baking soda)
- Optional: Food coloring, glitter
-
Instructions:
- Mix Glue and Shaving Cream: In a bowl, combine the white PVA glue with a generous amount of shaving cream (about 2-3 cups, or until the mixture looks visibly fluffy). Gently fold them together. Do not overmix, as this can deflate the fluffiness.
- Add Color and Sparkle (Optional): Stir in your desired food coloring and glitter.
- Activate: Slowly add your chosen activator (borax solution or contact lens solution/baking soda mixture) a tablespoon at a time, stirring gently.
- Knead Carefully: As the slime begins to form, knead it with your hands. Be gentle to preserve the airy texture.
- Storage: Store in an airtight container, as the shaving cream can dry out.
-
Tips for Fluffy Slime:
- Use foam shaving cream, not gel. Gel will not provide the desired fluffiness.
- The amount of shaving cream can be adjusted for desired fluffiness. More shaving cream means fluffier slime.
- Be gentle when activating and kneading to maintain the airy texture.
Clear Slime: Transparency and Sparkle
Clear slime offers a mesmerizing visual appeal, perfect for showcasing glitter or small objects suspended within it. The key is to use clear glue and ensure all ingredients are free of impurities.
-
Ingredients:
- 1/2 cup (4 oz) clear PVA glue
- 1/2 cup water
- 1/2 teaspoon borax powder dissolved in 1/2 cup warm water (or contact lens solution with baking soda)
- Optional: Glitter, confetti, beads, small plastic toys
-
Instructions:
- Mix Glue and Water: In a bowl, combine the clear PVA glue with the 1/2 cup of water. Stir gently to avoid creating too many air bubbles.
- Add Decorations (Optional): If you’re adding glitter or other small items, stir them in now.
- Activate Slowly: Gradually add the borax solution or contact lens solution/baking soda mixture, stirring gently. You will see the slime begin to clear up as it forms.
- Knead Carefully: Once the slime is cohesive, knead it with your hands. Again, be gentle to minimize air bubbles.
- The Waiting Game for Clarity: The slime will be cloudy initially due to air bubbles introduced during mixing and kneading. To achieve true clarity, let the slime rest in an airtight container for 24-48 hours. The air bubbles will naturally dissipate, leaving behind perfectly clear slime.
-
Tips for Clear Slime:
- Using clear glue is paramount. White glue will result in opaque slime.
- Stirring gently is crucial. Avoid vigorous mixing or rapid kneading, which introduces air bubbles.
- Patience is key! The resting period is essential for achieving maximum clarity.
- If you notice any undissolved particles in your activator, strain it before adding it to the glue mixture.
Glow-in-the-Dark Slime: Ethereal Nighttime Fun
To create glow-in-the-dark slime, you’ll need a special ingredient: glow-in-the-dark pigment powder.
-
Ingredients:
- 1/2 cup (4 oz) white or clear PVA glue
- 1/2 cup water
- 1/4 teaspoon borax powder dissolved in 1/2 cup warm water (or contact lens solution with baking soda)
- 1-2 teaspoons glow-in-the-dark pigment powder (available at craft stores)
- Optional: Glitter
-
Instructions:
- Mix Glue and Pigment: In a bowl, combine the PVA glue with the glow-in-the-dark pigment powder. Stir thoroughly until the pigment is evenly distributed throughout the glue.
- Add Water and Other Add-ins: Add the water and any optional glitter. Stir well.
- Activate: Gradually add your chosen activator (borax solution or contact lens solution/baking soda mixture) while stirring continuously.
- Knead: Once the slime starts to form, knead it with your hands until it reaches the desired consistency.
- "Charge" the Slime: To make the slime glow, expose it to a bright light source for several minutes. Then, take it into a dark room to witness its luminescence.
-
Tips for Glow-in-the-Dark Slime:
- The more pigment powder you use, the brighter the glow. However, too much can affect the slime’s texture. Experiment with amounts.
- Ensure the pigment is fully dispersed in the glue before activating.
- Different pigment powders have varying "charge" and "glow" times. Follow product instructions if available.
Troubleshooting Common Slime Problems
Even with the best intentions, slime-making can sometimes present challenges. Here are solutions to common issues:
-
Slime is too sticky:
- Cause: Not enough activator, or the activator was not added slowly enough.
- Solution: Add a tiny bit more activator (borax solution, contact lens solution, or liquid starch) a few drops at a time and knead thoroughly. If using contact lens solution, add a pinch more baking soda and then the contact lens solution.
-
Slime is too stiff/rubbery/breaks easily:
- Cause: Too much activator was added.
- Solution: This is trickier to fix. You can try adding a small amount of warm water (a teaspoon at a time) and kneading it in. Sometimes, letting it rest in a sealed container can help it soften slightly. For severe cases, you may need to start over.
-
Slime is breaking into pieces:
- Cause: Similar to being too stiff, this indicates over-activation.
- Solution: Try the warm water addition as described above.
-
Slime has too many air bubbles (cloudy when it should be clear):
- Cause: Vigorous mixing or kneading.
- Solution: For clear slime, the best solution is to let it rest in an airtight container for 24-48 hours. The bubbles will dissipate on their own. For other slime types, some air bubbles are normal and add to the texture.
-
Slime has an unpleasant odor:
- Cause: Can be due to the glue itself, or if the slime has been left out for too long and started to degrade.
- Solution: Ensure you are using fresh glue. If the slime has been stored properly and still smells, it might be time to discard it and make a fresh batch.
Safety First: Important Considerations
While slime is generally a safe and fun activity, adult supervision is always recommended, especially for younger children.
- Avoid Ingestion: Slime ingredients are not meant for consumption. Ensure children do not put slime in their mouths.
- Skin Sensitivity: Some individuals may have sensitivities to certain ingredients. If any skin irritation occurs, discontinue use. Wash hands thoroughly after playing with slime.
- Borax Handling: When using borax powder, ensure it’s dissolved completely in water and that children don’t ingest the concentrated powder. Washing hands after handling borax is important.
- Cleanliness: Always make slime on a clean, protected surface. Wash hands before and after playing with slime. Clean up any spills promptly.
Conclusion: Endless Slime Possibilities
Making slime is an accessible and rewarding activity that combines creativity with basic chemistry. By understanding the principles of polymer cross-linking and experimenting with different ingredients and techniques, you can unlock a world of tactile fun. From classic borax slime to fluffy, clear, and glow-in-the-dark variations, the possibilities are nearly endless. So gather your supplies, get creative, and enjoy the wonderfully oozy, stretchy, and satisfying experience of homemade slime.
