DIY Decorative Candles: A Beginners Guide
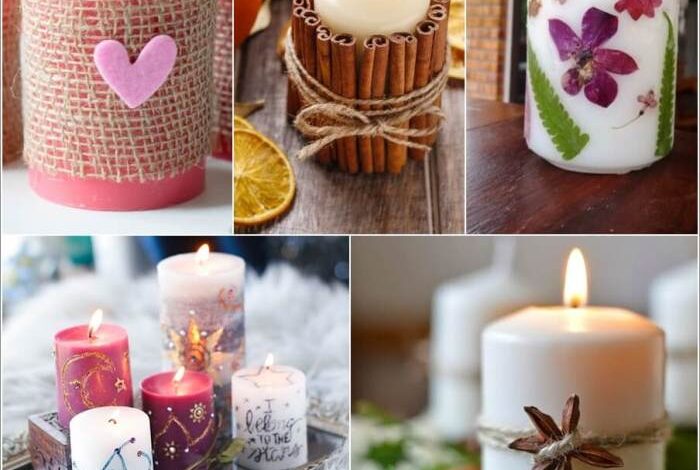
DIY decorative candles take center stage, inviting you to transform your home with personalized scents and stunning aesthetics. Creating your own candles offers a rewarding experience, allowing you to personalize your space with unique designs and fragrances. Whether you’re seeking a relaxing hobby or a creative outlet, crafting decorative candles is a fulfilling journey that blends artistry and practicality.
This guide delves into the world of DIY candle making, providing a comprehensive overview of essential supplies, techniques, design inspiration, and tips for success. From choosing the right wax to mastering decorative techniques, we’ll equip you with the knowledge to create beautiful and fragrant candles that reflect your individual style.
Tips for Success: Diy Decorative Candle

Making decorative candles can be a rewarding experience, but achieving professional-looking results requires attention to detail and some practice. This section provides tips to help you create beautiful, high-quality candles that you’ll be proud to display.
Troubleshooting Common Candle-Making Problems, Diy decorative candle
Candle-making can present some challenges, but with the right knowledge, you can overcome most common problems. Understanding the causes of these issues is crucial for preventing them in future projects.
- Uneven Burning:This is often caused by an uneven wax pool, which can be due to improper wick sizing, uneven pouring, or air bubbles trapped in the wax. To prevent this, use the correct wick size for your container and wax type, pour slowly and carefully to avoid air bubbles, and consider using a heat gun to remove any trapped air.
- Tunneling:When the candle burns down, a hollow tunnel forms in the center, leaving a large pool of wax around the wick. This happens when the wick is too small for the diameter of the candle, causing the flame to be too small and unable to melt the wax effectively.
Ensure you use the correct wick size for your candle, and if necessary, use a wick tab to create a wider flame.
- Sooting:Soot is a black residue that accumulates on the candle container and surrounding areas. It’s usually caused by using a wick that’s too large for the candle or by using a wax blend that produces a lot of smoke. Choosing the appropriate wick size and using a high-quality wax blend that is known for its clean burning qualities can help minimize soot formation.
- Cracking:Cracks can appear in the wax during cooling, often due to temperature fluctuations or improper pouring techniques. To avoid cracking, pour the wax at the recommended temperature for your wax type, avoid pouring into cold containers, and allow the candles to cool slowly and evenly.
Storing and Displaying Decorative Candles
Proper storage and display are essential for preserving the beauty and longevity of your decorative candles.
- Storage:Store candles in a cool, dry place away from direct sunlight and heat sources. Avoid storing them in humid environments, as this can cause the wax to become sticky or discolored. Consider using airtight containers or wrapping them in tissue paper to protect them from dust and debris.
- Display:Display candles in a well-ventilated area, away from flammable materials. Choose a location that is not exposed to direct sunlight or heat sources. You can create eye-catching displays by grouping candles together in different sizes and colors, using decorative trays, or incorporating candles into your existing home décor.
Safety and Proper Handling
Candle safety is paramount, and proper handling is crucial to prevent accidents.
- Never leave a burning candle unattended.Always extinguish candles before leaving the room or going to sleep. Ensure candles are placed on a stable, heat-resistant surface and away from flammable materials.
- Keep candles out of reach of children and pets.Children and pets may be curious about candles and could accidentally knock them over or burn themselves. Always supervise children when candles are burning.
- Trim wicks before each burn.Trim wicks to about ¼ inch to prevent excessive smoke and soot. This will also help ensure a clean and even burn.
- Extinguish candles properly.Use a candle snuffer or dip the wick in the melted wax to extinguish the flame. Never blow out candles, as this can create sparks and spread hot wax.
DIY decorative candles are a fun and rewarding craft, letting you personalize your home with unique scents and styles. Sometimes, though, you need a break from the wax and wick! If you’re looking for a different creative outlet, why not try your hand at cookie decorating?
There are so many possibilities, from classic royal icing to more modern techniques. Check out 5 ways you can decorate cookies for some inspiration, and then get back to those candles with renewed energy!
Making DIY decorative candles is a fun way to add a personal touch to your home. I love the idea of using vintage shutters to create a unique message board, like the ones featured on this website. And what better way to enhance a message board than with a few strategically placed, homemade candles?
The soft glow of candlelight adds a warm and inviting ambiance, perfect for showcasing your favorite photos and messages.
DIY decorative candles are a fun and creative way to add a personal touch to your home decor. It’s all about finding that perfect balance between function and aesthetics, just like choosing the right workout outfit. Sometimes, wearing clothes that motivate you to work out can make all the difference in getting you moving.
Similarly, a beautiful candle can set the mood for relaxation and create a welcoming atmosphere, making it the perfect finishing touch to any room.