Great Goal Setting Ideas: Achieve Your Dreams
Great goal setting ideas are the foundation for achieving your dreams, whether it’s a personal transformation, a career advancement, or simply living a more fulfilling life. The journey towards achieving your goals starts with a clear vision and a well-defined plan.
By understanding the importance of goal setting, embracing SMART goal strategies, and utilizing effective motivational techniques, you can unlock your full potential and make remarkable progress. This blog post will explore the essential steps and tools for setting and achieving meaningful goals, empowering you to reach new heights in all aspects of your life.
Understanding Goal Setting: Great Goal Setting Ideas
Goal setting is a fundamental aspect of personal and professional growth. It provides direction, motivation, and a roadmap for achieving desired outcomes. Whether you aspire to climb the career ladder, improve your fitness, or simply live a more fulfilling life, setting goals is essential for turning aspirations into reality.
The Importance of Goal Setting
Goal setting is crucial for both personal and professional success. It serves as a compass, guiding you towards your desired destination. In your personal life, setting goals can help you achieve greater happiness, fulfillment, and well-being. It can motivate you to pursue hobbies, develop new skills, and strengthen relationships.
In your professional life, goal setting can lead to increased productivity, career advancement, and financial success.
Benefits of SMART Goals
While setting goals is important, it’s equally crucial to ensure they are well-defined and achievable. This is where the SMART goal framework comes into play. SMART stands for Specific, Measurable, Achievable, Relevant, and Time-bound.
Setting goals can be incredibly motivating, and sometimes the best goals are tied to tangible changes in your life. For example, if you’re aiming for a more relaxed and inviting atmosphere, maybe a family room makeover is the perfect project! There are tons of resources available to help you create a space you love, like this one on family room decorating , which has tons of inspiration and practical tips.
Once you’ve got that cozy space ready, you’ll be well on your way to achieving your goals in style!
- Specific: A specific goal clearly defines what you want to achieve, leaving no room for ambiguity. Instead of saying “I want to be healthier,” a specific goal might be “I want to lose 10 pounds in the next three months.”
- Measurable: A measurable goal allows you to track your progress and assess your success. You can measure your progress towards losing 10 pounds by tracking your weight weekly or using a fitness tracker.
- Achievable: An achievable goal is challenging yet realistic, pushing you to grow while remaining within your capabilities. Aiming to lose 50 pounds in a month is unrealistic and potentially harmful, but losing 10 pounds in three months is achievable with a healthy diet and exercise plan.
Setting goals is all about prioritizing what matters most. Maybe you’re aiming for a healthier lifestyle, or maybe you want to spend more quality time with your family. If you’re looking for some inspiration, check out all momsense today 15 mothers day ideas for some heartwarming ideas.
Once you’ve identified your goals, break them down into smaller, manageable steps. This way, you’ll feel a sense of accomplishment as you progress, which will keep you motivated and on track!
- Relevant: A relevant goal aligns with your values, aspirations, and overall life goals. If your goal is to become a successful entrepreneur, learning about business management and marketing would be relevant goals.
- Time-bound: A time-bound goal sets a deadline, creating a sense of urgency and accountability. The deadline of losing 10 pounds in three months provides a clear target and motivates you to take action.
Types of Goals, Great goal setting ideas
Goals can be categorized into various types, depending on their scope, time frame, and area of focus. Here are some common examples:
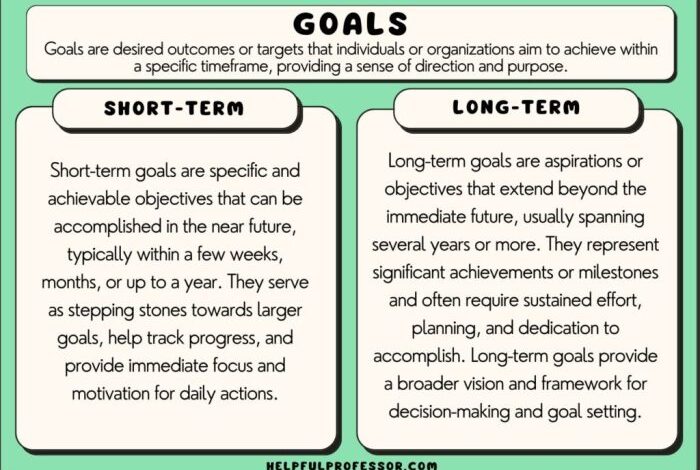
- Short-term goals: These are smaller goals that can be achieved within a short period, usually a few weeks or months. Examples include finishing a specific project at work, reading a book, or learning a new recipe.
- Long-term goals: These are larger goals that require significant effort and time to achieve, often spanning several months or years. Examples include completing a degree, buying a house, or starting a business.
- Financial goals: These goals focus on managing your finances effectively, such as saving for retirement, paying off debt, or investing in the stock market.
- Career goals: These goals relate to your professional development and advancement, such as getting a promotion, acquiring new skills, or changing careers.
- Personal goals: These goals focus on your personal growth and well-being, such as improving your health, learning a new language, or traveling to a new country.
Goal Setting Strategies

Setting effective goals is crucial for achieving success in any aspect of life. A well-defined goal acts as a compass, guiding your actions and providing a sense of purpose. But crafting effective goals goes beyond simply stating what you want to achieve.
Setting goals is a great way to stay motivated and focused, and sometimes a little bit of out-of-the-box thinking can help. For example, why not set a goal to add a pop of color to your wardrobe by learning how to wear neon in a non-neon way ?
It might seem a bit unusual, but it can be a fun and stylish way to step outside your comfort zone. After all, achieving goals is all about pushing yourself to try new things, and sometimes that means embracing a little bit of neon.
It involves a strategic approach that ensures your goals are realistic, attainable, and aligned with your values.
Breaking Down Large Goals
Breaking down large goals into smaller, manageable steps is a fundamental strategy for achieving success. This approach makes the goal seem less daunting and provides a sense of accomplishment as you progress. Breaking down a large goal into smaller steps involves:
- Identify the ultimate goal:Clearly define the overall objective you want to achieve.
- Divide the goal into milestones:Break down the large goal into smaller, more achievable milestones. Each milestone should be a stepping stone towards the ultimate goal.
- Set deadlines for each milestone:Assigning deadlines for each milestone adds structure and accountability to your progress.
- Create action plans for each milestone:Artikel the specific actions you need to take to achieve each milestone.
For example, if your goal is to write a book, you can break it down into milestones such as:
- Research and Artikel the story:This milestone involves gathering information, developing characters, and structuring the plot.
- Write the first draft:This milestone involves focusing on completing the initial version of the book.
- Revise and edit the manuscript:This milestone involves polishing the writing, correcting errors, and improving the overall quality of the manuscript.
- Find a publisher or self-publish:This milestone involves exploring publishing options and securing a publishing deal.
Identifying Potential Obstacles
Anticipating potential obstacles and developing contingency plans is crucial for staying on track with your goals. This proactive approach helps you navigate challenges and avoid setbacks.Identifying potential obstacles involves:
- Internal obstacles:These are challenges that arise from within yourself, such as procrastination, lack of motivation, or self-doubt.
- External obstacles:These are challenges that arise from external factors, such as financial constraints, time limitations, or unexpected events.
Once you identify potential obstacles, you can develop contingency plans. Contingency plans are alternative strategies you can implement if you encounter an obstacle. For example, if you’re working towards a fitness goal but anticipate potential time constraints, you can develop a contingency plan to exercise during your lunch break or find a workout buddy who can motivate you.
“By failing to prepare, you are preparing to fail.”
Benjamin Franklin
Motivational Techniques
Staying motivated is crucial for achieving your goals. When you’re motivated, you’re more likely to take action, persist through challenges, and ultimately reach your desired outcome. Here are some motivational techniques that can help you stay on track.
Positive Affirmations and Visualization
Positive affirmations are statements that express a desired outcome as if it has already happened. They can help you to reprogram your subconscious mind and believe in your ability to achieve your goals. Visualization is the practice of creating a mental image of yourself successfully achieving your goal.
By visualizing your success, you can increase your motivation and confidence.
“The mind is everything. What you think you become.”
Buddha
Here are some examples of positive affirmations for goal setting:
- I am capable of achieving my goals.
- I am committed to taking action every day to move closer to my goals.
- I am confident in my ability to overcome any challenges that come my way.
Motivational Strategies and Effectiveness
Different motivational strategies can be more or less effective depending on the individual and the specific goal. Here’s a table comparing some common strategies and their effectiveness:
| Motivational Strategy | Effectiveness | Example |
|---|---|---|
| Setting SMART goals | High | Instead of “I want to lose weight,” set a goal like “I will lose 10 pounds in the next 3 months by exercising 3 times a week and eating a healthy diet.” |
| Rewarding yourself | Moderate | Reward yourself with a small treat or activity after reaching a milestone, such as completing a week of workouts or finishing a chapter of a book. |
| Finding a mentor or support group | High | Connect with someone who has achieved similar goals or who can provide encouragement and accountability. |
| Using a goal-tracking app | Moderate | Apps like Habitica and Strides can help you track your progress and stay motivated. |
Goal Tracking and Evaluation
Having a clear plan and solid motivation is great, but to ensure success, you need to track your progress and make adjustments along the way. Goal tracking and evaluation are essential for staying on course, identifying roadblocks, and maximizing your chances of achievement.
Designing a System for Tracking Progress
Regularly tracking your progress towards your goals provides valuable insights and keeps you accountable. A well-designed tracking system can help you stay motivated, identify areas for improvement, and celebrate milestones.
- Choose the Right Tracking Method:The best method for tracking progress depends on your goals and personal preferences. Consider using a physical planner, a digital calendar, a spreadsheet, a dedicated goal-tracking app, or a combination of these methods.
- Break Down Goals into Smaller Steps:Large goals can feel overwhelming. Divide them into smaller, more manageable steps that are easier to track and celebrate. For example, instead of “Lose 20 pounds,” break it down into “Lose 2 pounds per week.”
- Establish Clear Metrics:Define measurable metrics for each step. This allows you to objectively track your progress and see how far you’ve come. For example, instead of “Exercise more,” track the number of days you exercise per week or the total minutes you spend exercising.
- Set Realistic Timelines:Avoid setting unrealistic deadlines. Give yourself enough time to reach each step, and adjust the timeline as needed.
- Use Visual Aids:Visual representations of your progress, like charts or graphs, can be motivating and help you see the bigger picture. You can use a simple spreadsheet or a specialized goal-tracking app to create these visualizations.
Methods for Evaluating Goal Achievement
Regularly evaluating your progress helps you stay on track and make necessary adjustments.
- Review Progress Regularly:Schedule regular check-ins to assess your progress. Weekly or monthly reviews can help you stay on track and make adjustments as needed.
- Analyze Your Performance:Examine your tracking data to identify patterns and trends. This can reveal areas where you’re excelling and areas where you need to improve.
- Identify Obstacles:Determine what obstacles are hindering your progress. Once you understand the challenges, you can develop strategies to overcome them.
- Celebrate Successes:Acknowledge and celebrate your achievements, no matter how small. This reinforces positive behaviors and keeps you motivated.
- Adjust Goals and Strategies:Don’t be afraid to adjust your goals or strategies if needed. Life is dynamic, and your goals should evolve with your experiences and priorities.
Effective Goal Tracking Tools and Resources
There are numerous tools and resources available to help you track your progress and stay motivated.
- Goal-Tracking Apps:Apps like Habitica, Strides, and Coach.me provide gamified goal tracking, personalized coaching, and community support.
- Spreadsheets:Create your own customized tracking system using a spreadsheet program like Google Sheets or Microsoft Excel.
- Project Management Tools:Tools like Trello, Asana, and Monday.com can be used to manage tasks and track progress toward larger goals.
- Physical Planners:Traditional paper planners offer a tangible way to track progress and visualize your goals.
- Online Communities:Join online communities or forums focused on your goals to connect with others, share experiences, and gain support.