Weekly Resolution Dry Erase Board Tutorial: A DIY Guide
Weekly resolution dry erase board tutorial is your key to unlocking a powerful tool for achieving your goals. Imagine a dedicated space where your weekly aspirations are laid out, ready to be tackled with renewed focus and determination. A dry erase board offers a visual, interactive, and ever-evolving platform for your goals.
It’s a constant reminder of what you’re striving for, and the flexibility of dry erase allows for adjustments and progress tracking. Whether you’re aiming for a healthier lifestyle, conquering a challenging project, or simply striving for better time management, a dedicated weekly resolution board can become your personal champion for success.
This tutorial will guide you through the process of creating your own weekly resolution dry erase board, from gathering materials to crafting a design that speaks to your unique needs. We’ll explore different layout options, provide tips for organizing your board, and even offer creative ideas for customization.
So, grab your supplies, unleash your creativity, and let’s embark on a journey to transform your goals into tangible progress.
Weekly Resolution Dry Erase Board

A weekly resolution dry erase board is a powerful tool for setting and achieving goals. It’s a visual reminder of your aspirations and helps you stay focused and motivated throughout the week. By writing down your goals on a dry erase board, you make them more tangible and actionable.
The act of physically writing them down reinforces your commitment and helps you visualize the path to achieving them.
Benefits of Using a Dry Erase Board for Goal Setting
Using a dry erase board for goal setting offers several advantages:
- Visual Reminder:A dry erase board serves as a constant visual reminder of your goals, keeping them at the forefront of your mind.
- Increased Motivation:Seeing your goals written down can boost your motivation and drive to achieve them.
- Track Progress:You can easily track your progress by marking off completed tasks or goals on the board. This sense of accomplishment further fuels your motivation.
- Flexibility:Dry erase boards allow for easy modifications and updates. You can adjust your goals as needed, ensuring they remain relevant and achievable.
- Cost-Effective:Dry erase boards are an inexpensive and readily available tool for goal setting.
Examples of Using a Weekly Resolution Dry Erase Board
Here are some examples of how a weekly resolution dry erase board can be used:
- Personal Goals:You can use the board to track your progress towards personal goals, such as exercising regularly, eating healthy, or learning a new skill.
- Work Goals:For work-related goals, the board can help you stay on top of deadlines, projects, and tasks.
- Household Tasks:You can use the board to list out household chores and keep track of their completion.
- Family Goals:As a family, you can use the board to set goals together, such as planning a family trip or completing a home improvement project.
Design and Layout: Weekly Resolution Dry Erase Board Tutorial
The design and layout of your dry erase board are crucial for its effectiveness. A well-designed board will be visually appealing, easy to navigate, and facilitate the process of setting and tracking your weekly resolutions.Think of the board as a visual representation of your goals.
My weekly resolution dry erase board is my little haven for staying on track. I even have a dedicated section for my “indulgences,” like trying out that crazy recipe for ooey gooey mud pie I found online. Maybe that’s why I’m so motivated to hit my fitness goals! It’s all about balance, right?
It should be organized in a way that makes it easy to see your progress and stay motivated.
Different Design Options
There are many different design options available for dry erase boards. You can choose a basic white board, or you can opt for a more colorful and creative design. You can also personalize your board with stickers, markers, and other decorations.
- Color-Coded System:Assign different colors to different categories of resolutions, such as personal, professional, or health. This helps you quickly identify and focus on specific areas.
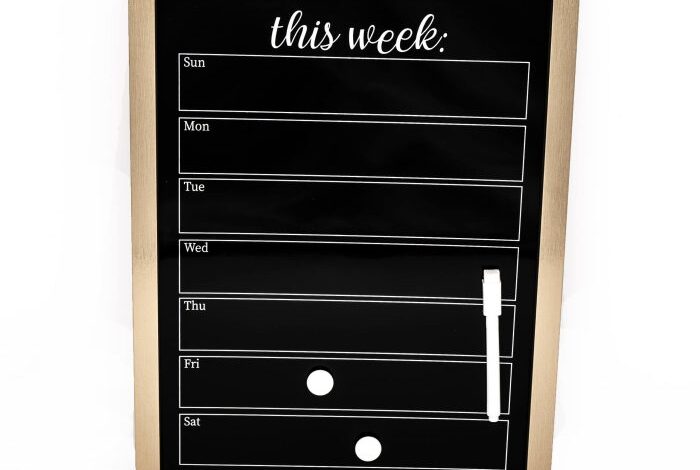
- Grid Layout:Divide the board into sections, each representing a day of the week. This provides a clear visual structure for your resolutions.
- Columnar Layout:Use columns to represent different categories of resolutions, such as “Goals,” “Tasks,” and “Progress.”
Creative Layout Examples
Here are some creative layout examples for your weekly resolution dry erase board:
- “Wheel of Resolutions”:Draw a large circle on the board and divide it into sections representing different areas of your life. Write your resolutions in each section, creating a visually engaging and holistic approach to goal setting.
- “Resolution Tree”:Create a tree-like structure with branches representing different aspects of your life. Write your resolutions on the leaves or branches, symbolizing growth and progress.
- “Calendar Grid”:Use a calendar grid to mark off each day of the week and assign specific resolutions to each day. This helps you stay focused on daily progress and ensures that you don’t miss any opportunities to work towards your goals.
Organizing the Board for Optimal Use
To maximize the effectiveness of your dry erase board, consider these organization tips:
- Use a Clear and Concise Writing Style:Write your resolutions in short, clear sentences or bullet points. Avoid using jargon or overly complex language.
- Prioritize Resolutions:Rank your resolutions in order of importance, focusing on the most critical goals first.
- Break Down Large Resolutions:If you have a large or complex resolution, break it down into smaller, more manageable steps. This will make it feel less overwhelming and easier to achieve.
- Leave Space for Notes and Reflections:Allocate space on the board for writing down your progress, challenges, and any insights you gain along the way.
Step-by-Step Tutorial
This section will guide you through the process of creating your own weekly resolution dry erase board. We’ll cover everything from gathering materials to assembling the board.
I love the idea of a weekly resolution dry erase board – it’s a great way to stay focused and motivated! I’m thinking of adding some cute decorations to mine, maybe even a ribbon snowman hair clip for a fun wintery touch.
It’ll be the perfect way to keep my resolutions front and center, even during the holiday season!
Preparing the Materials, Weekly resolution dry erase board tutorial
The first step is to gather all the necessary materials. This will ensure a smooth and efficient construction process.
- Dry erase board:Choose a size that fits your needs and space.
- Frame:Select a frame that complements the board and matches your aesthetic preferences.
- Dry erase markers:Ensure you have a variety of colors for writing and highlighting your resolutions.
- Dry erase board eraser:This is essential for easily removing written content from the board.
- Optional:You can add decorative elements like stickers, magnets, or clips to personalize your board further.
Assembling the Board
Now that you have all the materials, it’s time to assemble the board. This process is simple and can be done in a few steps.
So, you’re ready to conquer those goals in the new year, right? My weekly resolution dry erase board tutorial will help you stay on track! It’s a great way to keep your aspirations front and center, especially when the excitement of happy new year to you and yours starts to fade.
With a little planning and this simple DIY, you’ll be well on your way to achieving those resolutions!
- Attach the frame:If you’ve chosen a frame, carefully attach it to the dry erase board. Ensure a secure fit and alignment.
- Optional:Add any decorative elements you’ve chosen. You can use adhesive tape, magnets, or clips to secure these elements.
- Placement:Choose a prominent location in your home or office where you’ll see the board regularly. This will help you stay focused on your resolutions.
Designing the Layout
The layout of your weekly resolution board is crucial for its effectiveness. Consider these factors:
- Dividing the board:You can divide the board into sections for different areas of your life, such as personal, professional, or health.
- Creating a calendar:You can create a weekly or monthly calendar on the board to track your progress and deadlines.
- Adding motivational quotes:Including inspirational quotes or affirmations can provide a positive boost and keep you motivated.
Using the Board Effectively
To maximize the effectiveness of your weekly resolution board, follow these tips:
- Write down your goals:Clearly and concisely write down your weekly resolutions. This will make them tangible and easier to achieve.
- Review regularly:Make it a habit to review your board daily or weekly. This will help you stay on track and make necessary adjustments.
- Celebrate your successes:When you achieve a resolution, mark it off or celebrate your accomplishment. This will reinforce positive behavior and keep you motivated.
Troubleshooting Common Issues
While using a dry erase board is generally straightforward, you might encounter some issues. Here are some common problems and solutions:
- Ghosting:If you notice faint Artikels of previous writings, try cleaning the board with a specialized dry erase board cleaner. This will remove any residue that might be causing the ghosting.
- Marker streaks:If your markers leave streaks, try using a different brand or type of marker. You can also try cleaning the board with a damp cloth before writing.
- Difficult to erase:If you’re having trouble erasing your writing, try using a dedicated dry erase board eraser. You can also try using a damp cloth to remove stubborn marks.
Examples and Applications

The weekly resolution dry erase board is a versatile tool that can be adapted to suit various goals and preferences. Its adaptability allows you to track progress, stay motivated, and achieve your desired outcomes.
Examples of Weekly Resolutions
The weekly resolution dry erase board is a highly customizable tool, enabling you to track various aspects of your life. Here are some examples of weekly resolutions:
- Health and Fitness:Track daily exercise routines, water intake, calorie goals, or steps taken.
- Productivity and Work:List tasks for the week, prioritize projects, or monitor time spent on specific activities.
- Personal Development:Set reading goals, language learning targets, or track progress on skills you’re developing.
- Finances:Monitor spending, track savings goals, or plan for upcoming expenses.
- Relationships:Schedule quality time with loved ones, plan activities, or express gratitude.
Weekly Resolution Templates
Templates can provide structure and inspiration for your weekly resolutions. Here are some examples:
- Habit Tracker Template:This template allows you to track the consistency of your daily habits. You can create a grid with days of the week and list habits you want to develop. Mark off each day you successfully complete the habit.
- Goal Setting Template:This template helps you break down larger goals into smaller, achievable weekly steps. You can list your goals, identify weekly actions, and track progress.
- Gratitude Template:This template encourages reflection and appreciation. You can write down things you’re grateful for each day.
- Mindfulness Template:This template promotes self-awareness and focus. You can use it to track your mood, identify triggers, or practice mindfulness techniques.
Incorporating the Dry Erase Board into Daily Routines
Integrating the dry erase board into your daily routine can enhance its effectiveness. Consider these strategies:
- Morning Review:Start your day by reviewing your weekly resolutions and identifying your top priorities.
- Evening Reflection:Before bed, reflect on your progress and note any challenges you encountered.
- Visual Reminders:Place the dry erase board in a prominent location where you’ll see it frequently.
- Accountability Partner:Share your resolutions with a friend or family member to stay motivated and accountable.
Additional Tips and Tricks
Now that you’ve mastered the basics of creating your weekly resolution dry erase board, let’s explore some exciting ways to customize and enhance your experience. This section will delve into creative ideas for personalizing your board, maintaining its effectiveness, and even exploring alternative uses.
Customizing Your Dry Erase Board
Your weekly resolution board is a blank canvas for your aspirations. Let’s explore some fun and practical ways to personalize it:
- Choose a Theme:Align your board’s design with your interests or goals. For example, a fitness enthusiast might opt for a vibrant color scheme and motivational quotes, while a creative writer might prefer a more artistic and inspiring design.
- Add Decorative Elements:Incorporate decorative elements to reflect your personality. Stickers, washi tape, or even small pictures can enhance the visual appeal of your board.
- Utilize Different Colors:Assign different colors to specific categories or types of resolutions. For example, green could represent health goals, blue for work-related resolutions, and yellow for personal growth.
- Incorporate Visuals:Visual cues can be powerful motivators. Include small images, drawings, or even photographs that represent your goals. For example, a picture of a mountain could symbolize your desire to hike more.
Maintaining Your Dry Erase Board
Maintaining your board is essential for its longevity and effectiveness. These tips will help you keep your board looking its best:
- Clean Regularly:Wipe down the board with a dry cloth after each use to remove any dust or smudges. For stubborn marks, use a dry erase board cleaner.
- Store Properly:When not in use, store your board in a dry, dust-free environment. This will help prevent damage and keep it looking new.
- Replace Markers When Needed:Dry erase markers can fade or become dry over time. Replace them as needed to ensure clear visibility.
- Use High-Quality Markers:Investing in high-quality dry erase markers can make a difference in the clarity and longevity of your writing. Look for markers that are designed for dry erase boards and have vibrant colors.
Alternative Uses for Your Dry Erase Board
The versatility of a dry erase board extends beyond weekly resolutions. Here are some creative ways to repurpose your board:
- Brainstorming Sessions:Use the board as a collaborative brainstorming tool for work projects, creative endeavors, or even family planning.
- Meal Planning:Create a weekly meal plan on your board to streamline your grocery shopping and meal preparation.
- To-Do Lists:Transform your board into a visual to-do list. Write down tasks, prioritize them, and check them off as you complete them.
- Family Calendar:Share important dates, appointments, and events with your family by creating a visual calendar on your board.
- Educational Tool:Use the board for educational purposes, such as writing out math problems, practicing spelling words, or creating interactive learning games.