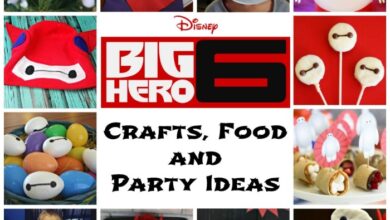
Be a DIY Diva: 5 Easy Projects Youll Love
Be a diy diva 5 easy projects youll love – Be a DIY Diva: 5 Easy Projects You’ll Love sets the stage for this enthralling narrative, offering readers a glimpse into a story that is rich in detail and brimming with originality from the outset. This blog post is all about empowering you to unleash your inner DIY diva with five simple, fun, and achievable projects that are perfect for anyone who wants to add a touch of personal style to their home, wardrobe, or life.
Whether you’re a seasoned crafter or a complete beginner, these projects are designed to be accessible and enjoyable, with clear instructions and helpful tips along the way. Get ready to embrace your creativity and transform your space, one project at a time!
The DIY Diva

There’s something incredibly empowering about creating something beautiful and functional with your own hands. DIY projects offer women a chance to express their creativity, learn new skills, and personalize their spaces – all while saving money. The satisfaction of completing a project, from crafting a unique piece of décor to building a custom piece of furniture, is truly rewarding.The term “DIY Diva” resonates with women who embrace their inner creativity and aren’t afraid to tackle projects big or small.
Want to unleash your inner DIY diva? Then you’ve got to check out these 5 easy projects you’ll love! From upcycling old clothes to creating stunning wall art, there’s something for everyone. And if you’re looking for a fun and festive project, try making some DIY yarn pom pom snowballs, perfect for adding a touch of winter magic to your home.
You can even add a little jingle to them by adding bells, as seen in this DIY yarn pom pom snowballs music tutorial! So get crafting and let your creativity shine!
It represents a confident and independent spirit, a desire to personalize and enhance their lives through hands-on projects.
Being a DIY diva is all about taking on projects that make your home feel more like you. Sometimes, though, you need a little inspiration to get started. That’s where this is a fun way to look at a house for sale can come in handy.
Seeing how others have transformed their spaces can spark your own creative ideas and give you the confidence to tackle your next DIY project.
Five Easy DIY Projects You’ll Love
This blog post will explore five easy DIY projects that are perfect for beginners. Each project is designed to be achievable, requiring minimal tools and materials. Whether you’re looking to add a touch of charm to your home, create personalized gifts, or simply enjoy a fun and rewarding activity, these projects are sure to inspire you.
Want to be a DIY diva without breaking the bank? Check out my five easy projects that you’ll love, from personalized gifts to festive decorations. And to add a touch of extra flair, don’t forget to browse through free printables for all occasions , which are perfect for adding a personalized touch to your projects.
You’ll be amazed at how easy it is to create stunning results with just a few simple supplies and a bit of creativity.
Upcycled Jewelry Organizer: Be A Diy Diva 5 Easy Projects Youll Love

This project is perfect for anyone who loves to create jewelry but doesn’t have a dedicated space to store it. It’s easy to make, inexpensive, and looks great. Plus, it’s a great way to give an old tray or box a new life! This DIY jewelry organizer is a great way to keep your jewelry organized and looking its best.
It’s also a fun and easy project that you can complete in an afternoon.
Materials Needed, Be a diy diva 5 easy projects youll love
You will need the following materials to complete this project:
- An old tray or box
- Fabric scraps (felt, velvet, or any fabric that won’t fray)
- Scissors
- Hot glue gun and glue sticks
- Optional: decorative elements (buttons, beads, ribbon)
The cost of these materials will vary depending on where you purchase them. However, you can expect to spend around $10-$20 for everything.
Step-by-Step Guide
Here is a step-by-step guide to creating your own upcycled jewelry organizer:
- Clean and prepare your tray or box.If it’s dirty, give it a good scrub with soap and water. Let it dry completely.
- Cut your fabric scraps to size.You will need enough fabric to cover the bottom and sides of your tray or box.
- Glue the fabric to the tray or box.Start by gluing the fabric to the bottom of the tray or box. Then, glue the sides of the fabric to the edges of the tray or box. Be sure to smooth out any wrinkles as you go.
- Add decorative elements (optional).If you want to add some extra flair to your jewelry organizer, you can glue on buttons, beads, or ribbon. Be creative and have fun!
Tips and Tricks
Here are a few tips and tricks to make your project a success:
- Choose fabric that is easy to work with. Felt and velvet are good choices because they don’t fray.
- Use a hot glue gun to attach the fabric to the tray or box. It will dry quickly and create a strong bond.
- Be careful when using the hot glue gun. It can get very hot, so be sure to use caution.
Project Summary
| Step | Materials | Estimated Time |
|---|---|---|
| Clean and prepare the tray or box | Tray or box, soap and water | 10 minutes |
| Cut fabric scraps to size | Fabric scraps, scissors | 15 minutes |
| Glue fabric to the tray or box | Fabric scraps, hot glue gun and glue sticks | 20 minutes |
| Add decorative elements (optional) | Buttons, beads, ribbon, hot glue gun and glue sticks | 15 minutes |
Upcycled Mason Jar Planters

Upcycled mason jar planters are a fun and easy DIY project that can add a touch of charm to your home or garden. You can use old mason jars that you have lying around, or buy them at a thrift store or online.
The best part is that they’re very versatile, so you can use them for a variety of plants.
Materials Needed, Be a diy diva 5 easy projects youll love
You’ll need a few basic materials to create your upcycled mason jar planters:
- Mason jars
- Potting soil
- Plants
- Optional: Paint, twine, ribbon, or other decorative items
Estimated Cost
The cost of this project will vary depending on the materials you choose. You can find mason jars for as little as $1 at thrift stores or online. Potting soil can cost anywhere from $5 to $10 per bag. And, of course, the price of plants will vary depending on the type and size.
Step-by-Step Guide
Here’s a step-by-step guide to creating your own upcycled mason jar planters:
- Clean your mason jars thoroughly. Wash them with soap and water, and then rinse them well. You can also sterilize them by boiling them in water for 10 minutes.
- Add drainage holes to the bottom of the mason jars. You can use a hammer and nail, or a drill with a small drill bit. Make sure the holes are big enough to allow excess water to drain out.
- Fill the mason jars with potting soil. Leave about an inch of space at the top of the jar to allow for watering.
- Plant your plants in the mason jars. Be sure to choose plants that are appropriate for the size of the jar. You can use a variety of plants, including herbs, succulents, and flowers.
- Water your plants thoroughly. Make sure to water them regularly, especially during hot weather.
- Decorate your mason jar planters (optional). You can paint them, wrap them with twine or ribbon, or add other decorative items to personalize them.
Tips and Tricks
Here are a few tips and tricks for success:
- Choose the right plants. Make sure to select plants that are appropriate for the size of the mason jar and the amount of sunlight they will receive. For example, succulents are a good choice for mason jars because they don’t need a lot of water.
- Use a good quality potting soil. A good quality potting soil will help your plants thrive. It should be well-draining and contain the right nutrients for your plants.
- Water your plants regularly. Make sure to water your plants thoroughly, especially during hot weather. You can test the soil moisture by sticking your finger in the soil. If the soil feels dry, it’s time to water.
- Fertilize your plants regularly. Fertilizing your plants will help them grow strong and healthy. You can use a liquid fertilizer or a slow-release fertilizer. Follow the instructions on the fertilizer label.