Easy DIY Fridge Makeover 2: Level Up Your Kitchen
Easy DIY Fridge Makeover 2: Level Up Your Kitchen is more than just a makeover; it’s a chance to inject personality and style into your kitchen’s heart. Think beyond simple paint jobs and explore the endless possibilities of upcycling, repurposing, and adding creative touches that transform your fridge into a statement piece.
This guide delves into the process, from planning your theme and gathering essential materials to mastering painting techniques and adding decorative elements. We’ll explore budget-friendly solutions, sustainable practices, and how to create a cohesive and stylish look that reflects your unique taste.
Whether you’re a seasoned DIYer or a beginner, this guide provides practical tips and inspiration to bring your fridge makeover vision to life.
Easy DIY Fridge Makeover
Giving your old fridge a new lease on life is a satisfying and cost-effective project. Instead of replacing your perfectly functional fridge with a new one, a DIY makeover can breathe new life into it, saving you money and allowing you to express your personal style.
The key to a successful fridge makeover is choosing the right materials and tools.
Choosing the Right Materials and Tools
The materials and tools you’ll need for your fridge makeover depend on the type of makeover you have in mind. Whether you’re planning a simple paint job or a more elaborate design, it’s important to have the right tools and materials on hand.
- Paint: Choose a paint that’s specifically designed for appliances. This type of paint will be durable and resist chipping and scratches. Consider the color and finish you want to achieve.
- Primer: Primer is essential for preparing the surface of your fridge for painting. It helps the paint adhere properly and creates a smooth finish.
- Sandpaper: Use sandpaper to smooth out any rough spots on the surface of your fridge before painting.
- Paintbrushes and rollers: Choose the appropriate brushes and rollers for the size and shape of your fridge.
- Masking tape: Masking tape is essential for protecting areas you don’t want to paint, such as the handles and doors.
- Protective gear: Wear a mask, gloves, and eye protection when working with paint and primer.
Planning Your Fridge Makeover
Before diving into the fun part of decorating, it’s essential to assess the current state of your fridge and plan your makeover. This step will help you avoid costly mistakes and ensure your project is successful.
Assessing Your Fridge’s Condition
Understanding your fridge’s current condition is crucial. This assessment will guide your makeover decisions, ensuring you choose the right approach.
- Surface Condition:Examine the surface for scratches, dents, or discoloration. A thorough cleaning will reveal the true condition of the surface. If the damage is extensive, you may need to consider repainting or applying a protective film before decorating.
- Functionality:Check if all doors, shelves, and drawers function properly. If any parts are damaged or missing, repair or replace them before you begin decorating. This ensures your fridge remains functional and safe to use.
- Magnetism:Test the fridge’s magnetism. This is important for deciding on your decorative elements. If the magnetism is weak, you may need to use stronger magnets or consider alternative methods for attaching decorations.
Choosing a Theme or Style
Once you’ve assessed your fridge, it’s time to decide on a theme or style for your makeover. This step sets the tone for your project and guides your creative choices.
- Personal Style:Consider your personal preferences and the overall style of your kitchen. Do you prefer a minimalist, modern look, or a playful, colorful design? Choosing a theme that complements your kitchen’s style will create a cohesive and visually appealing space.
So, I’m totally loving this easy DIY fridge makeover project, it’s like a mini-renovation for my kitchen! And speaking of fresh starts, remember to take care of your skin too. Check out these teen skin care tips for a healthy glow.
Back to the fridge, I’m thinking about adding some magnetic chalkboard paint for a personalized touch. What do you think?
- Inspiration Sources:Explore different sources of inspiration, such as magazines, websites, and social media. Look for themes that appeal to you and note down ideas for colors, patterns, and decorative elements. Consider incorporating your hobbies, favorite colors, or memorable travel experiences into your fridge design.
- Functional Considerations:Think about how you use your fridge and incorporate those needs into your theme. For example, if you often forget about leftovers, consider a theme that highlights a designated space for storing them. If you frequently use certain ingredients, consider a theme that helps you organize and access them easily.
Creating a Mood Board or Inspiration Board
A mood board or inspiration board is a visual representation of your chosen theme. It helps you visualize the final look of your fridge and organize your ideas.
- Gather Inspiration:Collect images, fabric swatches, paint samples, and other materials that reflect your chosen theme. You can use magazines, online resources, or even take your own photos.
- Arrange and Organize:Arrange your collected items on a large piece of paper, corkboard, or digital platform. Group similar elements together and experiment with different layouts until you create a visually appealing composition that represents your theme.
- Refine and Adjust:As you continue to gather inspiration, refine your mood board. Remove elements that no longer fit your vision and add new ones that inspire you. The mood board should evolve as your ideas become clearer.
Essential Materials and Tools

Before you embark on your fridge makeover adventure, it’s crucial to gather the necessary materials and tools. Having everything readily available will ensure a smooth and efficient process. Let’s dive into the essential items you’ll need.
Materials
Here’s a comprehensive list of materials needed for various fridge makeover techniques.
So, you’ve tackled the first round of fridge makeover magic, and now you’re ready for round two! Remember, a clean fridge is a happy fridge, and a happy fridge means more space for all those delicious holiday leftovers. Speaking of holiday leftovers, check out these top 12 Christmas storage tips to keep your fridge organized and your food fresh.
With a little planning and a touch of DIY, you can have a fridge that’s ready for anything, including all those festive treats!
- Adhesive Vinyl:This is a versatile option for adding color, patterns, or even images to your fridge. It’s available in a wide range of colors, textures, and finishes.
- Magnetic Paint:This paint allows you to transform your fridge into a magnetic surface, enabling you to stick notes, photos, and other magnetic items directly onto it.
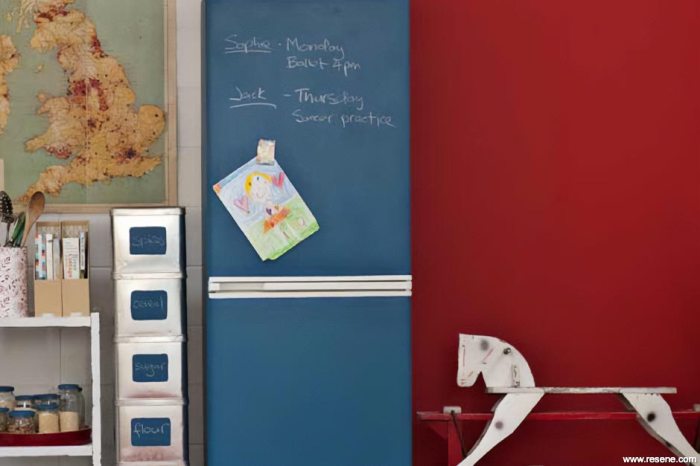
- Chalkboard Paint:This paint turns your fridge into a functional chalkboard, allowing you to jot down grocery lists, messages, or even create artistic designs.
- Contact Paper:This budget-friendly option is perfect for adding a pop of color or pattern to your fridge. It’s easy to apply and remove, making it ideal for temporary changes.
- Fabric:If you’re aiming for a more textured or personalized look, fabric can be used to cover your fridge.
- Decoupage Medium:This adhesive helps to secure paper or fabric onto your fridge, creating a unique and personalized design.
- Epoxy Resin:This durable material can be used to create a sleek and glossy finish on your fridge, giving it a modern look.
- Acrylic Paint:This versatile paint can be used to create custom designs, patterns, or even a solid color on your fridge.
- Paint Brushes:Choose brushes of different sizes and shapes depending on the design you’re creating.
- Painter’s Tape:This tape helps to create clean lines and protect areas you don’t want to paint.
- Primer:This helps to ensure the paint adheres properly to the surface of your fridge.
- Sandpaper:Use sandpaper to smooth out any rough spots before painting.
- Cleaning Supplies:It’s essential to clean your fridge thoroughly before starting your makeover.
Tools
Here’s a list of tools that will be helpful for your fridge makeover project:
- Measuring Tape:Essential for accurately measuring the size of your fridge and any materials you’re using.
- Level:Ensures that any designs or applications are straight and even.
- Scissors:For cutting adhesive vinyl, contact paper, or fabric to size.
- Utility Knife:For precise cutting and trimming.
- Squeegee:Helps to smooth out adhesive vinyl and remove air bubbles.
- Roller:For applying paint or epoxy resin evenly.
- Paint Tray:For holding paint and making it easier to apply.
- Gloves:Protect your hands from paint, adhesive, or other materials.
- Drop Cloth:Protects your floor or work area from paint spills or drips.
- Safety Glasses:Protect your eyes from paint splatters or dust.
Budget-Friendly Alternatives
If you’re looking for ways to save money on your fridge makeover, consider these budget-friendly alternatives:
- Contact Paper:A cheaper alternative to adhesive vinyl.
- Acrylic Paint:Can be used to create a wide range of designs and patterns.
- Fabric Scraps:Utilize leftover fabric scraps to create a unique and personalized look.
- Magnetic Sheets:A less expensive option than magnetic paint, allowing you to add magnetic functionality to your fridge.
- Chalkboard Contact Paper:A budget-friendly way to create a chalkboard surface on your fridge.
Cleaning and Preparation: Easy Diy Fridge Makeover 2
Before you start painting or applying any decorative treatments, it’s essential to thoroughly clean your fridge. A clean surface will ensure that your makeover adheres properly and lasts longer.
Okay, so you’ve got your fridge looking fabulous after that easy DIY makeover – now it’s time to focus on making the holidays even more magical! This year, why not try a new tradition that’s sure to delight the kids: get texts from Santa ! It’s a simple yet unforgettable way to add a touch of Christmas magic to your home.
And once you’ve got the Christmas spirit flowing, you can even decorate your fridge with some festive touches, like a Santa-themed magnet collection or a snowy scene drawn with chalk.
Cleaning the Fridge Exterior
A clean surface is essential for a successful fridge makeover. Start by removing any loose debris or dust with a damp cloth. For stubborn stains or grime, you can use a mild detergent and a soft-bristled brush.
Avoid using abrasive cleaners or harsh chemicals as they can damage the surface of your fridge.
Cleaning the Fridge Interior
The interior of your fridge needs a thorough cleaning as well. Start by removing all food items and shelves. Next, use a mild detergent and warm water to wipe down all surfaces. Pay special attention to the door seals and the drain holes.
For a more thorough cleaning, you can use a baking soda paste. To make this, mix baking soda with water until it forms a thick paste. Apply the paste to the interior surfaces and let it sit for a few minutes before wiping it off with a damp cloth.
Removing Stickers and Labels
Old stickers, labels, and residue can be a pain to remove. Here are a few tips for removing them effectively:
- Use a hairdryer:The heat from a hairdryer can soften the adhesive, making it easier to peel off.
- Apply a sticker remover:There are commercially available sticker removers that can be applied to the adhesive and left to sit for a few minutes before wiping off.
- Use a razor blade:If the sticker is stubborn, you can carefully use a razor blade to scrape it off. Be careful not to scratch the surface of your fridge.
- Use a paste of baking soda and water:Apply the paste to the sticker and let it sit for a few minutes before wiping it off.
Preparing the Surface
Once you have thoroughly cleaned your fridge, you need to prepare the surface for painting or other treatments. This may involve sanding, priming, or cleaning the surface with a degreaser.
- Sanding:If your fridge has a textured surface, sanding it down will create a smooth surface for paint to adhere to.
- Priming:Priming the surface will help the paint to adhere better and prevent it from chipping or peeling.
- Degreasing:Degreasing the surface will remove any oils or grease that could interfere with the paint adhesion.
Painting Techniques

Now that your fridge is clean and prepped, it’s time to get creative with paint! There are several painting techniques you can use to give your fridge a new look, each with its own advantages and disadvantages. Let’s explore the popular options and tips for achieving a professional-looking finish.
Spray Painting
Spray painting is a quick and efficient method for covering large surfaces like your fridge. It allows for a smooth and even finish, especially when using a high-quality spray paint. Here are some key points to consider when spray painting your fridge:
- Choosing the Right Spray Paint:Opt for a spray paint specifically designed for appliances or metal surfaces. These paints are formulated to adhere well and resist chipping or fading over time. Look for paints that are oil-based or enamel-based, as they offer greater durability.
- Preparation:Ensure adequate ventilation and wear a mask and gloves to protect yourself from paint fumes. Cover surrounding areas with drop cloths or plastic sheeting to prevent overspray.
- Technique:Hold the spray can about 12 inches away from the fridge and use smooth, even strokes. Avoid applying too much paint at once, as this can lead to drips or runs. Apply thin coats in multiple layers for a smooth finish.
Brush Painting
While brush painting might take longer than spray painting, it offers more control and allows you to achieve unique effects like distressed or textured finishes.Here’s how to brush paint your fridge effectively:
- Choosing the Right Paint:For brush painting, you can use acrylic or latex paint, which are readily available and easy to work with. Choose a paint specifically designed for appliances or metal surfaces for best results.
- Preparation:Protect your work area with drop cloths and wear gloves. Use painter’s tape to mask off areas you don’t want to paint.
- Technique:Use a high-quality brush designed for painting metal surfaces. Load the brush with a moderate amount of paint and apply thin, even strokes. For a smooth finish, use long, flowing strokes in one direction.
Using Stencils
Stencils allow you to create intricate designs and patterns on your fridge. They are a fun and easy way to personalize your appliance.Here are some things to keep in mind when using stencils:
- Choosing a Stencil:Stencils are available in a wide variety of designs, from simple geometric patterns to intricate floral motifs. Choose a stencil that complements your overall design aesthetic.
- Preparation:Clean the stencil thoroughly before use. Secure the stencil to the fridge using painter’s tape. Apply a thin layer of paint to the stencil using a sponge brush or roller.
- Technique:Apply paint to the stencil using gentle, even strokes. Be careful not to apply too much pressure, as this can cause the paint to bleed under the stencil. Remove the stencil carefully once the paint has dried.
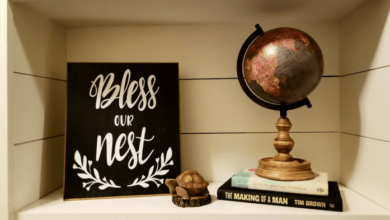
Decorative Elements
Decorative elements are the finishing touches that can transform your fridge from ordinary to extraordinary. They allow you to personalize your appliance and express your unique style. The key is to choose elements that complement the overall theme and create a cohesive look.
Choosing Decorative Elements
When selecting decorative elements, it’s important to consider the theme of your fridge makeover. For example, if you’re going for a modern and minimalist look, you might choose sleek, geometric vinyl decals and minimalist handles. On the other hand, if you’re aiming for a vintage or rustic vibe, you might opt for distressed wood handles and antique-looking magnetic boards.
Decorative Element Options
| Decorative Element | Description | Example |
|---|---|---|
| Magnetic Boards | For notes, photos, and reminders. | Corkboard, chalkboard, whiteboard |
| Vinyl Decals | For adding patterns, designs, or quotes. | Geometric shapes, floral patterns, motivational quotes |
| Handles | For a personalized touch and improved functionality. | Leather, metal, wood, acrylic |
| Lighting | For a stylish touch and improved visibility. | LED strip lights, fairy lights, pendant lights |
Creating a Cohesive Look
To achieve a cohesive and stylish look, consider the following tips:
- Choose a color palette:Select a few colors that complement the overall theme and use them consistently throughout the decorative elements. This will create a sense of unity and prevent the look from feeling cluttered.
- Use a variety of textures:Incorporate different textures to add visual interest and depth. For example, you could use a smooth, painted surface with textured vinyl decals or a wooden handle with a metal accent.
- Balance the elements:Avoid overcrowding the fridge with too many decorative elements. Choose a few key pieces that will make a statement and leave some space for breathing room.
- Consider the placement:Think about the placement of each element and how it will interact with the others. You might want to cluster similar elements together or create a focal point with a larger decorative piece.
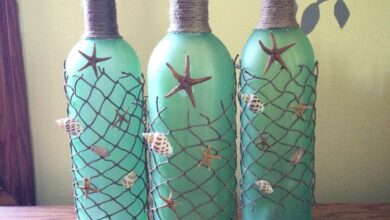
Upcycling and Repurposing
Upcycling and repurposing are fantastic ways to give your fridge makeover a unique touch while minimizing waste. By creatively using old materials, you can create a stunning and sustainable look for your fridge.
Repurposing Materials for a Unique Fridge Makeover, Easy diy fridge makeover 2
- Fabric:Fabric scraps can be used to create a vibrant and personalized look. You can use fabric glue or decoupage medium to adhere fabric to the fridge surface. This technique works especially well for adding patterns, textures, or even creating a collage effect.
- Wallpaper:Wallpaper offers a wide range of patterns and textures. You can use wallpaper samples, leftover rolls, or even vintage wallpaper for a unique look. Applying wallpaper to your fridge is a relatively simple process, and you can easily change it up whenever you want a new style.
- Cork:Cork is a versatile material that can add a rustic and natural feel to your fridge. You can use cork tiles or sheets, or even repurpose old cork boards to create a unique and functional surface. Cork is also a great material for adding magnets to your fridge, allowing you to easily display notes, photos, and other items.
- Old Magazines:Turn old magazines into a unique and eco-friendly art piece for your fridge. You can use decoupage techniques to attach magazine clippings, creating a collage with your favorite images or quotes.
Sustainable Practices in Fridge Makeover
Upcycling and repurposing materials are key to creating a sustainable fridge makeover. By using materials that would otherwise be discarded, you reduce waste and contribute to a more environmentally friendly approach. Here are some ways to incorporate sustainable practices:
- Choose Eco-Friendly Paints:Opt for paints that are low VOC (Volatile Organic Compounds) and water-based. These paints are healthier for you and the environment.
- Repurpose Old Frames:Instead of buying new frames for your fridge art, consider repurposing old frames. You can give them a fresh coat of paint or even use decoupage techniques to give them a new look.
- Use Natural Materials:Incorporate natural materials like wood, cork, or fabric into your fridge makeover. These materials are renewable and sustainable, adding a natural touch to your kitchen.
- Donate or Recycle:If you have any leftover materials, consider donating them to local charities or recycling them properly. This ensures that your fridge makeover is truly sustainable from start to finish.
Finishing Touches
Your fridge makeover is almost complete! Now it’s time to add those finishing touches that will truly make it shine and reflect your personal style. These final details can elevate your project from good to great, turning your fridge into a statement piece in your kitchen.
Adding a Personal Touch
A personalized touch can transform your fridge into something truly unique. This is your chance to inject your personality and style into the project.
- Magnetic Decorations:Magnets are a fun and easy way to add personality. You can use photos, artwork, or even your favorite quotes to create a personalized gallery on your fridge. This is a great way to showcase your family, hobbies, or memories.
- Chalkboard Paint:If you want a more interactive touch, consider painting a section of your fridge with chalkboard paint. This allows you to leave notes, reminders, or even fun drawings. You can even use chalkboard paint on the handles for a unique touch.
- Washi Tape:Washi tape is a versatile and decorative option for adding pops of color and patterns. Use it to create stripes, geometric designs, or even frame a section of your fridge. You can easily change the look by removing and replacing the tape.
Creating a Focal Point
A focal point draws the eye and adds visual interest. Consider these ideas to create a focal point on your fridge:
- Decorative Hardware:Replace the standard handles with something more stylish. Choose handles in a contrasting color, a unique design, or a material like brass or copper.
- Mirror Tiles:Adding mirror tiles to a section of your fridge can create a beautiful and reflective focal point. It can also make your kitchen appear larger.
- Patterned Contact Paper:Apply patterned contact paper to a section of your fridge to create a bold visual statement. Choose a pattern that complements your kitchen decor.
Protecting Your Makeover
Protecting your finished makeover with a sealant or varnish is crucial to ensure its longevity and prevent damage.
- Clear Coat:A clear coat sealant will protect the paint and decorative elements from scratches, spills, and general wear and tear. Choose a sealant specifically designed for appliances or surfaces that are exposed to moisture.
- Varnish:For a more durable finish, consider applying a varnish. Varnish provides a harder, more scratch-resistant coating, ideal for high-traffic areas.
Maintaining Your Transformed Fridge
Now that you’ve invested time and effort in transforming your fridge, it’s important to maintain it properly to keep it looking its best.
- Regular Cleaning:Wipe down your fridge regularly with a damp cloth and mild detergent. Avoid abrasive cleaners that can damage the paint or sealant.
- Protect from Moisture:Avoid placing items directly on the fridge surface that could cause moisture buildup. Use coasters or trivets to protect the finish.
- Handle with Care:Handle your fridge with care to avoid scratches or dents. Be mindful when opening and closing the door, and avoid using sharp objects on the surface.