
10 Ways To Frost Cupcakes
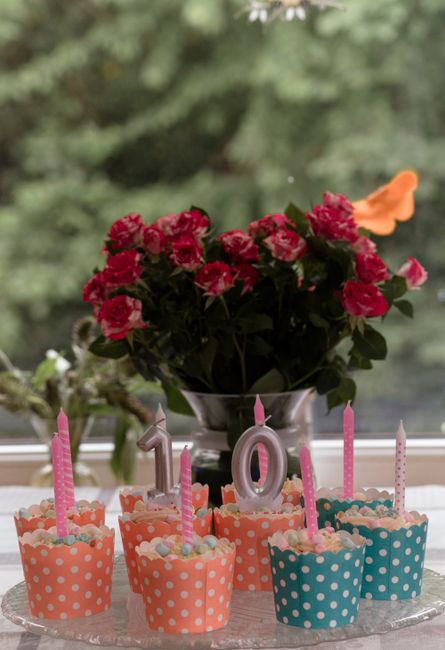
10 Expert Ways to Frost Cupcakes for Stunning Results
Achieving visually appealing and delicious cupcakes begins with mastering the art of frosting. Beyond simply spreading a sweet topping, the method of application significantly impacts both aesthetics and taste. This comprehensive guide explores ten distinct and effective techniques for frosting cupcakes, designed to elevate your baking game and impress any audience. Each method offers unique advantages, catering to different skill levels and desired visual outcomes. From classic swirls to intricate designs, understanding these techniques empowers bakers to transform plain cupcakes into edible masterpieces. Whether you’re a beginner looking for simple yet effective strategies or an experienced decorator seeking new inspiration, these methods provide a solid foundation and a springboard for creative expression. Mastering these techniques ensures your cupcakes are not only flavorful but also a feast for the eyes, making them perfect for any occasion, from casual gatherings to elaborate celebrations.
The Classic Swirl using a Piping Bag and Star Tip remains a perennial favorite for its simplicity and charming appearance. This method requires a piping bag fitted with a large star tip (such as a Wilton 1M or 2D). Begin by filling the piping bag with your prepared frosting, ensuring it’s at a workable consistency – not too stiff, not too runny. Hold the piping bag perpendicular to the cupcake surface, with the tip positioned just above the center. Apply steady, even pressure to the piping bag. Start piping at the edge of the cupcake, moving in a continuous, outward spiral towards the center. As you reach the center, gently pull up and away from the cupcake, creating a decorative peak. For a fuller swirl, begin a second, slightly smaller spiral on top of the first, focusing the pressure in the same direction. The key to a beautiful swirl is consistent pressure and a smooth, unbroken line of frosting. Varying the size of the star tip can create different textures and heights of swirls, from delicate rosettes to robust peaks. Practice is essential to achieve uniformity and prevent gaps. Ensure the tip is clean before starting each batch. This technique is forgiving enough for beginners but can be refined for more elaborate and consistent results by experienced decorators. The visual appeal of a perfectly executed swirl is undeniable, adding a professional touch to homemade treats.
The Smooth Frosting Spread with an Offset Spatula offers a clean, modern, and elegant look. This technique is ideal for showcasing the cupcake itself or as a base for further embellishments. Fill a piping bag with your frosting and pipe a generous mound of frosting directly onto the center of the cupcake. Alternatively, you can use a spoon to dollop a large amount of frosting onto the cupcake. Then, using a small offset spatula, gently begin spreading the frosting outwards from the center. Work in a circular or sweeping motion, smoothing the frosting towards the edges of the cupcake. For a perfectly flat top, hold the spatula at a slight angle and gently glide it across the surface in one smooth pass. To create a more domed effect, apply more frosting initially and use the spatula to gently coax it upwards and outwards, creating a soft mound. The offset spatula allows for greater control and maneuverability, preventing you from smudging the cupcake liner. For a perfectly smooth finish, a light touch is crucial. Avoid overworking the frosting, which can lead to air bubbles or an uneven texture. This method is excellent for creating a canvas for sprinkles, chocolate shavings, or intricate piping designs. The clean lines and smooth finish convey a sense of sophistication and attention to detail.
Creating a Rustic, Textured Frosting with a Spoon offers an effortlessly charming and homemade aesthetic. This technique requires no special tools beyond a spoon. Simply take a generous spoonful of frosting and dollop it onto the center of the cupcake. Then, using the back of the spoon, gently spread and swirl the frosting outwards. Don’t aim for perfection; embrace the imperfections. The goal is to create a visually interesting texture with peaks and valleys. You can create more defined ridges by dragging the spoon in different directions or by gently tapping the surface. This method is exceptionally forgiving and can be achieved by bakers of all skill levels. It’s perfect for a more casual, home-style presentation. For a more varied texture, consider using two different colors of frosting, alternating dollops and then gently swirling them together with the spoon. This technique is particularly well-suited for denser frostings like buttercream or cream cheese frosting, as they hold their shape better. The beauty of this method lies in its simplicity and the relaxed, approachable look it imparts.
The Rosette Technique with a French or Petal Tip offers a delicate and sophisticated floral presentation. This method utilizes a piping bag fitted with a French tip (like Wilton 104) or a petal tip. Start by piping a small dot of frosting in the center of the cupcake. Then, holding the piping bag at a slight angle (approximately 45 degrees) relative to the cupcake, begin piping outward in a U-shaped motion, creating a petal. Continue piping a series of overlapping U-shaped petals around the central dot, working in a circular direction. Each subsequent petal should overlap the previous one slightly, creating a layered, blooming effect. As you work your way around, gradually bring the piping bag closer to the cupcake to create a tighter, more compact rosette. For a fuller rosette, you can pipe a second layer of petals on top of the first. The key to this technique is consistent angle and pressure, ensuring each petal is uniformly shaped. This method requires a bit of practice but yields stunningly beautiful results that resemble real flowers. Ensure your frosting is smooth and free of lumps for optimal petal formation.
The Basketweave Technique creates a visually intricate and impressive pattern reminiscent of woven reeds. This technique typically requires a flat or basketweave piping tip. Begin by piping a series of vertical lines of frosting from top to bottom, evenly spaced across the cupcake. These will serve as the "warp" of your basket. Next, using the basketweave tip, pipe horizontal lines of frosting that weave over and under the vertical lines. Start at one edge and work your way across, alternating between going over and under the vertical frosting lines. Continue piping horizontal lines until the entire cupcake surface is covered in the basketweave pattern. This method requires precision and patience. The frosting consistency is crucial; it needs to be firm enough to hold its shape but pliable enough to weave. For beginners, practicing the weaving motion on a piece of parchment paper before applying it to the cupcake can be beneficial. The visual complexity of the basketweave pattern makes it a showstopper for any occasion.
The Ombre Effect using Multiple Frosting Shades adds a gradual, captivating color transition to your cupcakes. This technique involves preparing your frosting in multiple shades of the same color, ranging from light to dark. You can achieve this by dividing your base frosting and gradually adding food coloring. Fill separate piping bags with each shade. Start by piping the lightest shade at the outer edge of the cupcake, then pipe the next shade inwards, overlapping slightly. Continue this process, piping progressively darker shades towards the center. Once all shades are piped, use an offset spatula or a bench scraper to gently blend the colors together. Work from the outside in, with light, sweeping motions to create a smooth gradient. Alternatively, for a more defined ombre, you can pipe distinct rings of each color and then use a spatula to blend the edges. This technique is highly effective for creating visually striking cupcakes that draw the eye. The key is careful application and controlled blending to achieve a seamless color transition.
The Sprinkle-Covered Delight is a simple yet effective method for adding color, texture, and flavor to your frosted cupcakes. Once your cupcakes are frosted using any of the previously mentioned techniques (a smooth spread or a textured swirl works particularly well), generously coat the frosting with your desired sprinkles. You can use a single type of sprinkle or a mix of different colors, shapes, and sizes for a more dynamic look. For a full coverage, gently press the sprinkles into the frosting. For a more targeted application, you can use a spoon to sprinkle them over specific areas. This method is incredibly versatile and can be adapted to any theme or color scheme. Consider using sanding sugar for a fine, glittering finish, jimmies for a classic look, or nonpareils for a delicate speckled effect. This technique is a favorite for children’s parties and is a quick and easy way to elevate the presentation of any cupcake.
The Drizzled Chocolate or Caramel Finish provides an elegant and decadent touch, easily achievable with minimal effort. After frosting your cupcakes with a smooth or textured frosting, prepare a piping bag with a small round tip or a zip-top bag with a corner snipped off. Fill the bag with melted chocolate (dark, milk, or white) or caramel sauce. Hold the piping bag or zip-top bag a few inches above the frosted cupcake and drizzle the chocolate or caramel back and forth in a random or patterned fashion. For a more controlled drizzle, you can create zig-zag patterns or concentric circles. Allow the drizzle to set before serving. This technique adds a rich flavor dimension and a visually appealing contrast to the frosting. For an extra touch of flair, consider dusting the drizzle with edible glitter or adding a few sprinkles before it sets. This method is ideal for creating visually appealing treats with a gourmet feel.
The Stenciled Design allows for intricate and precise patterns on your frosted cupcakes, adding a touch of artistry. This technique requires food-safe stencils designed for baking. Frost your cupcakes smoothly, as a smooth surface is essential for clean stencil application. Place the stencil directly onto the frosted surface of the cupcake. Then, using a fine-mesh sieve or a small brush, lightly dust powdered sugar, cocoa powder, or edible glitter over the stencil. Alternatively, you can use a contrasting color of frosting, applied with an offset spatula or a small brush, to fill the stencil openings. Once the stencil is filled, carefully lift it away to reveal the pattern. Experiment with different stencil designs and dusting materials to create unique and personalized cupcakes. This method is perfect for themed parties or adding a sophisticated touch to any dessert. The key is a light hand and even application of the dusting or frosting material.
The Piped Lettering or Numbers allows for personalized messages and dates on your cupcakes, making them ideal for special occasions. This technique requires a piping bag fitted with a small round tip. Prepare your frosting to a smooth, pipeable consistency. Practice piping letters or numbers on a piece of parchment paper before attempting it on the actual cupcake. Hold the piping bag perpendicular to the cupcake and apply steady, even pressure. For cleaner lines, try to make your strokes in one continuous motion. You can pipe simple block letters or more elaborate script. Consider piping initials, short messages, or significant dates. This method adds a highly personalized and thoughtful element to your cupcakes, making them perfect for birthdays, anniversaries, or any celebratory event. Ensure your frosting is firm enough to hold the delicate lines of the lettering without spreading.
