
How To Make A Plexi Frame
Crafting Your Custom Plexi Frame: A Comprehensive Guide
Creating a custom plexi frame offers a sleek, modern, and durable alternative to traditional glass framing for artwork, photographs, and displays. Plexiglass, also known as acrylic, is lighter, more shatter-resistant, and can be more cost-effective than glass, making it an excellent choice for a variety of applications. This guide will walk you through the entire process, from material selection and design considerations to cutting, assembly, and finishing, enabling you to produce professional-looking plexi frames at home. Whether you’re a seasoned DIYer or a beginner, understanding the nuances of working with acrylic is key to achieving a successful and visually appealing final product.
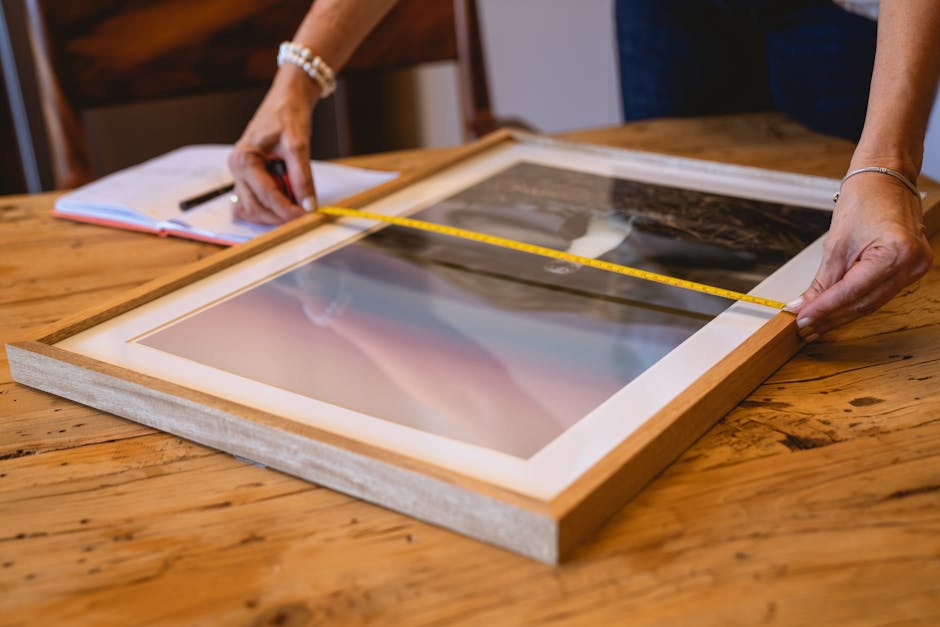
The foundational step in crafting any plexi frame is meticulous planning and material selection. Begin by determining the precise dimensions of the item you intend to frame. Measure the artwork, photograph, poster, or document accurately, accounting for any borders or matting you plan to incorporate. This will dictate the internal dimensions of your plexi frame. For external dimensions, consider the overall aesthetic and the desired visual impact. A larger frame can create a more dramatic statement, while a smaller one might be more suitable for delicate pieces. Next, decide on the thickness of the acrylic. Standard framing acrylic is typically between 1/8 inch (3mm) and 1/4 inch (6mm) thick. Thicker acrylic offers increased rigidity and a more premium feel, especially for larger frames, but it also increases the cost and can be more challenging to cut. For smaller frames or less demanding applications, thinner acrylic may suffice. Consider the clarity and optical properties of the acrylic. Museum-grade or UV-filtering acrylic can protect artwork from fading due to sunlight exposure, but it comes at a higher price point. Standard clear acrylic is perfectly suitable for most home décor and general display purposes. When sourcing your acrylic, look for reputable suppliers who offer custom cutting services. This can save you considerable effort and ensure precise dimensions. You’ll also need to select your fastening method. Common choices include adhesive strips (double-sided tape specifically designed for acrylic), mechanical fasteners (screws and standoffs), or specialized acrylic bonding adhesives. The chosen method will influence the design and the types of tools you’ll need. Finally, plan your mounting system. Will the frame be hung on a wall, or will it stand on a surface? This will determine the hardware required, such as D-rings, picture wire, or easel backs.
The design of your plexi frame is paramount to its functionality and aesthetic appeal. There are several common construction methods, each with its own advantages and suitability for different applications. The "sandwich" or "floating" mount is perhaps the most popular and versatile. In this design, your artwork is placed between two sheets of acrylic, with the edges of the artwork often appearing to float within the frame. This typically involves a front and back acrylic panel, with a spacer material or a slightly larger back panel to create the depth for the artwork. The artwork is often held in place by the pressure of the two acrylic sheets, or it can be attached to the back panel with archival-safe adhesive or mounting tape. Another common design is the "front-loading" or "poster" frame. This involves a single front piece of acrylic and a backing board, with the artwork slid in from the top or side. This is often secured with clips or a groove system. For a more robust and architectural look, consider a frame with a separate backing board and a front acrylic panel that is attached with standoffs. Standoffs are metal or plastic cylindrical fixtures that mount through the acrylic and into the backing board, creating a visually striking spaced effect. The choice of design will influence the complexity of the build, the materials required, and the tools you’ll need. Consider the weight of the artwork; heavier pieces will necessitate a more rigid frame design and stronger fastening methods. The desired presentation also plays a role. Do you want a minimalist, frameless look, or a more traditional framed appearance with visible edges? The "floating" mount excels at the former, while standoff frames offer a modern interpretation of the latter. If your artwork is particularly delicate or valuable, opt for designs that minimize direct contact with adhesives and consider UV-filtering acrylic for added protection.
Cutting acrylic requires precision and the right tools to achieve clean, straight edges and avoid chipping or cracking. For thinner acrylic sheets (up to 1/8 inch), a scoring knife or a specialized acrylic scoring tool is often sufficient. This involves making multiple passes along a straight edge to create a deep score line, after which the acrylic can be carefully snapped over the edge of a table. For thicker acrylic, or for achieving the most precise cuts, a power saw is recommended. A jigsaw with a fine-tooth, plastic-cutting blade is a good option for making curved cuts or intricate shapes. For straight cuts, a table saw with a fine-tooth blade designed for plastics or a plywood blade can be used. It is crucial to use a slow feed rate and ensure the blade is sharp to prevent melting or chipping. If you are using a circular saw, consider using a guide to ensure straightness. Always wear safety glasses and a dust mask when cutting acrylic, as fine plastic dust can be generated. If you’re not confident in your cutting abilities, or if you need very precise cuts for a complex design, consider having the acrylic cut to size by the supplier. Many acrylic suppliers offer a custom cutting service, which can be an excellent option for ensuring accuracy and a professional finish. When cutting yourself, measure twice and cut once. Use a fine-grit sandpaper (220-grit or higher) to smooth any rough edges after cutting. A belt sander or orbital sander with fine grit paper can expedite this process, but be careful not to overheat the acrylic. For a truly polished edge, you can use progressively finer grits of sandpaper, finishing with a polishing compound specifically designed for plastics.
Assembly is where your plexi frame design comes to life. The method of joining the acrylic panels will depend on your chosen design and fastening method. For simple sandwich frames without standoffs, acrylic bonding adhesive is the most robust and visually seamless option. These adhesives are specifically formulated to create a strong, permanent bond with acrylic. Apply the adhesive to the edge of one panel, align the second panel precisely, and clamp them together until the adhesive cures. Follow the manufacturer’s instructions regarding application, curing time, and ventilation, as some adhesives can have strong fumes. Alternatively, for less permanent or more adjustable frames, high-strength double-sided acrylic tape can be used. Ensure the tape is specifically designed for acrylic and is rated for the weight of your artwork. Clean both surfaces thoroughly before applying the tape to ensure good adhesion. For frames utilizing standoffs, begin by drilling pilot holes through the acrylic panels at your designated corners or intervals. Use a drill bit specifically designed for plastics to avoid cracking. Ensure the drill bit is sharp and that you apply steady, even pressure. Mount the standoff hardware through the pre-drilled holes, securing the front and back acrylic panels together. This method offers a clean, modern aesthetic and allows for easy disassembly if needed. If your design incorporates a backing board, such as MDF or Gatorboard, attach the acrylic panels to it using appropriate fasteners. For poster frames with a groove or channel, carefully slide the artwork and then the front acrylic panel into place, securing with clips or a locking mechanism. Always work on a clean, flat surface to prevent scratches on the acrylic. Consider using painter’s tape along the edges of the acrylic during assembly to protect them from accidental damage or adhesive spills.
Finishing touches are what elevate a DIY plexi frame from good to professional. After assembly, carefully remove any protective film from the acrylic. Be mindful of static electricity, which can attract dust; a lint-free cloth or an anti-static spray can be helpful here. Inspect all edges and surfaces for any imperfections. Minor scuffs can often be polished out with a plastic polish and a soft cloth. For a truly pristine finish, consider using a mild abrasive cleaner specifically designed for plastics, followed by a polish. Ensure all adhesive residue is removed. If you’ve used a bonding adhesive, ensure it has fully cured before handling the frame extensively. If your frame is designed for wall mounting, attach your chosen hardware, such as D-rings or picture wire, securely to the backing board or frame structure. For frames that will stand on a surface, attach an easel back or consider adding small rubber feet to the bottom of the frame to prevent slippage and protect furniture. If you have opted for a floating mount where the artwork is adhered to the back panel, ensure the adhesive used is archival-safe and will not damage the artwork over time. Consider the environment where the frame will be displayed. If it will be exposed to direct sunlight, investigate the use of UV-filtering acrylic for both panels to protect the artwork from fading. When cleaning your finished plexi frame, always use a soft, lint-free cloth and a mild, ammonia-free cleaner. Avoid abrasive materials or harsh chemicals, as they can scratch or cloud the acrylic surface. Microfiber cloths are ideal for this purpose. Regularly dusting the frame will help maintain its clarity and aesthetic appeal. With careful attention to detail throughout the entire process, your custom plexi frame will be a stylish and durable showcase for your chosen piece.
