
Make A Thank You Plate For Santa
Crafting a Memorable Thank You Plate for Santa: A DIY Guide for Festive Cheer
The tradition of leaving out treats for Santa Claus on Christmas Eve is a cornerstone of childhood holiday magic. Beyond the cookies and milk, a thoughtfully prepared "thank you plate" elevates this gesture into a personalized expression of gratitude. This guide provides a comprehensive, SEO-friendly exploration of creating these special plates, covering material choices, design inspiration, personalization techniques, and practical considerations. The objective is to empower parents and children to create a unique and cherished item that enhances the enchantment of Christmas morning. Optimizing for search terms like "DIY Santa plate," "make a thank you plate for Santa," "kids Christmas crafts," "Santa treat plate ideas," and "personalized Santa plate" will ensure this content reaches a broad audience seeking creative holiday activities.
The fundamental purpose of a thank you plate for Santa is to offer a dedicated space for his pre-flight sustenance. This isn’t merely about the edible offerings; it’s about the visual representation of appreciation. A homemade plate transforms a simple act into a tangible artifact of the holiday spirit. The process of creation itself becomes a valuable family activity, fostering creativity, fine motor skills in children, and a shared sense of anticipation for Christmas. When searching for ideas, parents will likely use terms like "easy Santa plate craft," "personalized Christmas plate ideas for kids," or "how to make a Santa cookie plate." Understanding these search intents is crucial for delivering relevant and actionable information.
Material selection is the initial and most critical step in crafting a Santa plate. The chosen medium dictates the overall aesthetic, durability, and safety of the final product. Ceramic plates offer a classic and elegant canvas. These can be purchased plain and then decorated using specific ceramic paints or markers designed for permanent application. Alternatively, plain white ceramic plates can be the base for decoupaged designs. For a more accessible and budget-friendly option, sturdy paper or cardstock plates can be utilized, particularly for younger children. These are easily decorated with markers, crayons, glitter, and glue. Wood slices also provide a rustic and charming alternative. They are naturally beautiful and can be enhanced with paints, wood burning tools (with adult supervision), or stencils. Each material has its own set of advantages and considerations, influencing the ease of decoration and the longevity of the plate. Keywords related to materials might include "ceramic Santa plate DIY," "paper plate craft for Santa," "wood slice Santa treat plate," and "decorate a plate for Santa."
Decorating techniques offer a vast spectrum of creative possibilities, allowing for the plate to reflect the personality of the child and the family. For ceramic plates, non-toxic ceramic paints are essential. These can be applied with brushes, sponges, or even fingers for abstract designs. Ceramic markers provide greater precision for lettering and detailed drawings. Decoupage, the art of adhering paper cutouts to a surface, is another popular technique. Magazine clippings, colorful tissue paper, or printed images can be adhered using Mod Podge or a similar sealant. Glitter adds a festive sparkle, though it’s advisable to use glitter glue for better control and less mess. For paper plates, a wide array of art supplies can be employed: markers, crayons, colored pencils, acrylic paints, stamps, stickers, and glitter glue. Wood slices can be painted with acrylics, stenciled, or even decorated with permanent markers. The goal is to create a visually appealing surface that conveys a message of thanks to Santa. Search queries might include "how to paint a Santa plate," "decoupage Santa plate tutorial," "glitter Santa plate craft," or "stencil ideas for Santa plate."
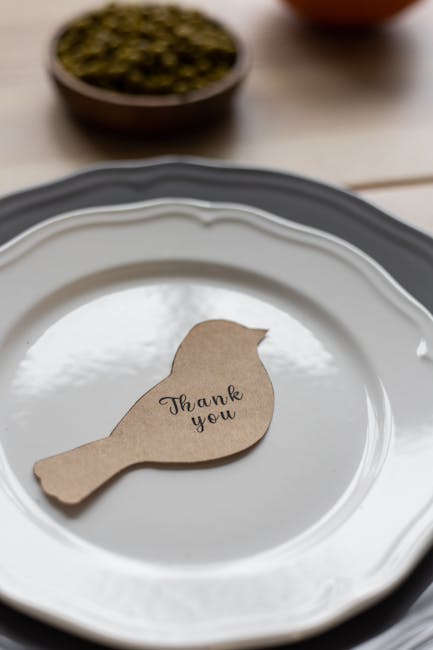
Personalization is what truly makes a Santa thank you plate special. Incorporating the child’s name is a fundamental element. This can be done through hand-lettering, using alphabet stickers, or printing their name onto a stencil. Beyond names, children can draw pictures that represent their Christmas wishes or what they envision Santa enjoying. Handprints or footprints, especially for younger children, can add a touching and unique touch. Encourage them to draw symbols of Christmas, such as stars, trees, snowflakes, or candy canes. For older children, they might write a short message of thanks. The personalization aspect is where the emotional resonance of the project lies, making it a treasured keepsake. Search terms related to personalization might include "personalized Santa plate with name," "handprint Santa plate craft," "footprint Santa plate idea," or "custom Santa treat plate."
Safety is paramount when crafting items that will be in close proximity to food, even if the food is intended for Santa. If using ceramic or glass plates, ensure they are food-safe and the paints or glazes used are non-toxic and lead-free. Allow ample drying and curing time for any paints or sealants to prevent leaching. For decoupaged plates, the glued areas should be fully sealed to create a smooth, non-porous surface. If using edible decorations, such as frosting or candy, ensure they are applied just before Santa’s arrival to maintain freshness. When involving children in the crafting process, always supervise them closely, especially when using sharp objects, glitter, or strong adhesives. The focus should always be on a fun and safe experience. Search terms incorporating safety might include "food safe Santa plate decorations," "non-toxic paints for Santa plate," or "safe crafts for Christmas."
Practical considerations enhance the functionality and longevity of the thank you plate. Choosing a plate size that can comfortably accommodate a cookie, some carrots for the reindeer, and a glass of milk is important. The material’s durability will determine how many Christmases the plate can be used. Ceramic and sealed wood are generally more robust than paper plates. Storage is another factor. If the plate is intended for multiple years, consider how it will be stored safely and compactly after the holidays. Some families choose to laminate their paper plates or store their ceramic plates in protective sleeves. The ease of cleaning is also a consideration. While the primary purpose is decorative, if any edible items are placed directly on the plate, it should be easily wipeable. Keywords related to practicality could include "reusable Santa plate," "how to store Santa plate," "easy to clean Santa plate," or "large Santa treat plate."
Inspiration for Santa plate designs is abundant and can be tailored to various themes and skill levels. Classic Christmas motifs like snowflakes, reindeer, sleighs, and holly are timeless. More contemporary designs can include patterns, abstract art, or even caricatures of Santa himself. The goal is to create something that sparks joy and anticipation. Encourage children to draw their favorite Christmas characters or elements of the holiday. For a more sophisticated look, consider using stencils to create intricate patterns or borders. The plate can also serve as a canvas for a personalized letter to Santa, with the artwork surrounding the message. Explore online galleries, Pinterest boards, and craft blogs for a wealth of visual ideas. Search queries for inspiration might include "Christmas plate design ideas," "Santa plate art inspiration," "festive cookie plate designs," or "unique Santa plate themes."
The process of creating a thank you plate for Santa can be broken down into manageable steps, making it an enjoyable family project. Step 1: Gather Materials. Select the base plate (ceramic, paper, wood) and all necessary decorating supplies (paints, markers, glitter, glue, stencils, stickers). Step 2: Design Planning. Discuss the design with the child. Sketch out ideas on paper before committing to the plate. Step 3: Decoration. Begin applying the chosen decorations. For ceramic plates, ensure proper ventilation if using paints. For decoupaging, allow ample drying time between layers. Step 4: Personalization. Add the child’s name, handprints, or any other personal touches. Step 5: Sealing and Drying. For paints and glues, ensure they are completely dry and, if necessary, sealed according to product instructions. Ceramic paints often require baking in a kiln or oven for permanent curing. Step 6: Final Touches. Add any last-minute embellishments or ensure all elements are secure. This structured approach ensures a smooth and successful crafting experience. Keywords related to the process might include "how to make a Santa plate step-by-step," "DIY Santa plate instructions," or "crafting a Santa cookie plate guide."
Beyond the traditional cookie and milk, the thank you plate can be a vehicle for other festive offerings. Carrots for Santa’s reindeer are a popular addition. Small bags of reindeer feed (oats, glitter, and perhaps a few dried cranberries) can be placed in a designated spot on or near the plate. For a more elaborate presentation, consider including a small, wrapped candy for Santa, or a small trinket as a token of appreciation. The plate itself becomes a centerpiece for these holiday treats, enhancing the overall tradition. When families search for "what to put on Santa plate," this information will be valuable.
The tradition of the Santa thank you plate is more than just a holiday activity; it’s an opportunity to foster creativity, encourage gratitude, and create lasting family memories. By understanding the materials, techniques, personalization options, and practical considerations, families can craft a truly special and memorable thank you plate that will be cherished for years to come. The act of creation, shared between parent and child, imbues the plate with a unique kind of magic, making the arrival of Santa even more enchanting. Optimizing this content with relevant keywords ensures that families seeking to engage in this heartwarming tradition can easily find the guidance they need. The comprehensive nature of this article, covering all aspects of the DIY process, aims to provide a definitive resource for anyone looking to create their own personalized thank you plate for Santa.
