
Make A Memory Quilt For Free From Your Old Clothes
Crafting a Memory Quilt: Free Keepsakes from Your Old Clothes
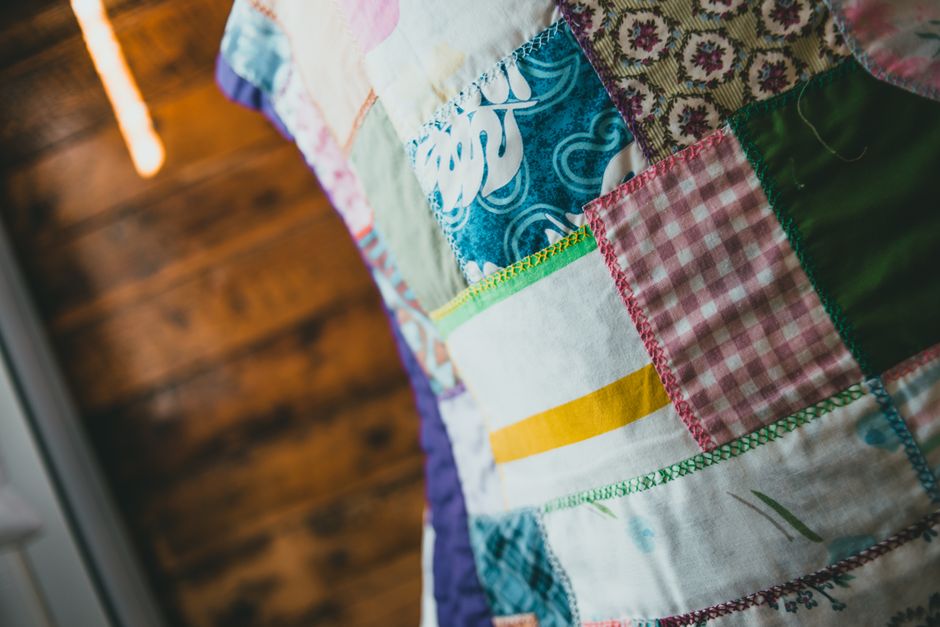
Repurposing sentimental clothing into a memory quilt offers a profound and budget-friendly way to preserve cherished moments. This article details the process of creating a memory quilt entirely from existing garments, requiring no initial monetary investment in fabric. The focus is on utilizing materials already on hand, transforming forgotten clothes into a tangible narrative of personal history. This approach not only offers a creative outlet but also promotes sustainability by giving new life to items that might otherwise end up in landfills. The emotional value of a memory quilt far surpasses any financial cost, making it an accessible and deeply meaningful project for anyone.
The initial step in creating your free memory quilt is meticulous fabric selection and preparation. Gather all the clothing items you wish to incorporate. These can include t-shirts, shirts, dresses, baby clothes, or any garment holding significant memories. The key is variety in texture and pattern, as this will contribute to the visual richness of the finished quilt. Once a collection is amassed, it is crucial to wash all garments thoroughly. This removes any residual dirt, odors, or sizing, ensuring a clean and fresh base for your quilt. Furthermore, washing helps pre-shrink the fabric, preventing any unexpected shrinkage after the quilt is assembled. After washing, allow the clothes to dry completely. Avoid using fabric softener, as it can sometimes make fabrics slippery and more difficult to work with, especially for beginners.
Next, the essential process of deconstruction and cutting begins. Lay each garment flat and carefully examine its construction. Identify seams, buttons, zippers, and any embellishments that may interfere with cutting flat fabric pieces. Use a seam ripper or small sharp scissors to meticulously take apart each item. The goal is to extract the largest possible flat pieces of fabric from each garment. For t-shirts, this often means cutting along the side seams and shoulder seams, then cutting across the body to remove sleeves and collar. For button-down shirts, you can often cut along the side and underarm seams, as well as the seams attaching the sleeves to the bodice. Be mindful of any printed graphics or significant design elements on the fabric. These can become focal points in your quilt design. Carefully cut around these elements if you wish to preserve them as distinct blocks. If a garment has significant wear or damage in certain areas, avoid those sections and focus on the intact portions.
The selection of cutting tools is critical for precision. While specialized rotary cutters and mats are ideal for fabric cutting, they represent a potential cost. For a free memory quilt, resourceful individuals can utilize a sharp pair of fabric scissors. Invest in a good quality pair if you don’t already own them; they will make a significant difference in the ease and accuracy of your cuts. If available, a ruler or straight edge will also be invaluable for ensuring straight lines. A long metal ruler is preferable for guiding your cuts. In the absence of a ruler, you can try to fold the fabric precisely and cut along the folded edge, though this is less accurate. For t-shirts and other knit fabrics, be aware that they can stretch. To minimize stretching while cutting, lay the fabric flat without pulling, and cut with a steady hand. Consider cutting slightly larger pieces than you ultimately need, as you can trim them down to a precise size later. This provides a buffer in case of slight inaccuracies.
Designing your memory quilt is where personalization truly takes flight. Consider the size and shape of the fabric pieces you have salvaged. Common quilt block sizes are squares, such as 6-inch, 8-inch, or 10-inch squares. However, you are not limited to squares. Rectangles, triangles, or even irregularly shaped pieces can be incorporated to add visual interest. Lay out your cut fabric pieces on a large flat surface, such as a floor or a large table. Experiment with different arrangements. Group similar colors or patterns together, or create contrasting juxtapositions. Think about the story you want your quilt to tell. Perhaps you want to arrange baby clothes chronologically, or group shirts from significant life events together. Consider the placement of any graphic elements from t-shirts to create focal points within the quilt. Take photographs of potential arrangements to help you visualize the final product. Don’t be afraid to mix and match different fabric types, but be mindful that different weights and textures might require slightly different quilting techniques later. The beauty of a memory quilt is its unique, personal nature, so embrace creative freedom in your design.
While traditional quilting often involves purchasing batting, a quilt backing fabric, and binding material, a free memory quilt necessitates resourceful alternatives. For batting, consider repurposing old blankets, fleece throws, or even layers of old sheets. An old duvet or comforter can also be cut down to size. The key is to find a material that provides some loft and insulation. Ensure that any repurposed batting material is clean and free from holes or excessive wear. For the quilt backing, a large flat sheet or a king-sized flat sheet in a solid color or subtle pattern can work effectively. Alternatively, you can piece together larger sections of fabric from your salvaged clothing. For example, if you have several large, plain pieces from dresses or larger shirts, you can sew them together to create a backing fabric. For binding, the strips of fabric that finish the outer edges of the quilt, you can again utilize fabric from your old clothes. Cut long, uniform strips of fabric, typically 2.5 inches wide. You can then sew these strips together end-to-end to create a sufficient length for the entire perimeter of your quilt.
The sewing process for a memory quilt can be achieved with minimal tools. A sewing machine is ideal for speed and consistency, but a free memory quilt can also be hand-sewn. If you have access to a sewing machine, ensure it is in good working order. Thread the machine with a strong, durable thread that complements your fabric colors, or use a neutral color like white or grey. If hand-sewing, use a strong needle and a sturdy thread. A backstitch is generally the strongest stitch for quilting. Begin by sewing your chosen quilt blocks together to form rows. Press the seams open or to one side as you go. This is a crucial step for creating a flat and professional-looking quilt. Once your rows are complete, sew the rows together to form the quilt top. Again, press the seams carefully. The goal is to create a flat, cohesive quilt top before attaching the batting and backing.
Attaching the batting and backing, and then quilting the layers together, can be achieved through various methods. If using a sewing machine, you can "quilt-in-the-ditch," which means sewing along the existing seam lines of your quilt blocks. This is a simple and effective way to hold the layers together. For a more decorative effect, you can free-motion quilt, but this requires more practice and a sewing machine with a drop-feed mechanism. Hand-quilting is also a beautiful and traditional option. Use a quilting needle and thread to create small, even stitches through all three layers. The spacing of your quilting stitches will determine how secure the layers are and the overall appearance of the quilt. For a free quilt, simplicity is key. Focus on securing the layers effectively rather than complex quilting patterns.
The final step is applying the binding. Cut your prepared binding strips to the required length. Fold each strip in half lengthwise and press. Starting on one side of the quilt, align the raw edges of the binding with the raw edge of the quilt top. Sew the binding to the quilt top, mitering the corners as you go. Once the binding is attached to the front, fold it over to the back of the quilt and hand-stitch it in place for a neat finish. This can be done with a slip stitch for an invisible look. The binding not only secures the raw edges but also provides a decorative border to your memory quilt.
Troubleshooting common issues is an inevitable part of any DIY project, especially when working with salvaged materials. Fabric stretching is a frequent challenge with knit fabrics like t-shirts. To mitigate this, when cutting, avoid pulling the fabric. When sewing, use a walking foot on your machine if you have one, as it helps feed layers evenly. If hand-sewing, use shorter stitches and be patient. Puckering can occur if seams are not pressed properly or if the layers are not held together evenly during quilting. Ensure you are pressing your seams flat and consider using safety pins to baste the layers together before quilting, especially if hand-quilting. Uneven edges can be a result of inaccurate cutting or stretching during the sewing process. Don’t be afraid to trim and square up your quilt blocks or the entire quilt top before the final assembly. Even with salvaged materials, a good pressing can dramatically improve the look of your finished quilt. Embrace the imperfections; they are part of the charm of a handmade, memory-filled item.
The beauty of a memory quilt lies in its personal narrative. Each fabric scrap represents a moment, a person, or an experience. A baby onesie can evoke the tender early days of parenthood. A favorite t-shirt from a concert can bring back the energy of a live performance. A dress worn to a special occasion can conjure memories of joy and celebration. The act of deconstructing and reassembling these garments is a physical manifestation of processing and honoring those memories. The finished quilt becomes a tangible tapestry of a life, a collection of stories woven together. This is a project that transcends mere craft; it is an act of remembrance, a way to keep loved ones and cherished times close, all without spending a single dollar on new materials.
Beyond the immediate creation, the care and maintenance of your memory quilt are straightforward. As it is made from various fabrics, it is advisable to wash the quilt gently. Hand-washing in cool water with a mild detergent is the safest option. If machine washing, use a gentle cycle with cool water and a mild detergent. Avoid harsh chemicals or bleach. Tumble dry on a low heat setting or air dry to prolong the life of the quilt and prevent excessive fading or shrinkage. When not in use, store the quilt folded or rolled in a cool, dry place, away from direct sunlight. Protecting your memory quilt ensures that the stories and memories it holds can be cherished for generations to come. The satisfaction of creating such a meaningful item from pre-loved materials is immense, offering a profound connection to the past and a beautiful keepsake for the future.
