
How To Easy Spring Braid Tutorial
Effortless Spring Braids: A Step-by-Step Guide to Fresh, Feminine Hairstyles
Spring signifies renewal, and what better way to embrace the season of blooming flowers and warmer days than with a fresh, effortlessly chic hairstyle? Braids have long been a staple in the hair styling world, offering both practicality and undeniable aesthetic appeal. This comprehensive guide delves into how to achieve easy spring braid tutorials, focusing on styles that are not only on-trend but also surprisingly simple to recreate at home. We’ll break down the techniques, offer variations, and provide tips to ensure your spring braids are your go-to look for the season. Whether you’re a braiding novice or looking to expand your repertoire, these tutorials will empower you to create beautiful, salon-worthy braids with minimal fuss.
The foundation of any successful braid lies in proper preparation. Before you even think about weaving strands, ensure your hair is in a manageable state. Start by brushing your hair thoroughly to remove any tangles. For added grip and to prevent flyaways, consider applying a small amount of styling cream, texturizing spray, or even a touch of dry shampoo. These products create a slightly "grippy" surface, making it easier to section and manipulate your hair, especially if your hair is very fine or silky. If you’re aiming for a sleeker look, a smoothing serum can be beneficial, while a texturizing spray will lend a more undone, bohemian vibe, perfect for spring. The choice of preparation product will ultimately depend on your hair type and the desired finish of your braid.
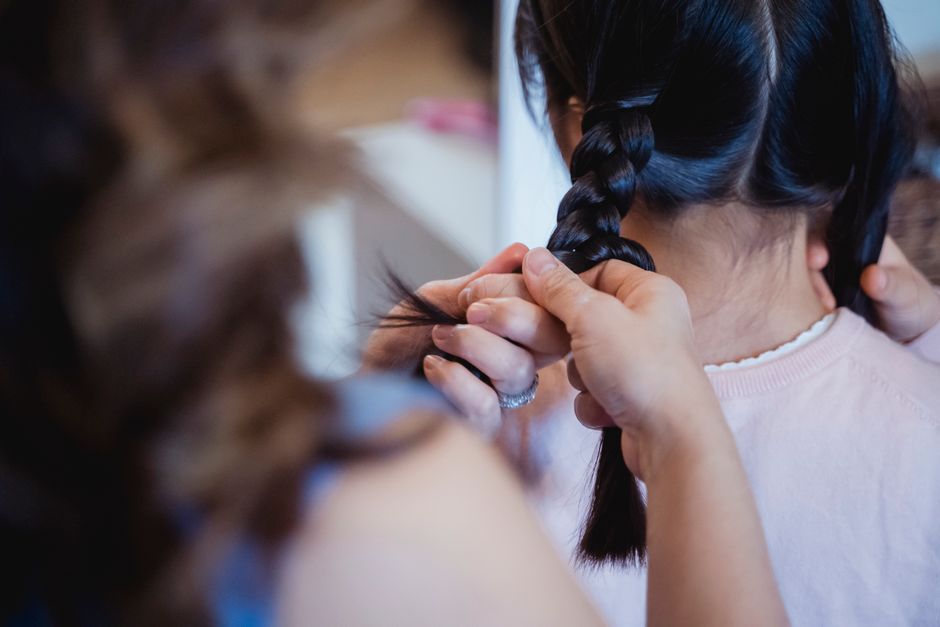
Let’s begin with a fundamental and incredibly versatile braid: the classic three-strand braid. This is the building block for many other, more intricate styles. To create a basic three-strand braid, divide your hair into three equal sections. Hold each section in your dominant hand. Begin by crossing the right section over the middle section, making it the new middle section. Then, cross the left section over the new middle section. Continue this alternating pattern, always bringing the outermost strand over the one next to it, until you reach the end of your hair. Secure the braid with a hair elastic. For a softer, more relaxed spring look, gently tug on the outer edges of each woven section to loosen the braid. This technique, known as "pancaking" or "loosening," adds volume and a bohemian, lived-in feel. Practice this until the motion feels natural; it’s the cornerstone of many beautiful braided styles.
Moving on to a slightly more advanced, yet still accessible, technique: the Dutch braid. Often referred to as an "inside-out" French braid, the Dutch braid stands out because the woven strands are brought underneath each other, rather than over, creating a braid that pops off the head. To start a Dutch braid, section off the hair where you want your braid to begin. Take a small section of hair at the top of your head, divide it into three equal strands. Instead of crossing the right strand over the middle, cross it under the middle strand. Then, cross the left strand under the middle strand. As you continue, incorporate small pieces of hair from the sides of your head into the outermost strands before crossing them under. For instance, pick up a small section of loose hair from the right and add it to the rightmost strand before crossing it under the middle. Repeat this on the left side. Continue this process down the length of your hair, always incorporating new hair into the outermost strand before crossing it under. The result is a braid that appears to be raised from the scalp, offering a beautiful three-dimensional effect. This braid is perfect for keeping hair off your face during spring activities and looks particularly striking when incorporated into ponytails or pigtails.
A variation on the Dutch braid that screams spring is the halo Dutch braid. This is ideal for a romantic, ethereal look. Start by creating a deep side part. Take a section of hair from the front of your head on the larger side of the part. Begin a Dutch braid, working your way around your head, following the hairline. As you braid, continue to pick up small sections of hair from the front and incorporate them into the braid. The key here is to keep the braid relatively tight as you go, guiding it in a circular motion around your head. Once you’ve braided all the hair from one side and reached the nape of your neck, you can either continue the Dutch braid all the way down and then pin it up, or you can switch to a simple three-strand braid to finish it off. To secure the halo, tuck the end of the braid underneath the starting point or across the crown and secure with bobby pins that match your hair color. This creates a beautiful, crown-like effect that is both elegant and practical.
For a playful and youthful spring vibe, consider the French braid pigtails. This is a classic for a reason. Divide your hair directly down the middle into two equal halves. Take one half and section off a piece of hair at the front of your hairline. Begin a French braid, working your way down the side of your head. Remember the French braiding technique: cross the right strand over the middle, then the left strand over the middle. As you braid, incorporate small pieces of loose hair from the side into the outermost strands before crossing them over. Continue this down the entire length of the section. Once you reach the nape of your neck, secure the braid with an elastic. Repeat the entire process on the other side of your head. For a softer look, gently pull on the outer edges of each French braid to widen them. You can also leave a few face-framing tendrils loose for a more bohemian feel.
Embracing the bohemian spirit of spring, the fishtail braid is another excellent choice. This braid creates a beautiful, intricate pattern that looks far more complex than it actually is. To create a fishtail braid, divide your hair into two equal sections. Take a small piece of hair from the outside of the left section and bring it over to the inside of the right section. Then, take a small piece of hair from the outside of the right section and bring it over to the inside of the left section. Continue this alternating pattern, always taking a thin strand from the outside and crossing it to the inside of the opposite section. The thinner the strands you take, the more intricate your fishtail braid will appear. Like the Dutch braid, this can be done on the scalp for a more intricate look or on a ponytail or low braid for simplicity. For a more relaxed spring feel, after completing the braid, gently tug on the sides to loosen and widen it, enhancing the "fishtail" appearance.
For an extremely easy, yet stylish option, the pull-through braid is a fantastic choice. This technique gives the illusion of a braided style without the actual weaving of hair. Start by creating a high ponytail. Divide the ponytail into two equal sections. Take one section and tie it into another ponytail just below the first one, making sure to leave a gap between the two elastics. Now, take the top ponytail and separate it into two. Pull the bottom ponytail up and through the gap you created in the top ponytail. Then, gather the two sections of the top ponytail back into one, creating a new ponytail just below the previous one. Repeat this process: divide the ponytail into two, create a new ponytail below with a gap, pull the existing ponytail through the gap, and then re-gather. Continue this down the length of your hair. This creates a beautifully layered, almost bubble-like braid effect that is incredibly easy to achieve and looks impressive.
For those with shorter hair or who want to add a touch of detail, incorporating braids into updos is a brilliant spring strategy. Consider a braided bun. You can create a simple three-strand braid or a Dutch braid and then wrap it around the base of your ponytail to form a bun. Secure with bobby pins. Another option is to create smaller braids along your hairline and then incorporate them into a low ponytail or messy bun. This adds texture and visual interest to an otherwise simple updo. A braided crown, as mentioned earlier, is also a stunning way to elevate a simple hairstyle for spring.
To truly master these easy spring braid tutorials, consistent practice is key. Don’t be discouraged if your first attempts aren’t perfect. Like any skill, braiding improves with repetition. Experiment with different hair textures and lengths to see how each braid looks and feels. Consider using clear elastics or elastics that match your hair color for a seamless finish. Bobby pins are your best friend for securing stray strands or anchoring braids. For added flair, incorporate hair accessories like floral clips, ribbons, or headbands. These can instantly elevate a simple braid and make it feel more festive and spring-appropriate.
The beauty of spring braids lies in their versatility and their ability to be both practical and fashionable. Whether you’re heading to a brunch, a picnic, or simply running errands, a well-executed braid can elevate your entire look. The techniques outlined here – the classic three-strand, the eye-catching Dutch, the bohemian fishtail, the romantic halo, the playful pigtails, and the illusionary pull-through braid – provide a solid foundation for a season of stylish hair. By understanding the basic principles and practicing these methods, you’ll be able to effortlessly create a variety of beautiful and easy spring braids that are perfect for embracing the vibrant energy of the season. Experiment, have fun, and let your hair blossom with these simple yet impactful braiding techniques.
