
How To Create A Greenhouse Out Of A Trampoline
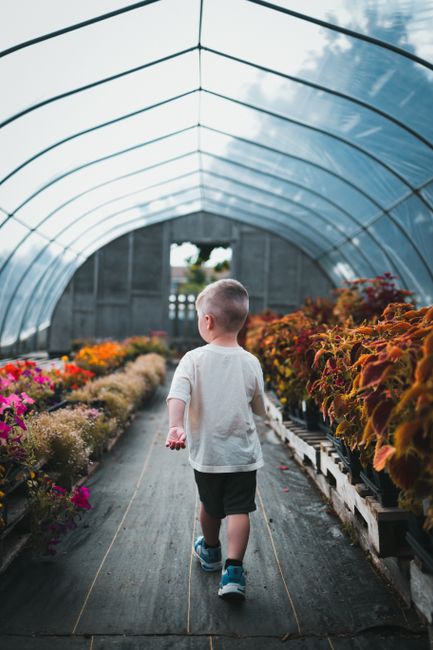
DIY Trampoline Greenhouse: Maximizing Your Backyard Space for Seed Starting and Plant Growth
Transforming an old or unused trampoline into a functional greenhouse is a resourceful and cost-effective way to expand your gardening capabilities, particularly for starting seeds or extending your growing season. This guide details the process, from selecting the right trampoline to constructing a durable and weather-resistant structure, focusing on practical steps and materials for an SEO-optimized, informative article.
Assessing Your Trampoline for Greenhouse Conversion
The suitability of a trampoline for greenhouse conversion depends on several factors. Primarily, its structural integrity is paramount. Inspect the frame for rust, bends, or weakened welds. A strong, stable frame will be the foundation of your greenhouse. The size of the trampoline will dictate the scale of your greenhouse. Larger trampolines offer more interior space, allowing for more extensive seed starting trays or even small potted plants. Consider the original mat and netting. While these will be removed, their attachment points can sometimes be repurposed. The presence of a safety net enclosure can be advantageous, as the poles might offer additional support points for attaching the greenhouse covering. A round trampoline offers a consistent shape that’s generally easier to cover evenly than an oval or rectangular one, though the latter can still be adapted. Assess the condition of the legs; they need to be stable and capable of supporting the weight of the frame when enclosed. If the trampoline is significantly rusted or unstable, it might be safer to reinforce it with additional metal bracing or consider it a less ideal candidate. The ideal trampoline for this project is one that is still structurally sound and readily available, perhaps one your children have outgrown or one purchased second-hand.
Dismantling the Trampoline: Safety and Preparation
The first practical step in converting a trampoline into a greenhouse is its thorough dismantling. Begin by removing the safety net enclosure. This typically involves unzipping the netting and carefully detaching it from the frame poles. Then, remove the net poles. These often slot into brackets on the main frame. Be mindful of any springs still attached; they can be under tension and pose a risk if released suddenly. Spring removal is a critical safety step. Use a spring puller tool, or a sturdy flathead screwdriver or pry bar, to carefully detach each spring from the frame and the mat. Work your way around the trampoline, releasing springs gradually. Once all springs are removed, the mat will be loose and can be lifted or rolled away. Finally, dismantle the main frame. Trampoline frames are usually held together by interlocking sections or bolts. Loosen and remove these, labeling any parts if you anticipate reassembling them for structural support later. Clean all components thoroughly. Remove any dirt, debris, rust, or old mat material. This cleaning process ensures a solid foundation for your new greenhouse. Safety is key during this stage; wear gloves to protect your hands from sharp edges and consider safety glasses.
Selecting Your Greenhouse Covering Material
The choice of covering material is crucial for a successful greenhouse, influencing light transmission, insulation, and durability. Several effective options exist for a trampoline conversion. Polyethylene greenhouse film, specifically UV-treated and greenhouse-grade, is a popular and cost-effective choice. It’s lightweight, easy to handle, and offers good light diffusion, which is beneficial for young plants. Look for films with a thickness of 6-mil or higher for better durability. Another excellent option is polycarbonate sheeting. These rigid panels are more expensive but offer superior insulation, impact resistance, and a longer lifespan. They come in twin-wall or multi-wall options, providing excellent insulation through trapped air pockets. For a more temporary or budget-friendly solution, greenhouse-grade tarps or even heavy-duty shower curtains can be used, though their longevity and insulation properties will be significantly less. Bubble wrap, particularly the larger bubble variety, can also be an effective insulating layer, especially for the roof, but it obstructs light more than other options. The ideal material will balance cost, ease of installation, light penetration, and insulation properties based on your climate and specific gardening needs. Consider the long-term maintenance requirements and the expected lifespan of each material.
Frame Reinforcement and Modification
While the trampoline frame provides a pre-existing structure, it may require reinforcement or modification to support the greenhouse covering and withstand weather elements. Inspect the frame for any weak points, especially at joints or where rust has occurred. For round trampolines, the circular frame can be a solid base, but additional horizontal or diagonal bracing might be beneficial to prevent flexing under the weight of the covering or wind loads. If you’ve opted for polycarbonate panels, the frame needs to be robust enough to support their weight. Consider adding extra crossbars or diagonal supports using PVC pipes or metal conduit, attached securely with clamps or bolts. For securing the covering, creating attachment points is essential. Drill small holes along the frame members and use zip ties, screws with washers, or specialized greenhouse clips to fasten the material. If your trampoline frame has upright poles from the safety net, these can be excellent anchor points for the covering, especially when using a film. You might also consider adding a simple door frame using PVC pipes or lumber to create an access point. Ensure all added components are treated for rust or are made of weather-resistant materials like PVC or galvanized steel.
Constructing the Greenhouse Structure: Covering Installation
The installation of the greenhouse covering is a critical step that determines the functionality and longevity of your DIY structure. For polyethylene film, it’s best to work on a calm day to prevent the material from being blown around. Drape the film over the reinforced trampoline frame, ensuring it’s centered. Start by securing one edge to the frame, using clamps, staples, or screws with washers. Gradually pull the film taut and secure the opposite edge, working your way around the structure. Overlap any seams generously, and use greenhouse repair tape or more clamps to ensure a watertight seal. For polycarbonate panels, the installation process is more structured. You’ll likely need to create a more rigid frame that the panels can be attached to. Measure and cut the panels to size, accounting for any overlaps required for sealing. Use appropriate polycarbonate connectors or a sealant designed for polycarbonate to join panels. Secure the panels to the frame using specialized screws with rubber washers to prevent leaks and expansion damage. Ensure all edges are well-sealed to prevent drafts and water ingress. For door construction, create a frame from PVC pipes or lumber and attach a section of your chosen covering material. Hinges can be attached to the frame, and a simple latch mechanism will complete the door.
Ventilation Strategies for Your Trampoline Greenhouse
Proper ventilation is essential in any greenhouse to regulate temperature, humidity, and prevent fungal diseases. For a trampoline greenhouse, several simple ventilation strategies can be implemented. The most basic method is to create roll-up sides. For polyethylene film coverings, you can leave one or more edges unattached at the bottom and use a system of pulleys or simple ties to roll the sides up. This allows for significant airflow. If you’ve used polycarbonate panels, you can incorporate hinged windows. These can be constructed from smaller polycarbonate pieces or even sturdy plastic sheeting, mounted with hinges and secured with latches. For more advanced ventilation, consider installing small, manual vents at the top of the greenhouse to allow hot air to escape. Even a simple hinged panel that can be propped open can make a difference. Observe the temperature and humidity inside your greenhouse and adjust the ventilation accordingly. On hot days, you’ll need more airflow, while on cooler days, you may want to close vents to retain heat. Combining passive ventilation (like roll-up sides) with more controlled openings (like hinged vents) provides the most effective temperature and humidity management.
Ground Preparation and Floor Construction
The ground surface within your trampoline greenhouse needs careful consideration for optimal plant growth and drainage. While you can plant directly into the ground if the trampoline is placed on bare earth, it’s often beneficial to prepare the area. Clear the ground of any weeds, rocks, or debris. For improved drainage and to prevent soil compaction, consider laying down a layer of gravel or coarse sand. Alternatively, you can create raised beds using lumber or salvaged materials. These beds will contain your soil, improve drainage, and make it easier to manage your plants. If you plan to use containers or seed starting trays exclusively, you might opt for a permeable weed barrier fabric as a base layer. This prevents weed growth while allowing excess water to drain away. Avoid using solid plastic sheeting directly on the ground, as this can lead to waterlogged conditions. For a more robust and easily cleaned floor, consider laying down interlocking rubber mats or paving stones, ensuring there are still gaps for drainage. The choice of floor construction will depend on your budget, the type of plants you intend to grow, and the desired level of maintenance.
Sealing and Weatherproofing Your Greenhouse
Effective sealing is crucial to maximize heat retention and prevent drafts, ensuring your trampoline greenhouse functions effectively, especially in cooler seasons. Once the main covering is installed, meticulously inspect all seams, edges, and attachment points. Use greenhouse tape, silicone sealant, or caulk specifically designed for outdoor use to seal any gaps or potential entry points for air and water. Pay close attention to where the covering meets the trampoline frame and any support structures. For polyethylene film, overlapping seams generously and securing them with tape or clamps is the primary method of sealing. If you’ve used polycarbonate panels, ensure the joining strips and edge caps are properly installed and sealed with appropriate polycarbonate sealant. For door and vent openings, ensure a snug fit when closed and use weather stripping to create a tighter seal. Consider reinforcing corners and high-stress areas with additional tape or sealant. Even small gaps can significantly impact the internal temperature and humidity, so thoroughness is key. Regularly inspect your greenhouse for any new leaks or openings and address them promptly to maintain its effectiveness.
Optimizing Light and Temperature for Plant Growth
Maximizing natural light and maintaining optimal temperatures are key to a successful greenhouse. The choice of covering material significantly impacts light transmission. UV-treated polyethylene film offers excellent light diffusion, which is beneficial for seedlings. Polycarbonate panels also allow ample light, with multi-wall options offering a good balance of light and insulation. Position your trampoline greenhouse in a location that receives ample sunlight, ideally 6-8 hours of direct sunlight per day, facing south if possible in the Northern Hemisphere. Observe how sunlight falls on the structure throughout the day and make adjustments to the covering if necessary to avoid excessive shading. For temperature regulation, ventilation is paramount. On sunny days, even in cooler weather, the greenhouse can heat up rapidly. Utilize your ventilation systems to prevent overheating. On colder nights, close vents and doors to trap heat. Consider using a thermometer inside the greenhouse to monitor temperature fluctuations. For added insulation on colder nights, you can temporarily cover the exterior with bubble wrap or blankets, removing them in the morning to allow sunlight in. Mulching the soil within the greenhouse can also help retain soil temperature.
Extending the Growing Season and Seed Starting
The primary benefits of a trampoline greenhouse lie in its ability to extend the growing season and provide an ideal environment for seed starting. By creating a controlled microclimate, you can sow seeds earlier in the spring than you would outdoors, giving them a head start. This allows for a wider variety of crops and often leads to earlier harvests. Tender plants that are sensitive to frost can be transplanted into the greenhouse earlier, protected from late frosts. As the season progresses, the greenhouse will keep plants warmer for longer into the autumn, allowing you to harvest produce beyond the typical outdoor growing period. For seed starting, the consistent warmth and protection from harsh weather conditions significantly increase germination rates and promote healthy seedling development. The ability to control temperature and humidity also reduces the risk of damping-off disease, a common problem in seed starting. Experiment with different planting schedules to see how much you can extend your season, and enjoy the bounty of a longer growing period enabled by your repurposed trampoline.
Maintenance and Longevity Tips
To ensure your DIY trampoline greenhouse remains functional and lasts for multiple growing seasons, regular maintenance is essential. Periodically inspect the frame for any signs of rust or structural weakness. Address any rust spots immediately by cleaning and applying a rust-inhibiting paint or sealant. Check the greenhouse covering for any tears, punctures, or loose attachments. Repair small tears with greenhouse repair tape. Re-secure any loose sections of the covering as needed. Clean the covering material annually, or more frequently if it becomes dirty, as accumulated dirt can reduce light transmission. Use mild soap and water, avoiding abrasive cleaners that could damage the material. Ensure ventilation systems are functioning correctly and clear any debris that may obstruct airflow. Check all seals and weatherproofing periodically and reapply sealant as needed. If you live in an area with harsh winters, consider how you will manage the greenhouse during the off-season. For extremely heavy snow loads, it might be advisable to temporarily dismantle or reinforce the structure to prevent damage. By investing a small amount of time in regular maintenance, you can significantly prolong the life of your trampoline greenhouse.
