Fancy Chocolate Tricks: Elevate Your Dessert Game
Fancy chocolate tricks aren’t just for professional pastry chefs. With a little practice and the right techniques, you can transform ordinary chocolate into stunning edible masterpieces. Whether you’re a seasoned baker or a curious beginner, this guide will equip you with the skills and knowledge to create intricate chocolate designs, decadent fillings, and captivating presentations.
From mastering the art of tempering chocolate to exploring creative molding techniques, we’ll delve into the world of chocolate artistry, uncovering secrets that will elevate your dessert game. Prepare to be amazed as we unveil the hidden potential of this beloved ingredient, unlocking a world of possibilities for crafting extraordinary chocolate creations.
The Art of Chocolate Tempering

Chocolate tempering is a crucial step in chocolate making, transforming it from a simple ingredient into a beautiful, smooth, and glossy treat. Tempering involves carefully controlling the temperature of the chocolate, creating a stable crystal structure that results in a desirable texture and appearance.
Understanding the Importance of Chocolate Tempering
Tempering chocolate is essential for achieving a smooth, glossy finish and a satisfying snap when broken. Unttempered chocolate, when cooled, will form unstable crystals that result in a dull, grayish surface and a soft, grainy texture. It is also prone to “blooming,” a phenomenon where white streaks or patches appear on the surface, making the chocolate less appealing.
Comparing Tempering Methods
Tempering methods aim to achieve a specific ratio of stable beta crystals, the ideal crystal structure for smooth, glossy chocolate. Here are three common methods:
Seeding Method
The seeding method involves adding a small amount of already tempered chocolate (the seed) to a larger amount of melted chocolate. This seed acts as a template, guiding the formation of stable crystals.
- Melt the chocolate to a specific temperature, typically 115-120°F (46-49°C).
- Cool the chocolate to 88-90°F (31-32°C) and add the tempered seed chocolate, stirring constantly.
- Reheat the mixture to 91-93°F (33-34°C) for dark chocolate or 92-94°F (33-34°C) for milk chocolate.
Tabling Method
The tabling method involves spreading melted chocolate on a cool surface, like a marble slab, to encourage the formation of stable crystals.
- Melt the chocolate to 115-120°F (46-49°C).
- Spread a thin layer of chocolate on the cool surface, allowing it to cool and solidify.
- Scrape the cooled chocolate back into the melted chocolate, repeating the process until the desired temperature is reached.
Using a Tempering Machine
Tempering machines offer a more precise and consistent way to temper chocolate. They use a combination of heating and cooling elements to control the chocolate’s temperature, ensuring a stable crystal structure.
- Melt the chocolate according to the machine’s instructions.
- The machine will guide you through the tempering process, automatically adjusting the temperature and stirring the chocolate.
Decorative Chocolate Techniques: Fancy Chocolate Tricks
Chocolate, a beloved indulgence, can be transformed into a canvas for artistry. Beyond its smooth texture and rich flavor, decorative techniques elevate chocolate to a new level, turning it into a stunning visual masterpiece.
Techniques for Enhancing Chocolate
The beauty of decorative chocolate lies in its versatility. Various techniques, each with its unique charm, can be used to enhance plain chocolate.
Stencils
Stencils are a simple yet effective way to create intricate designs on chocolate. They are thin, often plastic or metal sheets with cut-out patterns. To use a stencil, simply place it on top of a chocolate surface and dust it with cocoa powder, powdered sugar, or edible glitter.
Remove the stencil to reveal the design.
Fancy chocolate tricks are all about adding that extra touch of elegance, and sometimes, a little bit of creativity goes a long way. This year, I’m thinking of giving my neighbors some homemade cookie dough as a holiday treat, inspired by the great ideas I found in this article on 5 neighbor christmas gift idea cookie dough.
The perfect way to add a little extra flair to the dough? A drizzle of melted chocolate, a sprinkle of sea salt, or maybe even a few chopped nuts. It’s all about the details!
Piping
Piping allows for more intricate and detailed designs. Melted chocolate is placed in a piping bag fitted with a nozzle. The chocolate is then squeezed through the nozzle to create lines, swirls, and other shapes. Different nozzle shapes can be used to create various designs.
Edible Paints
Edible paints offer a vibrant and versatile way to color chocolate. They come in various colors and can be applied with a brush or airbrush. Edible paints can be used to create intricate details, add accents to designs, or create a full-color masterpiece.
Step-by-Step Guide for Creating a Marbled Chocolate Bar, Fancy chocolate tricks
This guide will show you how to create a visually stunning marbled chocolate bar.
1. Prepare the Chocolate
You know those fancy chocolate tricks, like the ones where they make intricate designs with a piping bag? It reminds me of that hilarious Price is Right blooper where the contestant completely missed the target with a pie! Maybe I should try some of those chocolate tricks myself, but I’ll probably end up looking like a pie-throwing contestant.
Melt different colored chocolates separately. For example, use white chocolate, milk chocolate, and dark chocolate.
2. Combine the Colors
Pour the melted chocolates into a bowl, layering them in different colors. For example, start with white chocolate at the bottom, followed by milk chocolate, and then dark chocolate.
3. Marble the Chocolate
Using a toothpick or a skewer, gently swirl the colors together. Do not overmix, as you want to create a marbled effect.
4. Pour into a Mold
I love trying out fancy chocolate tricks, like tempering and making intricate molds. It’s so satisfying to see the finished product, and it’s always a hit with friends and family. But sometimes, I get stuck on what to give my neighbors for Christmas.
If you’re feeling the same way, check out this awesome list of 34 neighbor Christmas gift ideas – it’s full of inspiration! Once I have my gifts sorted, I can get back to experimenting with more chocolate creations.
Pour the marbled chocolate into a mold. A rectangular mold is ideal for a traditional chocolate bar.
5. Cool and Set
Place the mold in the refrigerator to cool and set. Once the chocolate is solid, remove it from the mold.
Decorative Elements in Chocolate Artistry
The beauty of chocolate artistry lies in its versatility. Various decorative elements can be used to add a touch of elegance and sophistication to chocolate creations.
Edible Glitter
Edible glitter adds a touch of sparkle and shimmer to chocolate. It comes in various colors and can be sprinkled on chocolate surfaces or used to create intricate designs.
Sprinkles
Sprinkles add a playful and colorful touch to chocolate. They come in various shapes, sizes, and colors and can be sprinkled on chocolate surfaces or used to create designs.
Chocolate Transfers
Chocolate transfers are thin sheets of edible chocolate that can be used to transfer designs onto chocolate surfaces. They are typically printed with edible ink and can be used to create intricate patterns and logos.
Chocolate Encapsulation and Filling

Encapsulating fillings within chocolate shells is a delightful and intricate art that elevates chocolate creations to new heights. This technique allows for the creation of exquisite bonbons, pralines, and other chocolate delights that offer a symphony of flavors and textures.
Creating Chocolate Shells
Creating chocolate shells is the foundation of encapsulation. The process involves melting chocolate, tempering it to achieve the desired shine and snap, and then pouring it into molds or shaping it by hand. The choice of mold or hand shaping depends on the desired shape and size of the chocolate shell.
Molds offer precise and consistent shapes, while hand shaping allows for greater creativity and personalization.
- Molds: Chocolate molds come in a wide variety of shapes, sizes, and designs, from classic round and square to intricate floral and geometric patterns. When using molds, ensure they are clean and dry before pouring the tempered chocolate. Pour the chocolate into the molds, gently tapping them to remove air bubbles and ensure even distribution.
Allow the chocolate to set in a cool, dry place, typically at room temperature or in a refrigerator.
- Hand Shaping: Hand shaping involves using a spoon, spatula, or piping bag to create the desired shape. This technique requires a bit more practice and dexterity, but it allows for greater control and customization. Start by creating a thin layer of chocolate on a flat surface, such as a parchment paper-lined baking sheet.
Then, use a spoon or spatula to shape the chocolate into the desired form. Alternatively, a piping bag can be used to create intricate designs and shapes.
Filling Chocolate Shells
Once the chocolate shells have set, they are ready to be filled with a variety of delicious fillings.
- Ganache: Ganache is a classic chocolate filling made with chocolate and cream. It can be flavored with various ingredients, such as coffee, spices, or fruit purees. To fill chocolate shells with ganache, use a piping bag or a spoon to gently fill the shells, leaving a small space at the top for sealing.
- Praline: Praline is a crunchy filling made with nuts and sugar. It can be made with a variety of nuts, including almonds, hazelnuts, and pecans. To fill chocolate shells with praline, use a spoon or a piping bag to fill the shells, ensuring the praline is evenly distributed.
- Fruit: Fresh or dried fruits can be used to create flavorful and refreshing chocolate fillings. For fresh fruit fillings, choose fruits that are firm and have a good flavor. For dried fruit fillings, rehydrate the fruit before filling the shells.
Place the fruit in the center of the chocolate shell, ensuring it is not too close to the edges.
Sealing Chocolate Shells
After filling the chocolate shells, it is essential to seal them properly to prevent the filling from leaking out.
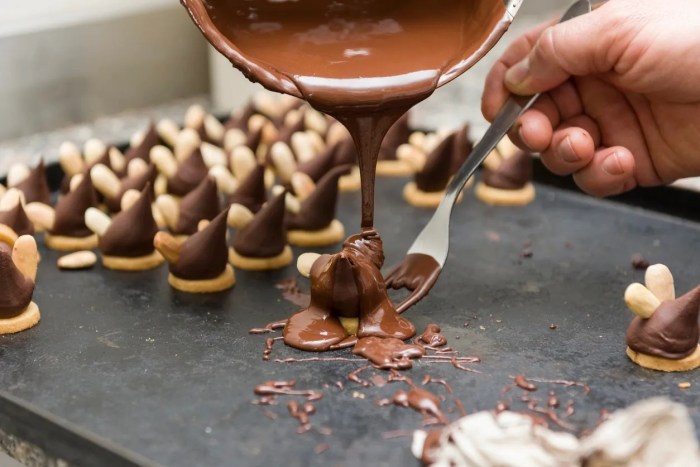
- Melting Chocolate: A small amount of tempered chocolate can be used to seal the shells. Dip the top of the filled shell in the tempered chocolate, ensuring the edges are fully sealed. Alternatively, a small amount of melted chocolate can be applied to the edges of the shell using a brush or a toothpick.
- Decorative Sealing: For a more decorative seal, use a piping bag to create a decorative border around the top of the filled shell. Alternatively, a small piece of chocolate can be placed on top of the filling and melted slightly to create a smooth seal.
Tips for Achieving a Smooth Finish
To achieve a smooth, consistent finish on chocolate shells, it is essential to temper the chocolate properly and to use the right techniques for pouring and shaping.
- Tempering Chocolate: Tempering chocolate is crucial for achieving a smooth, glossy finish and a crisp snap. This process involves heating and cooling the chocolate to specific temperatures to create a stable crystal structure.
- Pouring Technique: When pouring chocolate into molds, ensure the chocolate is poured evenly and without air bubbles. Gently tap the molds to remove any air bubbles and ensure the chocolate settles evenly.
- Smoothing the Surface: If any imperfections appear on the surface of the chocolate shell, they can be smoothed out using a warm spatula or a finger dipped in warm water. Work quickly and gently to avoid melting the chocolate.
Ensuring Proper Filling Ratios
The filling ratio is crucial for creating a balanced and enjoyable chocolate experience. The ratio of filling to chocolate should be carefully considered, ensuring that the filling is not too much or too little.
- Ganache: For ganache fillings, a good rule of thumb is to fill the shell about 75% full. This allows for the ganache to set properly and for the chocolate shell to retain its shape.
- Praline: For praline fillings, a slightly higher filling ratio of 80-85% is recommended. This ensures a generous amount of praline and a satisfying crunch.
- Fruit: For fruit fillings, the filling ratio will vary depending on the size and type of fruit. Use a filling ratio that allows the fruit to be fully enveloped by the chocolate shell without overflowing.
Chocolate Presentation and Packaging

The final touch to any delicious chocolate creation is its presentation and packaging. It’s not just about containing the chocolates; it’s about creating an experience that enhances their appeal and elevates the enjoyment. A thoughtfully designed presentation can transform ordinary chocolates into extraordinary gifts, capturing attention and leaving a lasting impression.
Presentation Ideas
Presentation is the art of showcasing your chocolates in a way that highlights their beauty and invites indulgence. Here are some ideas for creating captivating displays:
- Themed Chocolate Arrangements: Align chocolates with a specific theme, like a holiday, season, or event. For example, a Valentine’s Day arrangement might feature heart-shaped chocolates, while a summer celebration could incorporate vibrant colors and tropical fruit flavors.
- Tiered Stands: Tiered stands add visual interest and create a sense of grandeur. They are particularly effective for showcasing a variety of chocolates, allowing each piece to be seen and appreciated.
- Personalized Gift Boxes: Customized boxes allow for a personal touch. These can be adorned with the recipient’s name, a special message, or a design that reflects the occasion.
Packaging Options
Packaging is the protective shell that encases your chocolates and conveys their quality and value. Here are some common packaging options:
- Elegant Boxes: Boxes made of high-quality materials like cardboard, wood, or metal convey a sense of luxury and sophistication. They can be adorned with ribbons, bows, or other decorative elements to enhance their visual appeal.
- Trays: Trays are ideal for showcasing multiple chocolates, offering a practical and visually pleasing way to present a selection. They can be made from various materials like plastic, metal, or wood, and can be customized with different designs and colors.
- Decorative Wrappers: Individually wrapped chocolates add a touch of elegance and provide protection. Wrappers can be made from paper, foil, or cellophane, and can be printed with designs, logos, or special messages.
Branding and Marketing
Branding and marketing are essential for creating a memorable chocolate experience. A strong brand identity helps to establish your chocolates as unique and desirable. Here are some key considerations:
- Logo Design: A visually appealing logo is the foundation of your brand. It should be memorable, relevant to your chocolate offerings, and easily recognizable.
- Packaging Design: The packaging should reflect your brand’s personality and appeal to your target audience. It should be visually appealing, functional, and convey the quality of your chocolates.
- Marketing Strategies: Effective marketing strategies help to reach your target audience and create awareness of your brand. This might include social media campaigns, online advertising, or participation in food festivals and events.