
These Animals Became Unlikely Friends 2
The Unlikely Kinship: When Nature Defies Expectations and Forges Remarkable Friendships
The animal kingdom is a vast tapestry of predator and prey, competition and cooperation, and seemingly insurmountable biological divides. Yet, within this intricate web of life, instances arise that challenge our preconceived notions of natural order and reveal the astonishing capacity for connection. These are the stories of unlikely friendships, where species that evolution has seemingly placed at odds discover bonds of trust, affection, and mutual dependence. While these occurrences are rare and often fleeting, they offer profound insights into the complex social dynamics of animals and the surprising plasticity of their behavior. This article delves into the phenomenon of these unexpected alliances, exploring the driving forces behind them, the observable behaviors that characterize them, and the scientific understanding that attempts to unravel their mysteries. We will examine specific, well-documented cases, dissecting the circumstances that might have fostered such unusual relationships and the benefits, if any, that each individual species derives from the association. The very existence of these interspecies friendships serves as a powerful reminder that even in the face of biological imperatives, the capacity for connection can transcend ingrained instincts.
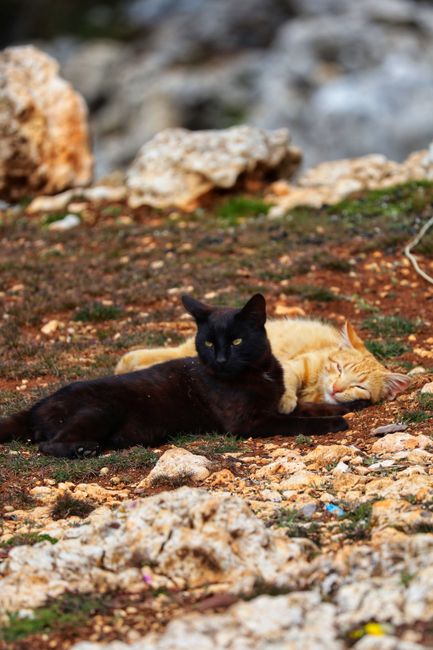
One of the most compelling and frequently cited examples of an unlikely animal friendship involves canids and felids, a pairing that typically evokes images of eternal animosity. The legendary friendship between a pit bull named Buster and a bobcat named Pip, documented extensively by wildlife photographer Mark Dumas, captivated the public imagination. Buster, a former fighting dog, was introduced to Pip, a rescued bobcat kitten, when they were both very young. Raised together under the care of Dumas, the two animals developed a remarkable bond. Photographs and videos showcased them playing, grooming each other, and sleeping curled up together. This wasn’t merely a tolerance of each other’s presence; it was an active and affectionate relationship. Buster, despite his breed’s reputation, displayed incredible gentleness towards Pip, and Pip, in turn, showed no fear or aggression towards the much larger canine. The success of this pairing is often attributed to early socialization. By introducing them at a formative age, before their natural predatory and prey instincts fully solidified, the animals were able to imprint on each other as companions rather than threats. This highlights a crucial factor in many unlikely friendships: the absence of ingrained fear and the presence of early, positive social exposure. The fact that a wild animal like a bobcat, with its inherent predatory drive, could form such a strong bond with a domestic dog underscores the influence of environment and upbringing on animal behavior.
Another extraordinary example involves the unlikely camaraderie between an elephant and a dog. The story of Timba, an orphaned elephant calf, and her canine companion, a stray dog, gained international attention. Timba was rescued and brought to a sanctuary where she was initially distressed and lonely. A brave stray dog, seemingly drawn by the elephant’s plight or perhaps seeking companionship itself, began to visit Timba. Over time, the dog became a constant presence, playing with the young elephant, nuzzling her, and offering a source of comfort. The visual of the massive elephant gently interacting with the small dog was striking and heartwarming. This particular friendship suggests that proximity and repeated positive interactions can overcome species barriers. The dog’s consistent, non-threatening presence likely provided Timba with a sense of security and companionship, alleviating her isolation. For the dog, the association with the elephant might have offered a safe haven, protection from other animals, or simply a novel and engaging relationship. This case emphasizes the role of individual personalities and serendipitous encounters in forging these unique bonds.
The aquatic realm also offers remarkable instances of interspecies friendships. One well-documented case involves a dolphin and a shark. While sharks are apex predators and dolphins are highly social and intelligent marine mammals, there have been reports of dolphins forming associations with sharks, sometimes to the point of mutual protection. In one notable instance, a lone dolphin named “Fred” was observed for years interacting amicably with a bull shark. The dolphin would often swim alongside the shark, and at times, they appeared to be playing. While the exact nature of this relationship is debated, some researchers hypothesize that the dolphin might have been using the shark’s intimidating presence as a form of defense against other predators, such as killer whales. Conversely, the shark might have benefited from the dolphin’s agility and intelligence in locating prey or navigating the waters. This scenario points to potential mutualistic benefits, where both species gain something tangible from the association, even if it’s not immediately obvious. It also highlights the adaptability of animal behavior in response to changing environmental pressures or the availability of specific social partners.
Beyond mammals, interspecies friendships can extend to birds and reptiles. The story of a parrot named Alex and a cat named Mittens, who were kept in the same household, is a testament to the possibility of cross-species affection in domestic settings. These two creatures, inherently different in their biological makeup and usual social circles, developed a strong bond. They were often seen interacting peacefully, with the parrot perching on the cat’s back or head, and the cat appearing to tolerate or even enjoy the parrot’s presence. This type of friendship in a captive environment often stems from constant exposure and the absence of stressors that might otherwise trigger predatory or defensive behaviors. The humans involved play a crucial role in facilitating these interactions and ensuring the safety and well-being of both animals. The success of such pairings within homes suggests that domestication and a controlled environment can significantly alter natural behavioral patterns and foster unexpected connections.
The scientific community grapples with understanding the underlying mechanisms that enable these unlikely friendships. Several theories are proposed, often revolving around a combination of factors. Early socialization and imprinting are paramount. When animals are introduced at a young age and have consistent, positive interactions, they are more likely to view each other as kin or non-threatening companions. This is especially true for species that are naturally inclined towards social behavior, like elephants and dolphins. The absence of fear and learned aggression also plays a significant role. If an animal has no prior negative experiences with another species and is consistently exposed to them in a safe context, ingrained predatory or defensive instincts may not be triggered. Mutual benefit, whether direct or indirect, can also be a driving force. This could range from increased safety through shared defense against predators to assistance in finding food. In some cases, the bond may be driven by novelty and curiosity. Animals are intelligent creatures, and the unique stimulus of interacting with a different species might be intrinsically rewarding. Furthermore, individual personality traits cannot be overlooked. Just as humans have different temperaments, so too do animals. Some individuals may be more open, tolerant, and amenable to forming unusual bonds than others.
The role of hormones and neurochemicals is also being explored. While direct studies on interspecies friendships are limited, research on social bonding in single-species interactions reveals the importance of oxytocin, often referred to as the "love hormone," in promoting trust and affection. It’s plausible that similar neurochemical pathways are activated during these cross-species interactions, fostering a sense of connection.
The context and environment in which these friendships develop are critical. Sanctuaries, rescue centers, and even well-managed private homes provide controlled environments where these unusual pairings are more likely to occur and thrive. In the wild, these situations are rarer and often more transient, influenced by the immediate needs for survival and the dynamic nature of predator-prey relationships.
The study of unlikely animal friendships is not merely anecdotal; it provides valuable insights into animal cognition, social behavior, and the complex interplay between genetics and environment. These extraordinary bonds challenge our anthropocentric view of the animal kingdom and reveal a deeper, more nuanced understanding of life’s capacity for connection. They serve as powerful reminders that the boundaries we perceive between species are often more fluid and permeable than we might imagine, and that even in the wild, compassion and companionship can bloom in the most unexpected of places. The ongoing observation and documentation of such phenomena continue to enrich our knowledge and inspire awe at the remarkable diversity and adaptability of the natural world. Ultimately, these stories highlight the universal drive for connection and the surprising ways in which it can manifest, even across the most profound biological divides.
