
How To Make A Ribbon Balloon
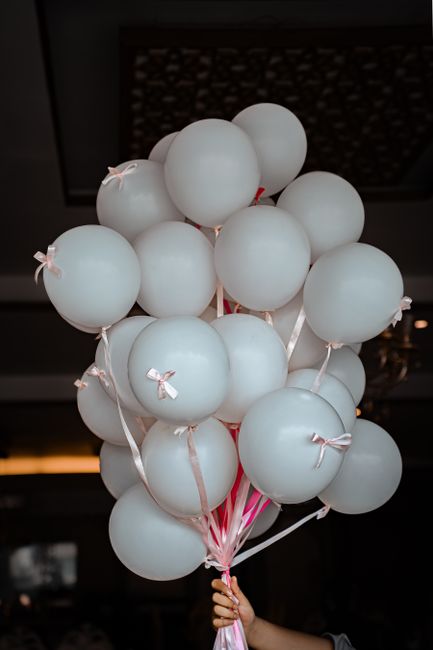
Mastering the Art of Ribbon Balloons: A Comprehensive SEO-Friendly Guide
Creating a ribbon balloon, often referred to as a "curly bow balloon" or a "decorated balloon," involves a two-step process: preparing the balloon and then meticulously crafting and attaching the ribbon. This guide will walk you through every stage, from selecting the right materials to achieving a professional, eye-catching finish. The primary goal is to enhance the visual appeal of standard balloons, transforming them into decorative centerpieces for parties, events, or even everyday celebrations. Understanding the principles of balloon inflation, ribbon manipulation, and secure attachment is crucial for success.
The foundation of any ribbon balloon lies in the balloon itself. The type of balloon chosen will significantly impact the final aesthetic and durability. Latex balloons are the most common and versatile option. They are readily available in a vast array of colors, sizes, and finishes, including standard, metallic, and pearlized. For a ribbon balloon, standard 11-inch latex balloons are generally ideal. Their size offers a good canvas for decoration without being overwhelmingly large, and they are easy to inflate and handle. Consider the event’s theme and color palette when selecting balloon colors. For more sophisticated events, metallic or pearlized finishes can add a touch of elegance. Mylar (foil) balloons are another option, particularly for special occasions. They hold helium for much longer than latex and come in pre-printed designs or in solid colors. However, their smooth, non-porous surface can make it slightly more challenging for some adhesives to bond effectively if you plan to attach embellishments beyond just ribbon. When working with Mylar, ensure the ribbon is securely taped or tied to the inflation valve or existing ribbon loop. For the purpose of this guide focusing on the "curly ribbon" effect, latex balloons are the primary material.
Inflation is a critical step that requires careful attention to detail. Overinflating a balloon can lead to popping, while underinflating results in a deflated, unappealing shape. For latex balloons, it is recommended to use a hand pump or an electric balloon inflator. If using helium, ensure you have a dedicated helium tank with a regulator. For standard 11-inch latex balloons, aim to inflate them to approximately 9-10 inches in diameter. A simple way to gauge this is to inflate the balloon until it feels firm but still has a slight give when gently squeezed. Alternatively, many balloon inflator nozzles have a measuring guide. For those using helium, overfilling can cause the balloon to be top-heavy and difficult to float properly, while underfilling will reduce its buoyancy and float time. The neck of the balloon should be long enough to tie securely after inflation. After inflating, twist the neck tightly several times to prevent air or helium from escaping. Hold the twisted neck firmly between your thumb and index finger, and then tie a strong knot. A double knot is recommended for added security. If using helium, a ribbon should be tied to the knotted neck immediately to prevent it from floating away.
The defining element of a ribbon balloon is, of course, the ribbon itself. The type and width of the ribbon play a significant role in the overall look. Satin ribbon, grosgrain ribbon, and curling ribbon are the most popular choices. Curling ribbon, specifically designed for gift wrapping, is exceptionally easy to curl and creates the signature wispy, cascading effect. It is lightweight and comes in a vast array of vibrant colors and patterns. Satin ribbon offers a more luxurious and sleek appearance, with a subtle sheen. It can also be curled, but it requires a slightly different technique. Grosgrain ribbon has a ribbed texture and is more durable, making it a good choice if you want a more structured or substantial bow. For the classic curly balloon effect, curling ribbon is the easiest and most effective. The width of the ribbon is also a consideration. For standard 11-inch balloons, ribbons that are ½ inch to 1 inch wide are generally proportionate. Wider ribbons can overwhelm smaller balloons, while very narrow ribbons might get lost. The length of ribbon needed will vary depending on how many curls you desire and how you plan to attach it. A good starting point is to cut a piece of ribbon that is approximately 3 to 4 times the desired finished length of your ribbon decoration. For example, if you want the ribbon to cascade about 2 feet, cut a piece of ribbon around 6 to 8 feet long.
Crafting the characteristic curls on the ribbon is where the magic happens. For curling ribbon, the technique is straightforward. Hold the ribbon taut with one hand. With the other hand, take a pair of scissors (a dull blade works best for curling) and firmly press the flat side of the blade against the ribbon. Run the scissors quickly along the length of the ribbon, from one end to the other. Apply consistent pressure as you pull. Repeat this process along the entire length of the ribbon, or at intervals, depending on the desired curl density. You can achieve tighter curls by applying more pressure or by running the scissors over the ribbon multiple times. For a more varied look, you can curl different sections of the ribbon with varying degrees of pressure. If using satin or grosgrain ribbon, you can still achieve curls, but it’s a slightly different process. You can try gently bending and creasing the ribbon, or using a curling wand or iron on a low setting (with caution, as some synthetic ribbons can melt). For the classic, effortless look, curling ribbon is highly recommended. Experiment with different speeds and pressures to find the curl style you prefer.
Attaching the ribbon to the balloon is the final, crucial step. There are several methods for securing the ribbon. The most common and simplest method is to tie the ribbon directly to the balloon’s knot. After tying the balloon, use the end of your prepared curly ribbon to tie a secure knot around the balloon’s neck, over the existing knot. Ensure the knot is tight enough to prevent the ribbon from slipping off. You can then let the curled ribbon cascade down. For added security, especially if the balloon will be handled or moved frequently, you can use a small piece of double-sided tape or a glue dot. Apply a small piece of tape or a glue dot to the balloon’s surface, just below the knot, and press the beginning of your ribbon securely onto it. This provides an extra anchor point. If you are creating a more elaborate bow or attaching multiple ribbons, you might consider using floral wire or a small zip tie to secure the ribbon to the balloon neck before tying it off. For Mylar balloons, it’s best to tie the ribbon securely to the inflation valve or any existing ribbon loop. If no loop is present, tape the ribbon securely to the back of the balloon, near the top.
To create a multi-layered or fuller ribbon effect, you can attach multiple pieces of ribbon. Prepare several lengths of ribbon, curling each one individually. Then, gather all the curled ribbons together at one end and tie them securely as a single unit. This bundle can then be attached to the balloon as described above. Another technique is to attach individual ribbons at slightly different heights or angles around the balloon’s neck. This creates a more voluminous and dynamic appearance. For a truly spectacular ribbon balloon, consider incorporating different ribbon textures and colors within the same decoration. For instance, combine curling ribbon with a few strands of metallic ribbon for added sparkle. Experiment with attaching ribbons of varying lengths to create a cascading waterfall effect. You can also create a more structured bow by folding and looping sections of ribbon before attaching it.
Beyond simple curling, advanced ribbon manipulation can elevate your ribbon balloons. For a fuller, more traditional bow, you can create loops and tails with wider satin or grosgrain ribbons. Fold the ribbon back and forth to create loops, securing them in the center with a twist tie or a piece of floral wire. Then, attach these loops to the balloon. You can also create elaborate streamers by cutting the ribbon into different lengths and attaching them at varying intervals around the balloon. Another creative approach is to weave the ribbon through the balloon’s neck before tying it, creating a more integrated look. For Mylar balloons, consider wrapping the ribbon around the balloon’s body and securing it with tape or glue dots, creating a striped or patterned effect. You can also attach embellishments like glitter, small charms, or even LED lights to the ribbon for added visual interest.
Properly securing the ribbon is paramount to its longevity. A loose ribbon can detach, diminishing the visual impact. For helium-filled balloons, the weight of the ribbon can affect buoyancy. If you are using a significant amount of ribbon or heavier ribbon materials, consider using a slightly larger balloon or ensuring it’s adequately inflated. For latex balloons, the inherent stickiness of the latex can sometimes help the ribbon adhere, but a secure knot is always the primary anchor. Double-checking that the knot is tight and that there are no slipping points is essential. If the balloon is intended to be handled by children, ensure all knots are secure and that no small parts of embellishments can be easily detached and pose a choking hazard.
The versatility of ribbon balloons makes them suitable for a wide range of occasions. For birthdays, use brightly colored curling ribbons and perhaps a themed Mylar balloon. For weddings, elegant satin ribbons in white, ivory, or pastel shades create a sophisticated ambiance. Baby showers can feature soft pastel ribbons and balloons in animal shapes. Corporate events can utilize branded ribbon colors to reinforce company identity. Even a simple get-together can be enhanced with a few well-placed ribbon balloons. Consider the overall décor and theme when choosing your ribbon and balloon colors and styles. For outdoor events, be mindful of wind, which can tangle ribbons. Securing the balloon’s string to a weighted base is crucial.
Troubleshooting common issues with ribbon balloons is part of the learning process. If your ribbon won’t curl, ensure you are using a suitable type of ribbon (curling ribbon is best) and applying enough pressure with the scissors. If the ribbon keeps slipping off the balloon, ensure your knot is tight and consider adding a piece of double-sided tape for extra grip. If the balloon is deflating too quickly, check the knot for any leaks or consider using a higher quality balloon or a sealant. For helium balloons that aren’t floating well, ensure they are not overinflated or that the ribbon isn’t too heavy. If the ribbon tangles excessively, try using shorter lengths or consider a different curling technique. Patience and practice are key to mastering these techniques.
In conclusion, creating a ribbon balloon is an accessible yet impactful decorating technique. By understanding the nuances of balloon selection and inflation, mastering ribbon curling and attachment, and exploring creative embellishment possibilities, you can transform simple balloons into captivating decorative elements. The principles outlined in this guide provide a solid foundation for creating visually appealing and durable ribbon balloons for any event, enhancing the festive atmosphere and leaving a lasting impression. Consistent practice will refine your skills and allow for even more intricate and personalized designs.
