
20 Creative Pie Crimping Techniques In 120 Seconds 2
20 Creative Pie Crimping Techniques in 120 Seconds: Elevate Your Pastry Game
Mastering pie crimping is more than just sealing a crust; it’s an art form that transforms a delicious dessert into a visually stunning masterpiece. While speed is often associated with efficiency, the true value lies in understanding diverse techniques that offer both aesthetic appeal and structural integrity. This article delves into 20 creative pie crimping methods, achievable with practice in a timeframe that encourages exploration rather than rote memorization. The key is to develop muscle memory and a feel for the dough, allowing for swift and beautiful execution. Focus on a consistent dough consistency, slightly chilled but pliable. This will be your foundation for all these techniques, enabling you to adapt and experiment rapidly. Don’t be afraid to discard a poorly crimped edge; learning from mistakes is part of the process. The following techniques are presented with the understanding that a skilled baker can demonstrate several of them within the suggested 120-second window, showcasing versatility and artistry.
The Classic Fork Press: This foundational technique is the most accessible and widely recognized. Utilizing a standard dinner fork, press the tines firmly into the edge of the double-crust pie where the top and bottom crusts meet. Overlap each press slightly to create a scalloped or fluted edge. The spacing of the fork tines dictates the visual density of the crimp. For a quicker execution, use a wide-spaced fork or slightly lighter pressure. This method is excellent for beginners and provides a secure seal. It’s also adaptable; varying the angle of the fork can create a more pointed or rounded scallop. This is a staple for a reason: it’s reliable, attractive, and efficient once mastered. The key to speed here is a confident and consistent rhythm. Imagine the fork as an extension of your hand, applying even pressure with each pass.
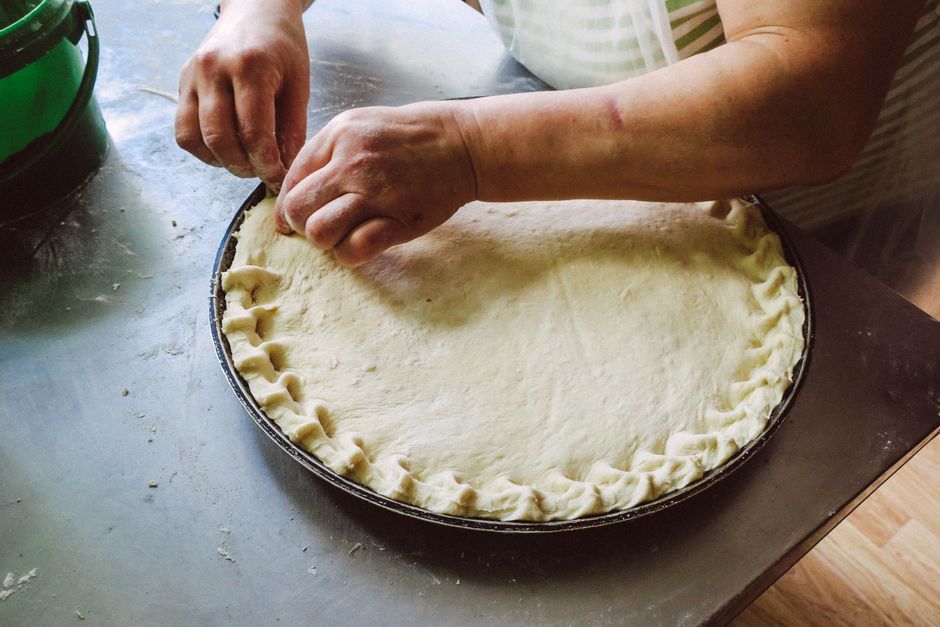
The Pinch and Tuck (Scallop): This is a hand-formed technique that offers a beautifully organic and rustic appearance. Pinch a small section of the pie crust edge between your thumb and forefinger. Then, tuck this pinched section inwards towards the center of the pie. Repeat this process around the entire circumference, overlapping each pinch slightly. The result is a series of rounded, petal-like indentations. For speed, practice making consistent pinches and tucks with a fluid motion. Avoid tearing the dough. This technique is particularly effective on fruit pies where a more natural, less uniform look is desired. The size of the pinch can vary, leading to larger, bolder scallops or more delicate, subtle ones. A slight twist of the wrist can add an interesting dimension to each tuck.
The Thumb and Forefinger Roll: Similar to the pinch and tuck, this technique involves using your thumb and forefinger. However, instead of a distinct pinch, you’ll gently roll the edge of the crust upwards and inwards between your fingers. Imagine you are slightly stretching and then folding the dough. This creates a smoother, more continuous wave-like crimp. The speed comes from a consistent rolling motion and smooth transitions between sections. This method yields a sophisticated and refined finish, perfect for elegant desserts. Experiment with the pressure and the angle of your fingers to control the height and roundness of the wave. A slight pull as you roll can create a more pronounced, almost rope-like effect.
The Twisted Rope: This striking technique involves twisting sections of the dough. Take a small section of the pie crust edge, divide it into two strands, and twist them together like a rope. Then, press this twisted rope onto the pie. Repeat around the edge. For speed, practice creating uniform twists and smooth integrations. This method adds a bold, decorative element and a satisfying texture. It’s visually impactful and offers a substantial barrier against filling leakage. The thickness of the strands you twist will affect the overall appearance; thicker strands create a bolder rope. Ensure the twists are firm enough to hold their shape during baking.
The Lattice Top Integration: While not a standalone crimp, the way a lattice top is attached to the bottom crust is a form of crimping. Weave the lattice strips over the filling and then press them firmly onto the bottom crust’s edge. For a decorative seal, you can then use a fork or your fingers to create additional crimps along the edge where the lattice meets the bottom crust, effectively merging them. This is about securing the lattice and creating a finished edge simultaneously. Speed here lies in efficiently pressing the lattice strips and then applying a quick, uniform crimp over the top.
The Finger-Rolled Waves: This is a variation of the thumb and forefinger roll, but it’s executed with more deliberate finger articulation. Use the pads of your index finger and thumb to create distinct, wave-like indentations. Press down with your thumb and then roll your index finger along the edge, creating a series of peaks and valleys. Practice a fluid, repetitive motion for speed. This technique creates a visually dynamic and beautifully textured crust. The size and depth of the waves can be easily controlled by adjusting finger pressure and placement.
The Fluted Edge (Knife): This technique utilizes the back (blunt side) of a knife or a pastry wheel. Press the blunt edge of the knife into the edge of the crust, creating a series of sharp, angled indentations. Overlap each press to form a continuous, fluted pattern. For speed, use a sharp, consistent angle and a steady hand. This method provides a clean, precise, and elegant finish. It’s ideal for pies where a sharp, defined look is desired. The angle of the knife will determine the sharpness of the flutes; a steeper angle creates more pronounced points.
The Double Fork Press: This is an intensified version of the classic fork press. After making the initial fork press, go back over the same area with the fork, pressing slightly deeper or at a slightly different angle. This creates a more defined and substantial scalloped edge, offering superior structural integrity. For speed, focus on a consistent double pass. This is excellent for very wet fillings or pies that might be handled more.
The Fanned Edge: This technique creates an effect reminiscent of a fan. Pinch the edge of the crust and then gently pull it outwards and slightly upwards, creating a series of fanned-out pleats. Repeat this around the entire edge. For speed, focus on consistent pulls and a uniform fanning motion. This method adds a delicate and intricate visual element. The width of the pleats and the degree to which they are fanned out can be adjusted for different effects.
The Button Crimp: This simple yet effective technique involves pressing your thumb into the edge of the crust, creating a small, round indentation. Repeat this all the way around, with each indentation slightly overlapping the previous one. This creates a charming, button-like pattern. For speed, maintain a consistent thumb pressure and spacing. This is a quick and easy technique that adds a touch of visual interest without being overly complicated.
The Zigzag Crimp: Similar to the fluted edge with a knife, this technique uses the side of your thumb or a pastry tool to create a distinct zigzag pattern along the edge of the crust. Press down and then pull slightly to create the peaks and valleys of the zigzag. For speed, a fluid, continuous motion is key. This offers a more playful and dynamic edge than a simple flute.
The Overlapping Pleat: This is a variation of the fanned edge. Instead of fanning outwards, pinch the edge of the crust and fold it inwards to create a pleat. Then, overlap the next pleat over the previous one. Repeat this around the edge. For speed, a consistent folding and overlapping rhythm is essential. This creates a layered and textured effect. The size of the pleats can be adjusted for a more subtle or dramatic look.
The Braided Edge: This is a more advanced but incredibly impressive technique. Divide the edge of the crust into three equal sections. Braid these sections together like hair, and then press the braided edge onto the pie. This requires more dexterity and practice for speed, but the visual impact is immense. It’s a statement crimp that elevates any pie. Ensure the braids are firm to prevent unraveling during baking.
The Petal Edge (Pointed): Similar to the pinch and tuck, but with a sharper, more pointed outcome. Pinch a small section of the crust and then press your thumb and forefinger outwards, creating a defined point that angles towards the center of the pie. Repeat this with sharp, defined points. For speed, focus on precise finger placement and consistent pressure. This creates a delicate, floral-inspired edge.
The Scalloped Edge (Varying Depth): This builds on the classic fork press by intentionally varying the depth of each press. Alternate between a lighter and a deeper fork press to create a more dynamic and visually interesting scalloped edge. This adds a touch of artistry and prevents the edge from looking too uniform. For speed, develop an intuitive rhythm of light and deep presses.
The Textured Crimp (Pastry Wheel/Comb): Utilize a pastry wheel or a decorative comb to press patterns directly into the edge of the crust after it’s been sealed. This can be done after a basic fork or finger crimp, adding an extra layer of detail. For speed, practice making confident, single passes with the tool. This allows for quick, intricate embellishments.
The Knotted Edge: This is a visually intriguing technique where small sections of the crust are gathered and twisted to resemble a knot. This is achieved by gathering a small section, then twisting and tucking it. It’s a more intricate method that requires practice for speed, but it’s incredibly unique. Think of small, tight twists that are then secured.
The Starburst Crimp: This technique involves making diagonal cuts into the edge of the crust, then folding these sections outwards like the rays of a star. Each cut section is then pressed onto the pie. For speed, practice making consistent, evenly spaced cuts and a fluid folding motion. This creates a bold, eye-catching edge.
The Layered Scallop: This is a more elaborate version of the standard scallop. After making a basic fork crimp, go back and make a second, slightly offset fork press within each scallop. This creates a layered, dimensional effect. For speed, ensure your initial crimp is secure enough to act as a base for the second press.
The Decorative Finger Fluting: This involves using the side of your index finger to create a series of small, parallel indentations along the edge of the crust. This is a more subtle and delicate form of fluting that can be done quickly with practice. The angle and pressure of your finger will dictate the appearance of the flutes.
Mastering these 20 techniques within a 120-second timeframe is an ambitious but achievable goal for any dedicated baker. It’s not about performing each one perfectly at lightning speed, but rather about developing the dexterity and knowledge to execute several of them with confidence and aesthetic intent in a short burst. The true benefit lies in the expanded repertoire of decorative options and the enhanced structural integrity these techniques provide, ultimately leading to more beautiful and successful pies. Consistent practice, experimentation with dough consistency, and a willingness to refine your movements will unlock the full potential of your pie-making artistry.
