5 Ways You Can Decorate Cookies
5 Ways You Can Decorate Cookies – Ever wondered how to take your cookie baking skills to the next level? We’ve all been there, staring at a plate of plain cookies, longing to transform them into edible masterpieces.
But don’t worry, you don’t need to be a professional pastry chef to create stunning cookie designs. With a little creativity and some simple techniques, you can turn those plain cookies into eye-catching treats that will impress your friends and family.
In this blog post, we’ll explore five different ways to decorate cookies, each offering a unique approach to transforming your baking creations. From the classic elegance of royal icing to the playful charm of sprinkles, we’ll cover a range of techniques that cater to every skill level and aesthetic preference.
So, grab your cookie cutters, gather your supplies, and let’s dive into the world of cookie decorating!
Royal Icing Techniques: 5 Ways You Can Decorate Cookies

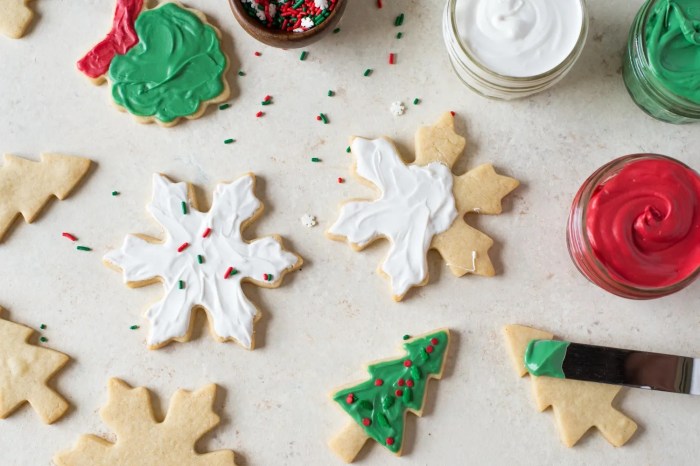
Royal icing is a staple in cookie decorating, offering endless possibilities for creating intricate designs. It’s a versatile icing that comes in various consistencies, each suited for different applications. This guide will explore the fundamentals of royal icing, from its preparation to its application in various decorating techniques.
Royal Icing Consistency
The consistency of royal icing is crucial for achieving different decorating effects. There are three primary consistencies:
- Flooding Consistency:This thin consistency is perfect for filling in large areas like cookies or cakes. It flows smoothly and self-levels, creating a smooth, even surface.
- Piping Consistency:This medium consistency is ideal for outlining cookies, creating borders, and piping delicate details. It holds its shape well but is still manageable for piping.
- Stiff Consistency:This thick consistency is best for creating raised details, writing, and intricate designs. It holds its shape well and can be piped in thin lines.
Making Royal Icing, 5 ways you can decorate cookies
Royal icing is made with simple ingredients: powdered sugar, meringue powder, and water. The process involves beating the ingredients together until they reach the desired consistency.
- Gather your ingredients:You will need powdered sugar, meringue powder, and water.
- Combine the powdered sugar and meringue powder:In a large bowl, whisk together the powdered sugar and meringue powder.
- Add water gradually:Slowly add water to the dry ingredients, beating with an electric mixer on low speed.
- Increase speed and beat until smooth:Once the ingredients are combined, increase the mixer speed to medium and beat until the icing is smooth and glossy.
- Adjust consistency:If the icing is too thick, add more water. If it’s too thin, add more powdered sugar.
- Divide and color:Divide the icing into separate bowls and add food coloring to achieve the desired shades.
Piping Royal Icing Designs
Piping royal icing requires practice and a steady hand. Here are some basic techniques for piping borders, flowers, and lettering:
Piping Borders
Piping borders is a fundamental technique that involves using a piping bag fitted with a round tip to create a continuous line around the edge of a cookie. The consistency of the icing should be medium or piping consistency.
- Prepare the cookie:Ensure the cookie is completely dry before piping the border.
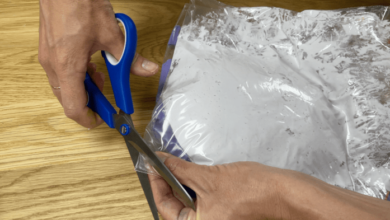
- Fill the piping bag:Fill the piping bag with royal icing, leaving some space at the top.
- Start piping:Holding the piping bag at a 45-degree angle, gently squeeze the icing to create a continuous line around the edge of the cookie.
- Maintain a consistent pressure:Apply even pressure to the piping bag to create a smooth, even border.
- Finish the border:End the border by lifting the piping bag slightly and gently pulling it away from the cookie.
Piping Flowers
Piping flowers requires a bit more skill, but with practice, you can create beautiful and realistic blooms. The consistency of the icing should be stiff.
- Choose a flower tip:There are many different flower tips available, each creating a unique shape.
- Fill the piping bag:Fill the piping bag with royal icing, leaving some space at the top.
- Start piping:Hold the piping bag at a 90-degree angle and gently squeeze the icing to create the center of the flower.
- Create petals:To create petals, gently squeeze the icing and rotate the piping bag while moving it outwards from the center.
- Finish the flower:Once the desired number of petals is created, lift the piping bag and gently pull it away from the cookie.
Piping Lettering
Piping lettering requires a steady hand and a good understanding of letter shapes. The consistency of the icing should be stiff.
- Choose a lettering tip:There are many different lettering tips available, each creating a unique style.
- Fill the piping bag:Fill the piping bag with royal icing, leaving some space at the top.
- Start piping:Hold the piping bag at a 45-degree angle and gently squeeze the icing to create the letters.
- Maintain a consistent pressure:Apply even pressure to the piping bag to create smooth, even letters.
- Finish the lettering:Once the lettering is complete, lift the piping bag and gently pull it away from the cookie.
Tips for Achieving Smooth, Consistent Icing
- Use high-quality ingredients:Using high-quality powdered sugar and meringue powder will result in smoother, more consistent icing.
- Beat the icing thoroughly:Beating the icing for the recommended time will ensure that it is smooth and free of lumps.
- Adjust the consistency:Add water or powdered sugar as needed to achieve the desired consistency.
- Use a piping bag with a coupler:A coupler allows you to easily change tips without having to refill the piping bag.
- Practice, practice, practice:Piping royal icing takes practice, so don’t be discouraged if your first attempts aren’t perfect.
Avoiding Common Royal Icing Mistakes
- Over-mixing the icing:Over-mixing the icing can cause it to become too stiff and difficult to pipe.
- Not beating the icing long enough:If the icing is not beaten long enough, it may not be smooth and may contain lumps.
- Using too much water:Adding too much water can make the icing too thin and runny.
- Using the wrong tip:Using the wrong tip can make it difficult to achieve the desired design.
- Not letting the icing dry completely:If the icing is not allowed to dry completely, it may smudge or become sticky.
From royal icing to sprinkles, there are so many fun ways to decorate cookies. But sometimes, you just want to go for something a little different. Why not try making a watermelon-inspired cookie? You can even check out this helpful guide on how to make a watermelon to get some inspiration for your cookie design.
Once you’ve mastered the watermelon look, you can even try incorporating other fruits or vegetables into your cookie creations!
From royal icing to sprinkles, there are tons of ways to personalize your cookies. But if you’re looking for a truly unique touch, why not try a cookie “door”? You can make a small cutout in the cookie and create a fun, sliding door effect with a mini-version of a diy automatic sliding back door.
It might be a little tricky, but the result is sure to be a conversation starter. And speaking of conversation starters, you can also use edible paint to add intricate details to your cookies, or even try your hand at cookie sculpting!
From royal icing swirls to sprinkles galore, there are so many ways to personalize your cookies! And speaking of sweet treats, have you tried the caramelized peach melba with raspberry granita ? It’s a heavenly dessert that’s sure to satisfy your sweet tooth.
But back to those cookies, don’t forget about edible paint, cookie cutters, and even personalized messages for a truly unique touch.