
Create A Ghoulish Garland
Craft a Terrifyingly Terrific Ghoulish Garland: A Comprehensive DIY Guide
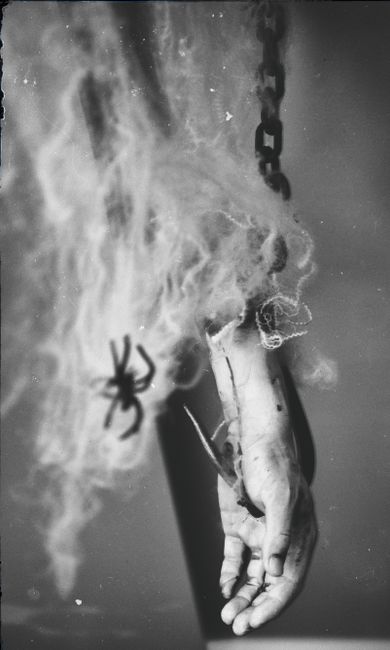
Unleash your inner macabre artist and construct a truly spine-chilling ghoulish garland that will be the envy of every haunted house and Halloween enthusiast. This guide will walk you through the entire creative process, from conceptualization and material selection to detailed construction techniques and optimal placement for maximum fright. Forget flimsy, store-bought decorations; this is about creating a custom, impactful piece that embodies the spirit of the season. We will explore various thematic approaches, covering classic graveyard imagery, spectral apparitions, monstrous mutations, and wicked witchcraft. Whether you’re aiming for a subtly sinister atmosphere or a full-blown horror spectacle, this comprehensive tutorial will provide the knowledge and inspiration to bring your ghoulish vision to life.
The foundational element of any effective ghoulish garland lies in meticulous planning and theme selection. Before cutting a single piece of fabric or stringing a single bead, define the overarching aesthetic you wish to achieve. Consider the specific location where the garland will be displayed. Is it an indoor entryway, an outdoor porch railing, a mantelpiece, or a creepy crawl space? Each environment will dictate the materials you choose, their durability, and the scale of your creation. For an outdoor setting, prioritize weather-resistant materials like treated fabric, plastic, and sturdy wire. Indoor displays offer more flexibility, allowing for delicate papers, soft fabrics, and even light-up elements. Think about the narrative you want your garland to tell. Is it a procession of ghostly figures, a collection of severed body parts, a tangle of thorny vines and wicked eyes, or a swarm of monstrous insects? A clear theme will guide your material choices and ensure a cohesive, impactful final product. For instance, a graveyard theme might call for shades of grey, black, and muted greens, incorporating elements like tombstones, skeletal fragments, and wispy fog. A more creature-focused garland could involve vibrant, unsettling colors, textured fabrics resembling scales or fur, and jagged, toothy shapes.
Material selection is paramount to achieving the desired ghastly effect and ensuring longevity. For fabric elements, consider felt, burlap, faux leather, or even ripped and distressed cotton. These materials offer excellent texture and can be easily cut, glued, or sewn. For a more ethereal, spectral look, sheer fabrics like organza or tattered cheesecloth can be layered and manipulated to create wispy ghosts or spectral veils. Paper-based materials can also be highly effective. Cardstock, construction paper, and even recycled cardboard can be cut into various shapes like bats, skulls, or witch hats. For a more weathered, ancient look, consider using tea-dyed paper or strategically applied ink washes. For structural components like tombstones or dangling limbs, craft foam, cardboard, or even sturdy plastic sheeting are excellent choices. These can be painted and detailed to achieve a realistic, albeit horrifying, appearance. Adhesives are crucial. Hot glue guns are indispensable for quick and strong bonds, especially with fabric and foam. Craft glue is suitable for paper and lighter materials. For a more permanent and weather-resistant assembly, consider using E6000 or similar industrial adhesives. Stringing your garland requires a robust and flexible medium. Jute twine, thick fishing line, or even thin gauge wire will serve well, depending on the weight and size of your individual garland elements. Don’t overlook the power of embellishments. Spooky paints (black, grey, white, blood red), glitter (in morbid hues like black or deep purple), plastic eyeballs, fake cobwebs, and even strategically placed faux insects can elevate your creation from good to terrifying.
Let’s delve into the construction of individual ghoulish elements. For a classic graveyard theme, creating miniature tombstones is a staple. Cut rectangles from craft foam or sturdy cardboard, varying the sizes for visual interest. Use a craft knife or box cutter for precise edges. Once cut, round off the corners slightly to simulate wear and tear. Painting is key. Apply a base coat of grey or black acrylic paint. Once dry, use a lighter grey or white to dry-brush over the raised edges and surfaces, creating a weathered stone effect. You can then use a fine brush to inscribe epitaphs – think of witty, morbid phrases like "Here Lies [Your Name]," "Not My Problem Anymore," or simply "Rest in Pieces." For a more decayed look, lightly mist with watered-down brown or black paint. Skeletal elements can be crafted from white or off-white felt or craft foam. Cut out simple bone shapes – femurs, rib cages, or even individual vertebrae. For added dimension, consider layering multiple pieces or using a bit of stuffing for a slightly three-dimensional effect. Stringing them together creates a macabre bone chain. For a spectral apparition, cut out irregular ghost shapes from white felt or even tattered cheesecloth. Stuff them lightly with cotton batting to give them a bit of volume. You can draw on simple, spooky faces with a black permanent marker, or even attach plastic googly eyes for an unsettling stare. Drape them over a thin wire armature to give them a floating, ethereal quality.
When constructing a ghoulish garland, the assembly process requires careful consideration of balance, flow, and visual impact. Start by laying out your completed individual elements on a flat surface in the order you envision them appearing on the garland. This allows you to adjust spacing and ensure a pleasing rhythm. Begin by attaching your stringing material to the first element. For fabric pieces, you can punch small holes near the edges and thread the string through. For stiffer materials like foam or cardboard, you might need to drill small holes or use a strong adhesive to secure the string. Work your way along, attaching each element at consistent intervals, or deliberately varying the spacing for a more chaotic, unsettling feel. Consider the weight distribution. If you have heavier elements, ensure they are balanced by lighter ones or strategically placed to avoid the garland sagging. For instance, a series of heavy foam tombstones might be interspersed with lighter felt bats. You can also incorporate "filler" elements like faux cobwebs, black or grey yarn for a tangled, web-like effect, or even strategically placed black beads or small plastic spiders. These filler elements help connect the main components and create a sense of depth and texture. When attaching fabric elements, consider creating a slightly gathered effect where the string passes through. This adds visual interest and a more organic, less rigid appearance. For a truly dynamic garland, consider incorporating elements that dangle or move independently. Small, lightweight skull charms or plastic spiders tied with fishing line can add a subtle, startling movement.
The power of a ghoulish garland is amplified by strategic placement. Think of your garland as a narrative element that guides the eye and sets the mood for your entire Halloween display. Drape it across a fireplace mantel for a classic haunted parlor effect. Weave it through outdoor railings or porch eaves to create a menacing entryway. Hang it above a doorway to serve as a terrifying portal to your haunted abode. Consider the height and scale of your garland in relation to the surrounding décor. A long, sprawling garland can effectively unify a larger space, while a shorter, more densely packed garland can create a focal point. For an outdoor display, consider how the wind might interact with your garland. Lightweight, flowing elements like tattered fabric ghosts can add a spooky, dynamic movement. Sturdier elements like painted foam tombstones will remain more stationary. If your garland includes lights, ensure they are securely integrated and protected from the elements if outdoors. Consider alternating between static lights and flickering LEDs for an extra eerie effect. Think about how light and shadow will play on your garland. Strategically placed spotlights can highlight specific horrifying elements, casting unsettling shadows that enhance the overall spookiness. For instance, a spotlight shining from below onto a row of tombstones can create an intensely menacing atmosphere. Don’t be afraid to experiment with layering. You can hang your primary garland and then add secondary elements, like dangling chains or individual creepy crawlies, to create a more complex and immersive visual.
To enhance the SEO-friendliness of your content, incorporating relevant keywords naturally throughout the text is crucial. Terms like "DIY Halloween decorations," "spooky garland," "ghoulish garland tutorial," "haunted house décor," "crafting Halloween," "DIY spooky crafts," "outdoor Halloween decorations," "indoor Halloween décor," "homemade Halloween garland," "skeleton garland," "ghost garland," "tombstone garland," and "witch garland" should be woven into the narrative. For instance, when discussing material selection, mention how felt and burlap are excellent choices for "DIY Halloween decorations" that require a textured feel. When detailing the construction of tombstones, you can refer to them as key components of a "ghoulish garland tutorial" that aims for a "haunted house décor" aesthetic. Throughout the assembly and placement sections, reiterate the goal of creating impactful "spooky garland" designs for both "outdoor Halloween decorations" and "indoor Halloween décor." Furthermore, ensure your headings and subheadings are descriptive and keyword-rich. For example, instead of a generic "Materials," use a heading like "Selecting the Perfect Materials for Your Ghoulish Garland." Similarly, "Construction Techniques" could become "Mastering Ghoulish Garland Construction: From Bones to Apparitions."
To further optimize your ghoulish garland article for search engines, consider incorporating a frequently asked questions (FAQ) section at the end. This provides an opportunity to address common queries and naturally integrate more keywords. For example:
FAQ: Crafting Your Ultimate Ghoulish Garland
-
Q: What are the best weather-resistant materials for an outdoor ghoulish garland?
A: For outdoor displays, prioritize treated fabrics like polyester or acrylic blends, sturdy craft foam, UV-resistant paints, and strong, waterproof adhesives. Fishing line or thin galvanized wire are excellent choices for stringing weather-appropriate elements for your "outdoor Halloween decorations." -
Q: How can I make my ghoulish garland look aged and creepy?
A: Achieve an aged look by using tea-dyed paper, distressing fabric edges by tearing or singeing them (with extreme caution and fire safety in mind), and applying washes of watered-down black or brown paint to simulate dirt and decay. Dry-brushing lighter colors over raised surfaces also creates a weathered effect, perfect for any "DIY spooky crafts." -
Q: What are some common themes for a DIY Halloween garland?
A: Popular themes include classic graveyard scenes with tombstones and skeletons, spectral apparitions with ghost shapes, monstrous creatures with fangs and claws, and wicked witch aesthetics featuring hats and cauldrons. Each theme offers unique opportunities for "homemade Halloween garland" creations. -
Q: How do I make my ghoulish garland stand out amongst other Halloween decorations?
A: The key is to go beyond basic shapes. Incorporate texture, varying sizes, and dynamic elements. Consider adding subtle lighting effects, incorporating sounds, or creating a narrative flow within your garland design. A well-executed "spooky garland" can truly transform a space. -
Q: Where is the best place to hang a ghoulish garland for maximum impact?
A: Strategic placement is vital. Drape it over entryways to create a terrifying welcome, weave it through railings for a menacing perimeter, or use it to frame a focal point like a spooky vignette. Think about how the garland will interact with the overall "haunted house décor."
By integrating these keywords and a comprehensive FAQ, your article will be more discoverable by individuals actively searching for "how to create a ghoulish garland" or looking for inspiration for their "DIY Halloween decorations." The detailed explanations and practical advice will solidify your content as a valuable resource, encouraging engagement and sharing within the crafting and Halloween enthusiast communities. The focus remains on providing actionable information and detailed guidance, ensuring readers can successfully embark on their own terrifyingly terrific ghoulish garland creation.
