
Counting Down Never Looked So Good Diy Fabric Countdown Links
DIY Fabric Countdown Links: A Stylish and Sustainable Way to Anticipate Special Events
The anticipation of a special event, whether it’s a birthday, holiday, wedding, or a long-awaited vacation, can be almost as exciting as the event itself. Traditionally, advent calendars and countdown charts have been employed to mark the passage of time, but these can often be temporary, disposable, or lack a certain aesthetic appeal. This article explores a highly customizable, reusable, and aesthetically pleasing DIY project: fabric countdown links. By crafting your own fabric countdown links, you not only create a charming decoration but also embrace a sustainable approach to celebrating milestones. This method allows for endless personalization, adapting to any theme, color scheme, or personal style.
The beauty of fabric countdown links lies in their inherent versatility. Unlike rigid cardboard or plastic alternatives, fabric offers a soft, tactile quality that can elevate the visual and sensory experience of counting down. The process itself is a rewarding craft project, accessible to individuals with varying levels of sewing experience, from absolute beginners to seasoned quilters. The core concept involves creating a series of connected fabric segments, each representing a day or a unit of time. These segments can be simple rectangles, squares, or even more intricate shapes, allowing for a broad spectrum of design possibilities. The connection mechanism can be as straightforward as sewing them together in a chain or as elaborate as incorporating snaps, buttons, or ribbon ties for added interactivity. This DIY approach empowers individuals to move beyond mass-produced, generic countdowns and create something deeply personal and meaningful.
To embark on this creative journey, gathering the right materials is paramount. The cornerstone of your fabric countdown links will be the fabric itself. Consider the theme and occasion. For a Christmas countdown, traditional reds, greens, and whites with festive patterns like snowflakes, holly, or reindeer would be ideal. For a wedding, elegant silks, satins, or lace in muted tones or the couple’s wedding colors would be fitting. A child’s birthday might call for bright, playful prints featuring favorite characters or animals. Cotton is an excellent choice for its durability, ease of sewing, and wide availability of prints. Linen offers a more rustic, natural feel, while velvet or faux fur can add a touch of luxury. You’ll also need a sturdy thread that complements or contrasts with your fabric choices, a sewing machine (though hand-sewing is also an option), scissors, pins, and a ruler or measuring tape. For a more decorative finish, consider embellishments like embroidery floss, beads, buttons, or small charms. The type of closure you envision for your links will also dictate additional materials, such as small metal snaps, Velcro, or grosgrain ribbon.
The process of creating the fabric countdown links can be broken down into several manageable steps. First, determine the total number of links you’ll need. If you’re counting down to a specific date, calculate the number of days. If it’s for a more general occasion, decide on a reasonable timeframe, perhaps 12, 24, or 31 links. Next, decide on the size and shape of each link. A common approach is to create rectangular strips. For example, if you want each link to be 4 inches wide and 6 inches long when finished, you’ll need to cut fabric rectangles that are larger to account for seam allowances. A good rule of thumb is to add 0.5 inches to each dimension for a standard 0.25-inch seam allowance. So, for a 4×6 inch finished link, you’d cut 5×7 inch rectangles. Consider how the links will connect. If you’re sewing them directly together, you’ll need to account for the seam allowance where they join. If you’re using snaps or buttons, you’ll need to ensure the fabric is large enough to accommodate these attachments.
Once your fabric pieces are cut, the construction phase begins. For simple rectangular links, fold each fabric rectangle in half lengthwise, right sides together, and sew along the raw edges, leaving one short end open. Turn the tube right side out and press flat. Then, fold one of the raw short ends inward by 0.25 inches twice to create a neat hem, and stitch it closed. This creates a finished pocket. Repeat for all your fabric pieces. The next crucial step is connecting the links. You can achieve this by sewing the open end of one finished link to the hemmed end of the next. This creates a continuous chain. Alternatively, you can attach snaps, buttons, or Velcro to the ends of each link, allowing them to be joined and detached as needed, which adds a layer of interactivity and reusability for different countdown lengths. For instance, you can attach one half of a snap to the hemmed end of one link and the other half to the open end of the next.
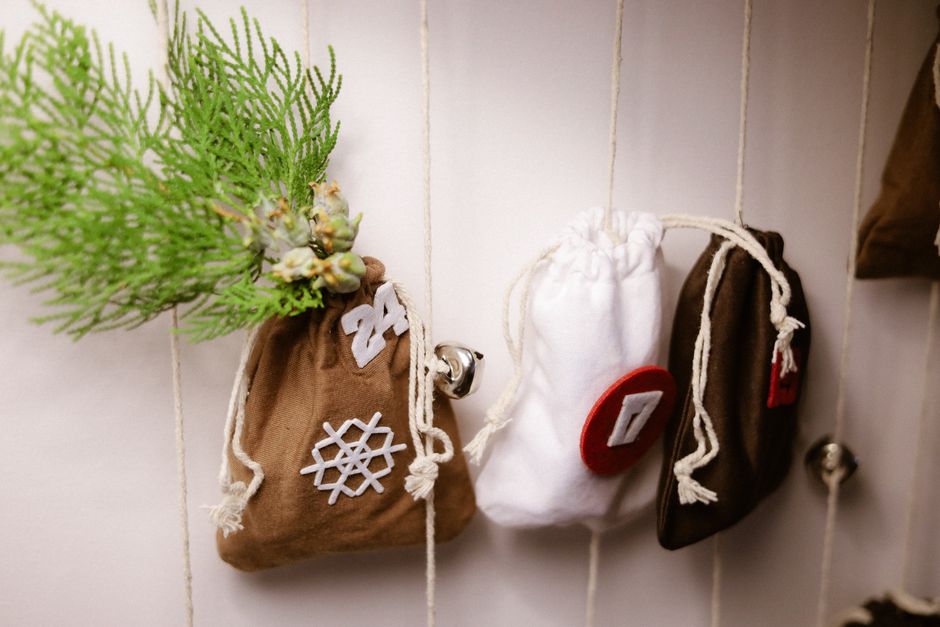
Personalization is where the true magic of DIY fabric countdown links shines. Once your basic links are constructed, you can begin to embellish them. For a holiday theme, consider embroidering numbers onto each link, starting from the final day and working backward. You could also applique small fabric shapes, like stars, hearts, or Christmas trees, onto each link. Beads can be sewn onto the fabric to represent snowflakes or sparkle. For a child’s birthday, iron-on transfers of their favorite characters or simple fabric paint can add a fun, personal touch. If your links are designed to hold small treats or notes, consider using fabric paints to write the corresponding date or a festive message. The possibilities for decoration are limited only by your imagination and the materials at hand. Think about color palettes, patterns, and the overall aesthetic you wish to achieve.
The SEO potential of this DIY project lies in its descriptive and searchable keywords. Phrases like "DIY fabric countdown," "handmade advent calendar," "fabric chain countdown," "personalized event countdown," "sewing craft project," "reusable countdown," and "holiday fabric decorations" are all highly relevant. The article should strategically incorporate these terms throughout the text, particularly in headings, subheadings, and the opening and closing paragraphs. Explaining the "how-to" aspect with clear, actionable steps naturally lends itself to long-tail keywords such as "how to make fabric advent calendar links," "easy fabric chain craft," or "DIY fabric numbers for countdown."
Beyond the aesthetic appeal and the joy of creation, fabric countdown links offer significant practical advantages. Their reusability is a major selling point from an environmental and economic perspective. Instead of purchasing a new countdown calendar each year or for each event, you can simply store your fabric links and bring them out year after year. This reduces waste and saves money in the long run. Furthermore, the ability to customize them means they can adapt to various occasions. A set of neutral-colored links can be redecorated or embellished differently for Christmas, Easter, or even a general "countdown to summer" theme. This adaptability makes them a versatile addition to any home decor.
To further enhance the SEO value and user experience, consider including a section on variations and advanced techniques. For instance, you could suggest using different fabric types for varied textures. Introduce the idea of adding pockets to each link, allowing small notes, candies, or tiny gifts to be hidden within. This transforms the countdown from a simple visual marker to an interactive experience. For those who enjoy quilting, suggest incorporating small quilt blocks as each link, adding intricate patchwork designs. Another variation could involve using iron-on interfacing to give the fabric links more body and structure, making them stand up more effectively. For a more sophisticated look, suggest using embroidery machines to create personalized designs and numbers.
When it comes to displaying your fabric countdown links, the options are as varied as the links themselves. They can be draped over a mantelpiece, hung on a wall, strung across a doorway, or even incorporated into a larger decorative display. Consider using clothes pegs or binder clips to attach them to a length of twine or ribbon for a rustic feel. For a more polished look, you can create a dedicated hanging rod or use command hooks. The visual impact of a well-crafted fabric countdown chain is undeniable, adding a touch of handmade charm and festive spirit to any space. The tactile nature of the fabric also invites interaction, making the act of removing each link a delightful part of the anticipation.
In conclusion, creating DIY fabric countdown links is a rewarding, creative, and sustainable endeavor that offers a unique and personalized way to mark the passage of time leading up to special events. By focusing on clear, actionable instructions, incorporating relevant keywords naturally, and highlighting the benefits of customization and reusability, this article aims to inspire crafters to embark on their own fabric countdown journey. The ability to adapt the design to any theme, color scheme, or personal preference ensures that these handmade treasures will be cherished and used for years to come, transforming the anticipation of any occasion into a truly stylish and memorable experience. The SEO-friendly nature of the project, with its numerous searchable terms and practical applications, further solidifies its appeal to a wide audience looking for both creative and functional DIY solutions.
