
Easy Brioche Doughnuts With Chocolate Orange Ganache Glaze
Easy Brioche Doughnuts with Chocolate Orange Ganache: A Culinary Masterclass
Crafting perfect brioche doughnuts at home, often perceived as an intimidating feat, is surprisingly achievable with a straightforward approach. This recipe demystifies the process, delivering impossibly soft, eggy brioche dough that yields tender, airy doughnuts. The magic lies in the enriched dough, a blend of flour, yeast, eggs, butter, and sugar, which undergoes a gentle proofing and then a quick fry, culminating in a delicate crumb. The accompanying chocolate orange ganache glaze offers a sophisticated counterpoint to the sweet dough, its zesty citrus notes beautifully complementing the deep cocoa flavors. This comprehensive guide will walk you through every step, from preparing the dough to achieving a flawless glaze, ensuring homemade doughnuts that rival those from your favorite patisserie. We’ll delve into the science behind brioche, the nuances of yeasted dough, and practical tips for achieving ideal frying temperatures, making this an accessible yet rewarding baking project.
The foundation of any exceptional brioche doughnut is, of course, the brioche dough itself. Brioche is characterized by its high proportion of eggs and butter, which contribute to its rich flavor, tender texture, and golden hue. To begin, activate your yeast. In a small bowl, combine warm milk (around 105-115°F or 40-46°C), a teaspoon of sugar, and active dry yeast. Stir gently and let it sit for 5-10 minutes until foamy. This indicates the yeast is alive and ready to work its magic. In the bowl of a stand mixer fitted with the dough hook, whisk together all-purpose flour, granulated sugar, and salt. Create a well in the center and pour in the activated yeast mixture and two large eggs. Mix on low speed until a shaggy dough forms.
The crucial stage for developing brioche’s signature texture is the gradual incorporation of softened unsalted butter. Once the initial dough has come together, increase the mixer speed to medium-low and begin adding the softened butter, one tablespoon at a time, allowing each piece to be mostly absorbed before adding the next. This process can take several minutes, and the dough will appear to break apart initially. Be patient; this is normal. Continue mixing until all the butter is incorporated and the dough starts to pull away from the sides of the bowl, becoming smooth and elastic. This signifies that gluten development is well underway. The dough should feel slightly tacky but not overly sticky.
Once the dough has reached the desired consistency, place it in a lightly oiled bowl, turning to coat all sides. Cover the bowl tightly with plastic wrap or a damp kitchen towel and let it rise in a warm place for 1.5 to 2 hours, or until doubled in size. The exact time will depend on the ambient temperature. A slightly warmer environment will accelerate proofing. For optimal flavor development, consider a slow, cold proof in the refrigerator overnight after the initial rise. This overnight rest can enhance the dough’s complexity and make it easier to handle for shaping.
After the first rise, gently punch down the dough to deflate it. Turn the dough out onto a lightly floured surface and knead it briefly to remove any large air pockets. For doughnuts, a slightly thicker dough is desirable for ease of handling and to ensure plumpness after frying. Roll out the dough to about ½-inch thickness. Using a floured doughnut cutter or two round cutters of different sizes (one for the outer ring and one for the inner hole), cut out your doughnuts. Reroll scraps gently, avoiding overworking, and cut more doughnuts. Place the cut doughnuts on parchment-lined baking sheets, ensuring they have enough space between them to prevent sticking during their second proof.
The second proof is critical for achieving light and airy doughnuts. Cover the baking sheets loosely with plastic wrap or a clean kitchen towel and let the doughnuts rise again in a warm place for 30-45 minutes, or until they appear noticeably puffy and have increased in volume. They should be significantly lighter to the touch. While the doughnuts are proofing, prepare your frying oil. In a heavy-bottomed pot or Dutch oven, heat about 3 inches of neutral oil, such as vegetable, canola, or sunflower oil, to 350-365°F (175-185°C). Maintaining a consistent oil temperature is paramount for achieving perfectly cooked doughnuts. Too low, and they’ll absorb excess oil and become greasy; too high, and they’ll brown too quickly on the outside while remaining undercooked inside. A candy thermometer or an instant-read thermometer is essential for this.
Carefully lower 2-3 doughnuts at a time into the hot oil, using a slotted spoon or a spider strainer. Avoid overcrowding the pot, as this will lower the oil temperature and lead to uneven cooking. Fry for 1-2 minutes per side, or until deep golden brown. The doughnuts will puff up significantly during frying. Use the slotted spoon to gently flip them to ensure even browning. Once golden brown on both sides, remove the doughnuts from the oil and place them on a wire rack set over a baking sheet to drain any excess oil. Allow them to cool slightly before glazing.
Now, for the exquisite chocolate orange ganache glaze. This glaze is a simple yet elegant combination of dark chocolate and a citrus-infused liquid. In a heatproof bowl, place finely chopped high-quality dark chocolate (about 60-70% cacao). In a small saucepan, heat heavy cream until it just begins to simmer around the edges. Do not let it boil. For the orange flavor, you have a few options: you can add a tablespoon of fresh orange zest to the cream as it heats, or incorporate a teaspoon of high-quality orange extract or a tablespoon of fresh orange juice into the glaze. Remove the cream from the heat and pour it over the chopped chocolate. Let it sit for 5 minutes without stirring to allow the heat from the cream to melt the chocolate.
After 5 minutes, begin to gently whisk the mixture, starting from the center and working your way outwards, until a smooth, glossy, and emulsified ganache forms. If the ganache appears too thick, add a teaspoon of warm cream or milk at a time until the desired consistency is reached. If it’s too thin, let it sit at room temperature for a few minutes to thicken, or gently warm it over a double boiler for a minute. The ganache should be thick enough to coat the back of a spoon but fluid enough to dip the doughnuts into easily. The orange element should be present but not overpowering, allowing the chocolate to shine.
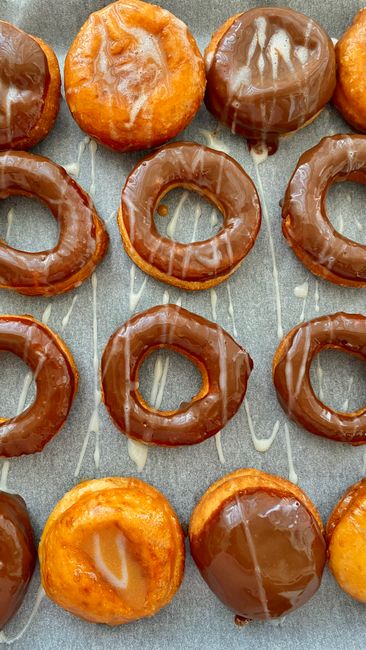
Once the ganache has reached the perfect consistency, it’s time to glaze. Dip the top of each slightly cooled doughnut into the ganache, allowing any excess to drip back into the bowl. You can also spoon the ganache over the doughnuts for a more rustic look. For added flair and flavor, consider garnishes. A sprinkle of candied orange peel, a dusting of cocoa powder, or even a few chocolate shavings can elevate the presentation and taste. Let the glazed doughnuts sit on the wire rack until the ganache has set, which typically takes about 15-30 minutes at room temperature. For a faster set, you can refrigerate them for a short period, but be mindful that refrigeration can sometimes dull the shine of the ganache.
The beauty of this recipe lies in its adaptability. Feel free to experiment with different types of chocolate for the ganache, such as milk chocolate or white chocolate, adjusting the orange flavoring accordingly. For a more intense orange flavor, consider adding a splash of orange liqueur, like Grand Marnier or Cointreau, to the ganache once it has cooled slightly. The brioche dough itself can also be a canvas for flavor. A touch of cardamom or cinnamon can be added to the dough for a subtle spice note. For those who prefer a richer, more decadent glaze, a few tablespoons of unsalted butter can be whisked into the ganache at the end for an extra glossy finish.
Storing your homemade brioche doughnuts is straightforward. They are best enjoyed fresh, within 1-2 days of baking. Store them in an airtight container at room temperature. If you need to store them for longer, a day or two in the refrigerator is acceptable, though this may affect their texture. Reheating them briefly in a low oven can help revive their freshness. The process of making brioche doughnuts might seem daunting at first, but with careful attention to ingredient temperatures, proofing times, and frying temperatures, the results are incredibly rewarding. The combination of the ethereally light brioche and the rich, zesty chocolate orange glaze creates a truly special treat, perfect for any occasion, from a weekend brunch to a festive gathering. This recipe is designed to be accessible to home bakers, offering a pathway to creating restaurant-quality doughnuts in your own kitchen, a testament to the fact that delicious, complex baked goods are well within reach with the right guidance and a little patience. The depth of flavor and the delightful texture of these brioche doughnuts, complemented by the bright citrus notes of the ganache, will undoubtedly impress your taste buds and those of your lucky recipients, solidifying their place as a beloved homemade delicacy.
