
Feel That Chill Time To Knit Some Mittens
Feel That Chill? Time to Knit Some Mittens! A Comprehensive Guide to Cozy Handwear
As the mercury drops and winter’s icy grip tightens, there’s a primal urge for warmth and comfort. And what better way to combat the biting cold than by crafting your own cozy handwear? Knitting mittens isn’t just a practical endeavor; it’s a deeply satisfying art form that allows you to express your creativity while ensuring your digits stay toasty. This comprehensive guide will equip you with everything you need to know, from selecting the perfect yarn to mastering different knitting techniques, ensuring your winter is filled with warmth and stylish protection.
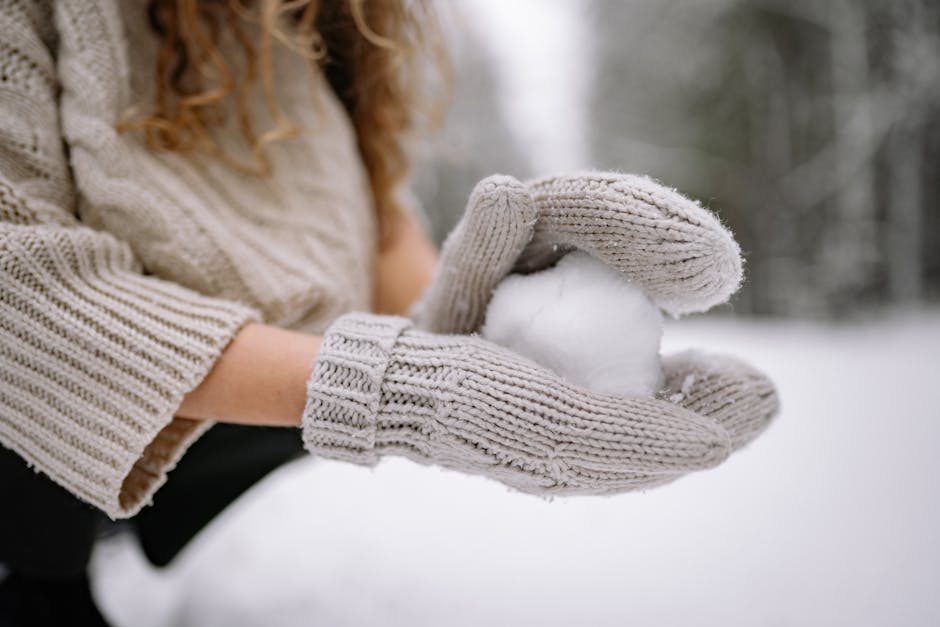
The appeal of hand-knitted mittens lies in their inherent charm and superior warmth. Unlike gloves, which separate each finger, mittens keep your fingers grouped together, allowing them to share body heat more effectively. This simple anatomical advantage makes mittens a superior choice for extreme cold. Furthermore, the tactile experience of knitting itself is incredibly therapeutic. The repetitive motion, the feel of the yarn slipping through your fingers, and the gradual transformation of raw materials into a functional and beautiful object can be a profound stress reliever. For beginners, mittens offer a manageable project that provides a sense of accomplishment relatively quickly. You’ll be able to see tangible progress with each row, and the finished product will be something you can wear and use immediately, offering a rewarding feedback loop for your efforts. As you gain confidence, you can explore more intricate patterns and designs, turning this practical skill into a creative outlet.
Choosing the right yarn is paramount to successful mitten knitting. The material will directly impact the warmth, durability, and feel of your finished mittens. For ultimate warmth, consider natural fibers like wool. Merino wool is a popular choice due to its exceptional softness, elasticity, and warmth-retaining properties, even when damp. It’s also naturally breathable, preventing your hands from getting overly sweaty. Alpaca wool offers even greater warmth and a luxurious, silky feel, though it can be more expensive. For a budget-friendly option, acrylic yarn is a good choice, especially for beginners. It’s durable, washable, and comes in a vast array of colors. However, acrylic doesn’t offer the same insulating properties as wool and can sometimes feel less breathable. Blends are also an excellent option, combining the best of different fibers. For example, a wool-acrylic blend can offer warmth and durability at a more accessible price point. When selecting yarn, pay attention to its weight. Worsted weight is a popular choice for mittens as it knits up relatively quickly and creates a fabric with good insulation. Bulky or super-bulky yarns will produce even warmer and faster-knitting mittens, perfect for those who prioritize speed and extreme warmth. Always check the yarn label for recommended needle sizes; this information is crucial for achieving the correct gauge, which dictates the fit of your mittens.
Beyond yarn, you’ll need a few other essential tools. Knitting needles are obviously key. For mittens, you have a few options: double-pointed needles (DPNs), circular needles (using the magic loop technique or two at a time), or even straight needles if you’re knitting flat and seaming later. DPNs are traditionally used for small circumference projects like socks and mittens, allowing you to knit in the round without seams. Many knitters find them easiest for shaping the fingers and thumb. Circular needles, when used with techniques like the magic loop, can also be employed for knitting in the round, offering the advantage of not having multiple needles to manage. Straight needles are suitable for knitting the mitten flat, which then requires seaming. The choice often comes down to personal preference and knitting style. Needle size is determined by your yarn choice and desired gauge. Stitch markers are invaluable for keeping track of your place in the round, especially when working on patterns or increases/decreases for shaping. A tapestry needle is essential for weaving in yarn ends and for seaming if you choose to knit flat. Finally, a measuring tape will be necessary to ensure your mittens are the correct size.
The fundamental construction of a mitten involves knitting a tube for the hand and then creating a separate opening for the thumb. There are two main methods for knitting mittens: in the round or flat with seaming. Knitting in the round is generally preferred for mittens as it creates a seamless, more comfortable, and often warmer finished product. This method typically uses double-pointed needles or circular needles with the magic loop technique. The basic process involves casting on a sufficient number of stitches for the circumference of your hand, joining to work in the round, and then knitting a ribbed cuff for a snug fit. After the cuff, you’ll transition to stockinette stitch for the main body of the mitten. The key shaping element for mittens is the thumb gusset. This is usually created by increasing stitches on either side of a designated stitch (or a few stitches) for a few rounds, forming a triangular wedge. Once the gusset has reached a certain width, the gusset stitches are placed on hold, and the main body of the mitten is continued to the desired length, usually up to the tip of the little finger. After completing the main hand portion, you’ll decrease stitches to shape the top of the mitten to a rounded point. Then, you’ll pick up the held thumb stitches and knit a short tube for the thumb, decreasing as needed to finish it off.
Alternatively, mittens can be knitted flat and then seamed. This method might be easier for absolute beginners who are more comfortable working back and forth on straight needles. You’ll typically knit two separate rectangles, one for the palm side and one for the back of the hand, incorporating shaping for the thumb. Once the pieces are knit, they are joined together using a mattress stitch or whip stitch. While this method is simpler in terms of needle management, the seams can sometimes create pressure points and reduce the overall warmth and comfort compared to a seamless mitten.
For those venturing into knitting mittens, understanding basic stitches is crucial. The knit stitch and the purl stitch are the building blocks of almost all knitting patterns. The knit stitch creates a smooth, V-shaped loop, while the purl stitch creates a bumpy, horizontal loop. Combining these stitches in various sequences creates different textures and patterns. Stockinette stitch, created by knitting all stitches on one side and purling all stitches on the other when knitting flat, or knitting all stitches on every round when knitting in the round, results in a smooth, often slightly curling fabric that is ideal for the main body of a mitten. Ribbing, typically achieved by alternating knit and purl stitches (e.g., K1, P1 or K2, P2), is excellent for cuffs as it creates a stretchy fabric that hugs the wrist snugly. Garter stitch, created by knitting every stitch on every row when knitting flat, is a reversible fabric with a bumpy texture and doesn’t curl. While less common for the main body of a mitten due to its bulk, it can be used for cuffs or accents.
The thumb gusset is a key element that requires careful attention. There are several ways to construct a thumb gusset. A common method involves placing a marker and then increasing one stitch before and one stitch after the marker every few rounds. Another method is to increase into the same stitch, creating a small eyelet. The number of increases and the length of the gusset will determine the size and fit of your thumb. Once the gusset is formed, you’ll place those stitches onto a spare piece of yarn or a stitch holder, cast on a few stitches to bridge the gap, and continue knitting the main hand of the mitten. When it’s time to knit the thumb, you’ll pick up the held stitches and the newly cast-on stitches, and knit a small tube. Decreases are then worked at the end of the thumb to close it off neatly.
Mastering shaping is essential for well-fitting mittens. For the top of the mitten, you’ll typically decrease stitches in a pattern to create a rounded or slightly pointed tip. This usually involves knitting two stitches together (k2tog) or slipping one stitch, knitting the next, and then passing the slipped stitch over the knitted stitch (ssk). The specific decrease pattern will depend on the pattern you are following and the desired shape. Similarly, the thumb often requires decreases to taper it to a neat finish. Experimentation and following a reputable pattern are your best guides here.
Choosing a pattern is a vital step, especially for beginners. Many free and paid mitten patterns are available online and in knitting magazines. Look for patterns that clearly state the yarn weight, needle size, gauge, and stitch count. Beginners might want to start with a simple, seamless mitten pattern that utilizes basic stitches and a straightforward thumb gusset. As you gain confidence, you can explore more complex patterns that incorporate cables, colorwork, or different shaping techniques. Reading a knitting pattern can seem daunting at first, but understanding abbreviations and stitch terminology will unlock a world of creative possibilities. Common abbreviations include K (knit), P (purl), CO (cast on), BO (bind off), ST (stitch), RND (round), DEC (decrease), INC (increase), K2TOG (knit two together), SSK (slip, slip, knit), M1 (make one).
The gauge is perhaps the most critical element for ensuring your mittens fit correctly. Gauge refers to the number of stitches and rows per inch (or 4 inches) that you achieve with your chosen yarn and needle size. Before you begin knitting your actual mittens, it’s imperative to knit a gauge swatch. This involves casting on a few more stitches than indicated in the pattern and knitting for a few inches in the same stitch pattern you’ll use for the mittens. Once you have a swatch, measure the number of stitches and rows within a 4-inch square. If you have too many stitches per inch, your knitting is too tight, and you should try a larger needle size. If you have too few stitches per inch, your knitting is too loose, and you should try a smaller needle size. A correct gauge ensures that your finished mittens will be the size intended by the pattern designer.
Caring for your hand-knitted mittens will ensure their longevity and continued coziness. Woolen mittens, especially those made from natural fibers, often benefit from handwashing in cool water with a mild wool wash. Avoid wringing or stretching them excessively. Instead, gently squeeze out excess water and lay them flat on a towel to dry, reshaping them as needed. Acrylic mittens are generally more forgiving and can often be machine washed on a delicate cycle with cool water and mild detergent, then air-dried. Always check the yarn manufacturer’s care instructions for the most accurate guidance. Proper care will prevent felting, stretching, and damage, keeping your mittens warm and beautiful for many winters to come.
Knitting mittens is a rewarding journey that combines practicality with artistry. From selecting the perfect yarn to mastering essential techniques, each step brings you closer to creating a cherished item that will keep you warm and stylish throughout the colder months. Embrace the process, enjoy the creative outlet, and revel in the satisfaction of wearing something beautifully handmade. The chill is in the air; it’s time to grab your needles and bring your winter handwear dreams to life.
