Simple Chic DIY Headband: Elevate Your Style with Ease
Simple chic DIY headband – it’s a phrase that evokes images of effortless elegance and personalized style. Creating your own headbands allows you to express your unique taste and add a touch of sophistication to any outfit, whether you’re heading out for a casual brunch or a special occasion.
This DIY project isn’t just about crafting, it’s about empowerment – taking control of your style and making something beautiful with your own two hands.
The beauty of simple chic headbands lies in their versatility. They can be dressed up or down, and they work with a wide range of hairstyles and outfits. Whether you prefer a minimalist aesthetic or love adding a pop of color, there’s a simple chic headband out there for you.
And the best part? You can create them yourself, tailoring them to your exact preferences and making them truly your own.
The Allure of Simple Chic

Simple chic headbands embody the art of effortless elegance. They radiate a timeless charm that transcends trends, making them a versatile accessory for any occasion. Their understated design and minimalist aesthetic exude sophistication, adding a touch of refinement to even the most casual outfits.
Elevating Outfits with Simple Chic Headbands
Simple chic headbands possess the remarkable ability to elevate the look of various outfits. They can seamlessly transition from day to night, effortlessly adding a touch of polish to any ensemble. Here are some examples of how simple chic headbands can enhance different styles:
- Casual Chic:Pair a simple chic headband with a flowy maxi dress or a relaxed denim outfit for an instant touch of sophistication. The headband’s minimalist design complements the casual vibe while adding a touch of elegance.
- Business Casual:A simple chic headband can elevate a tailored blazer and trousers for a polished and professional look. The headband’s subtle design adds a touch of femininity without detracting from the overall professional aesthetic.
- Evening Elegance:For a special occasion, a simple chic headband can complement an evening gown or a cocktail dress. The headband’s minimalist design adds a touch of glamour without overwhelming the overall look.
DIY Headbands: A Creative Outlet
The allure of simple chic extends beyond just the aesthetic; it’s also about embracing the joy of creating something beautiful with your own hands. And what better way to express your personal style than with a DIY headband? Crafting your own headbands allows you to personalize your accessories, reflecting your unique taste and creativity.
The Benefits of DIY Headbands
Creating your own headbands is a rewarding experience that offers a multitude of benefits. It’s not just about the end product; it’s about the journey of crafting something beautiful and unique.
- Customization:DIY headbands allow you to personalize your accessories to perfectly match your style and wardrobe. You can choose the colors, patterns, and embellishments that speak to your individual taste. Whether you prefer minimalist designs or bold statements, the possibilities are endless.
- Cost-Effectiveness:DIY projects can be a cost-effective way to create beautiful accessories. You can often find materials at thrift stores, online marketplaces, or even repurpose old items to create unique and affordable headbands.
- Personal Fulfillment:Crafting your own headbands can be a deeply fulfilling experience. The process of designing, creating, and wearing your own accessories can boost your confidence and creativity.
DIY Headbands as Expressions of Individual Style
DIY headbands are a fantastic canvas for expressing your unique style. They can be simple and elegant, or bold and eye-catching, reflecting your personality and mood.
- Bohemian Vibes:A headband made with natural materials like leather, suede, or macrame can add a touch of bohemian chic to any outfit.
- Minimalist Elegance:A simple, sleek headband in a neutral color can elevate any outfit, adding a touch of sophistication.
- Bold Statements:For those who love to make a statement, a headband with bright colors, bold patterns, or eye-catching embellishments can be a fun and unique way to express their individuality.
Essential Materials and Tools

Crafting simple chic headbands is a delightful endeavor that requires a minimal yet essential set of materials. These materials form the foundation of your creations, allowing you to express your unique style and taste. This section explores the core materials needed for your headband projects, offering guidance on selecting high-quality options for durability and aesthetic appeal.
Materials
The foundation of any headband lies in the materials used. Here’s a breakdown of the key components and where to find them:
| Material | Description | Where to Find It |
|---|---|---|
| Fabric | Choose fabrics that are lightweight, comfortable, and drape well. Cotton, linen, silk, and velvet are popular choices. Consider the season and occasion when selecting your fabric. | Fabric stores, online retailers, and even thrift stores can offer a variety of fabric options. |
| Elastic | Elastic provides the necessary stretch and fit for your headband. Look for elastic that is soft, flexible, and durable. | Craft stores, online retailers, and sewing supply stores offer a range of elastic options. |
| Embellishments | Embellishments add a touch of personality and style to your headbands. Beads, sequins, ribbons, flowers, and charms are all popular choices. | Craft stores, online retailers, and jewelry supply stores offer a wide variety of embellishments. |
Choosing High-Quality Materials
Investing in high-quality materials is crucial for creating headbands that are both stylish and durable. Here are some tips:
Fabric:Opt for fabrics that are woven tightly, have a good drape, and are colorfast.
Making a simple chic DIY headband is a fun project that can be done in an afternoon. While you’re crafting, you might want to have a quick break and check out this article for 5 ideas to keep kids entertained at a restaurant , just in case you need some inspiration for your next family outing.
Once you’re back to your headband, you’ll be ready to add a touch of personal style to your look with a unique and easy-to-make accessory.
Elastic:Select elastic that is smooth, flexible, and has a good amount of stretch.
Embellishments:Choose embellishments that are durable, lightweight, and complement the fabric and style of your headband.
Step-by-Step Guide
Now that you have gathered all the necessary materials and tools, it’s time to dive into the creative process of crafting your simple chic headband. This step-by-step guide will walk you through the process, from cutting the fabric to securing the elastic, ensuring you achieve a beautiful and comfortable headband.
Cutting the Fabric
To begin, you need to determine the length and width of your headband. The length should be long enough to comfortably fit around your head, and the width will depend on your desired style. A good starting point for length is approximately 22 inches (56 cm), and for width, 2 inches (5 cm).
However, you can adjust these measurements based on your head size and desired style.
Tip: It’s always better to cut the fabric a bit longer than you think you’ll need, as you can always trim it later if necessary.
A simple chic DIY headband can be the perfect finishing touch to any outfit, especially when you’re going for a spooky and stylish look. Whether you’re attending a costume party or just want to add a touch of Halloween flair to your everyday style, a headband can make all the difference.
And speaking of Halloween, have you seen all the amazing ideas for spooktacular Halloween party food ? They’re so creative and delicious, it’s hard to choose just one! But back to the headband, it’s the perfect way to tie your look together and add a touch of personal style.
- Place the fabric flat on a clean surface.
- Use a ruler and fabric marker to measure and mark the desired length and width of the headband.
- Carefully cut the fabric along the marked lines using fabric scissors.
- To achieve a neat and professional finish, ensure the edges of the fabric are cut straight and clean.
Sewing the Headband
Once you have cut the fabric, you can start sewing it together.
Tip: If you are using a sewing machine, it’s best to use a straight stitch and a medium-sized needle.
- Fold the fabric in half lengthwise, right sides facing each other.
- Pin the fabric along the raw edge to secure it in place.
- Sew along the pinned edge, leaving a small opening at one end for turning.
- Turn the headband right side out through the opening you left.
- Carefully press the seam flat to create a smooth finish.
- Close the opening by hand-stitching it closed.
Attaching the Elastic
Now, it’s time to add the elastic for a secure fit.
Sometimes, the simplest DIY projects are the most rewarding. A chic headband can be whipped up in minutes with just a few supplies, and it’s a great way to add a touch of personality to any outfit. I find that getting creative with my headband designs is a lot like figuring out the best candy tricks or treats for Halloween – it’s all about finding the perfect balance of style and fun! Once you’ve mastered the basic headband, you can experiment with different fabrics, embellishments, and even seasonal themes, like adding a festive touch for the holidays.
Tip: For a comfortable fit, use a stretchy elastic that’s about 1/2 inch (1.25 cm) wide.
- Measure your head circumference.
- Cut the elastic to a length that is slightly smaller than your head circumference.
- Fold the ends of the elastic under to prevent fraying.
- Pin the elastic to the inside of the headband, at the ends of the fabric.
- Sew the elastic to the headband using a zigzag stitch.
- Ensure the elastic is securely attached to the headband.
Finishing Touches
With the elastic attached, your simple chic headband is complete. You can add some finishing touches to personalize it further.
- Iron the headband to remove any wrinkles.
- You can add embellishments such as beads, buttons, or ribbons to the headband.
- If you’re using a fabric with a raw edge, you can fold the edge under and sew it to create a clean finish.
- Alternatively, you can use a serger to finish the edges for a professional look.
- Once you are satisfied with your headband, you can wear it with pride.
Embellishing Your Headband
Now that you have a basic headband, it’s time to add your personal touch and make it truly unique. Embellishments can transform a simple headband into a statement piece, reflecting your style and creativity.
Adding Ribbons
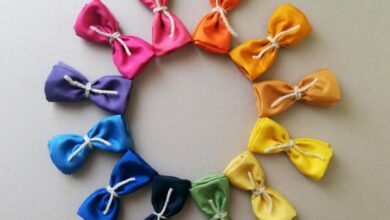
Ribbons offer a versatile way to embellish your headband. You can use them to create bows, wraps, or even as a base for other embellishments. Ribbons come in various colors, patterns, and textures, allowing you to choose the perfect match for your headband.
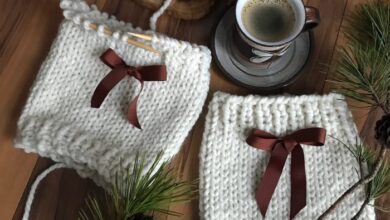
- Bows:Create a simple bow by tying a ribbon around the headband and securing it with a knot or hot glue. You can also use a ribbon to create a more elaborate bow, such as a layered bow or a bow with tails.
- Wraps:Wrap a ribbon around the headband, securing it with hot glue or a stitch. For a more elegant look, choose a ribbon with a metallic finish or a delicate pattern.
- Base for other embellishments:Glue a ribbon to the headband and then attach beads, charms, or flowers to the ribbon. This technique allows you to create a more cohesive and layered look.
Adding Beads
Beads add a touch of sparkle and elegance to your headband. They come in various sizes, shapes, and materials, allowing you to create a personalized look.
- Scattered Beads:Glue small beads randomly along the headband for a whimsical look. You can use beads of different colors and sizes for a more dynamic effect.
- Clustered Beads:Create a cluster of beads by gluing them together in a group. You can use beads of the same color or mix and match different colors and sizes for a more dramatic look.
- Beaded Patterns:Glue beads in a pattern along the headband, creating a geometric or floral design. This technique requires a bit more patience but can create a stunning and unique look.
Adding Flowers
Flowers add a touch of femininity and romance to your headband. You can use real flowers, silk flowers, or even fabric flowers.
- Single Flower:Glue a single flower to the center of the headband for a simple and elegant look. Choose a flower that complements the color of your headband.
- Flower Garland:Create a flower garland by gluing multiple flowers together in a row. You can use flowers of different colors and sizes for a more dynamic look.
- Flower Crown:Create a flower crown by gluing flowers around the entire headband. This technique requires a bit more time and effort, but it can create a stunning and unique look.
Adding Charms
Charms add a touch of personality and whimsy to your headband. You can use charms that represent your interests, hobbies, or even your favorite animal.
- Single Charm:Glue a single charm to the center of the headband for a simple and stylish look. Choose a charm that complements the color and style of your headband.
- Charm Cluster:Create a charm cluster by gluing multiple charms together in a group. You can use charms of different colors, shapes, and sizes for a more dynamic look.
- Charm Garland:Create a charm garland by gluing charms along the headband in a row. You can use charms that represent a theme or story.
Styling Your Simple Chic Headband: Simple Chic Diy Headband
The beauty of a simple chic headband lies in its versatility. It can effortlessly elevate any outfit, from casual to formal, adding a touch of elegance and sophistication. Whether you’re aiming for a bohemian vibe, a minimalist aesthetic, or a touch of vintage charm, there’s a simple chic headband style to complement your look.
Styling for Different Occasions, Simple chic diy headband
The key to styling a simple chic headband is to consider the occasion and your personal style. For a casual day out, a simple fabric headband in a neutral color can be paired with jeans and a t-shirt. For a more polished look, a leather headband with a subtle embellishment can elevate a dress or skirt.
For formal events, a delicate headband with sparkling accents or pearls can add a touch of glamour to your evening attire.
Creating Different Looks with Hairstyles and Outfits
The possibilities for styling simple chic headbands are endless. Here are a few ideas to inspire your creativity:
Pairing with Hairstyles
- For a casual look:A simple fabric headband can be worn with a ponytail, braid, or loose waves. This creates a relaxed and effortless style that’s perfect for everyday wear.
- For a polished look:A leather headband can be paired with a sleek bun or a low ponytail. This adds a touch of sophistication to your outfit.
- For a romantic look:A delicate headband with floral embellishments can be worn with loose curls or a half-up hairstyle. This creates a feminine and romantic look that’s perfect for special occasions.
Pairing with Outfits
- For a casual outfit:A simple fabric headband can be paired with jeans, a t-shirt, and sneakers. This creates a comfortable and stylish look for everyday wear.
- For a semi-formal outfit:A leather headband can be paired with a dress, skirt, or trousers. This adds a touch of polish to your outfit.
- For a formal outfit:A delicate headband with sparkling accents can be paired with a cocktail dress or evening gown. This creates a glamorous and sophisticated look.
Choosing Headbands that Complement Your Features and Style
- Consider your face shape:A headband can help to accentuate your best features. For example, a wide headband can help to balance a round face, while a narrow headband can help to elongate a long face.
- Choose colors that complement your skin tone:A headband in a color that complements your skin tone will make your face look brighter and more radiant. For example, if you have a warm skin tone, you might want to choose a headband in a warm color like red, orange, or yellow.
If you have a cool skin tone, you might want to choose a headband in a cool color like blue, green, or purple.
- Choose a style that reflects your personal style:There are endless possibilities when it comes to headband styles. Choose a style that reflects your personal taste and preferences. If you prefer a minimalist aesthetic, you might want to choose a simple headband in a neutral color. If you prefer a bohemian style, you might want to choose a headband with floral embellishments.