
Chic Halloween Glowing Jars
Chic Halloween Glowing Jars: DIY Decor That Dazzles and Delights
Transforming your home into a bewitching wonderland for Halloween doesn’t require a massive budget or professional decorator. Chic Halloween glowing jars offer an elegant, customizable, and surprisingly simple way to infuse your space with festive ambiance. These illuminated vessels, ranging from ethereal to playfully spooky, are more than just decorations; they’re miniature works of art that capture the magic of the season. Their versatility allows them to be incorporated into any Halloween theme, from rustic farmhouse charm to sophisticated gothic allure. The beauty of glowing jars lies in their adaptability. You can tailor the contents, colors, and even the type of light source to perfectly match your desired aesthetic. This guide will delve into the creation, customization, and strategic placement of these enchanting decorations, ensuring your Halloween display is both memorable and impeccably stylish. We will explore various techniques, materials, and design inspirations to empower you to craft your own unique collection of glowing jars. From selecting the right jars to choosing the most impactful illumination, every step will be broken down for clarity and ease of execution, making this DIY project accessible to crafters of all skill levels. Furthermore, we will discuss SEO considerations to ensure that those seeking inspiration for their Halloween decor can easily find these delightful ideas.
The foundation of any chic Halloween glowing jar is the vessel itself. Glass jars are the most common and effective choice due to their transparency and ability to refract light beautifully. Consider a variety of shapes and sizes for visual interest. Mason jars, old jam jars, apothecary jars, pickle jars, and even repurposed wine bottles (with caution and appropriate cutting techniques) can all serve as excellent canvases. For a more refined look, opt for jars with interesting textures or vintage appeal. Etched glass, ribbed jars, or those with subtly colored tints can add an extra layer of sophistication. The cleanliness of the jar is paramount. Thoroughly wash and dry each jar to remove any residue that might interfere with adhesion or the clarity of the glow. If you’re using jars with labels, ensure they are completely removed. Soaking in warm, soapy water followed by a good scrub is usually sufficient. For stubborn adhesive, a bit of Goo Gone or rubbing alcohol can be a lifesaver. The size of the jar will dictate the scale of your creation. Smaller jars are perfect for accent pieces on shelves or mantels, while larger apothecary jars can become impressive centerpieces. Think about the overall impact you want to achieve and select your jars accordingly. Don’t be afraid to mix and match different types of jars to create a dynamic and visually engaging display. The inherent charm of recycled glass adds an eco-conscious and budget-friendly element to your Halloween decor, further enhancing their appeal.
The "glowing" element is where the magic truly happens. Several illumination methods can achieve this effect, each offering a distinct ambiance. Battery-operated LED lights are the most popular and safest choice. Fairy lights, often referred to as string lights, are incredibly versatile. They come in various colors, including warm white, cool white, orange, purple, and green, allowing you to customize the mood. Tiny LED bulbs are discreet and can be easily arranged within the jar. Look for waterproof or water-resistant options if you plan to incorporate elements like water or faux water beads. Flameless LED candles are another excellent option, providing a flickering, realistic candlelight effect without the fire hazard. These are particularly effective in larger jars or when simulating a spooky lantern. Submersible LED lights are designed to be placed underwater, perfect for creating a mesmerizing glow within a jar filled with water or faux water. These often come with remote controls, allowing you to change colors and modes. For a more diffused and ethereal glow, consider using battery-operated LED puck lights or small LED modules placed at the bottom of the jar. These can be hidden beneath other decorative elements. When choosing LED lights, pay attention to the color temperature. Warm white lights evoke a cozy, inviting feel, while cool white or colored LEDs can create a more dramatic or spooky atmosphere. The lifespan of the batteries is also a practical consideration, especially if you plan to have your glowing jars illuminated for extended periods throughout the Halloween season. Opt for high-quality LED lights known for their longevity.
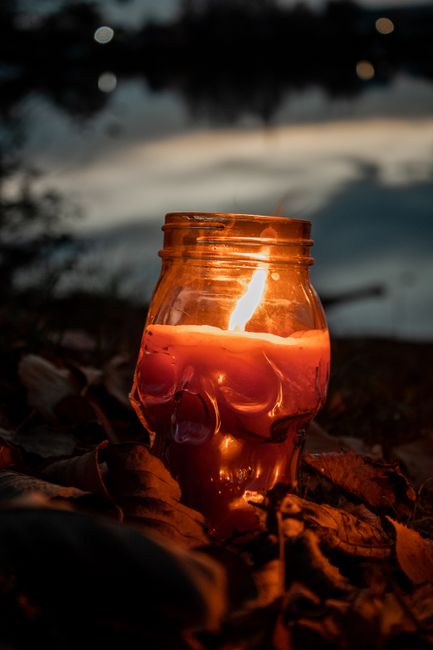
The contents of your glowing jars are where your creativity truly shines. This is where you’ll infuse your jars with Halloween spirit and theme. For a classic spooky vibe, consider filling jars with faux cobwebs, plastic spiders, miniature bats, or ghostly figures. A touch of black or orange paint on the inside of the jar can enhance the colored glow of the lights. For a more elegant and sophisticated look, fill jars with artificial autumn leaves in rich jewel tones, faux moss, acorns, or pinecones. Small branches sprayed with metallic gold or silver paint can add a touch of glam. Crystal or glass beads can catch and reflect the light, creating a dazzling effect. Consider filling jars with "potions." This can involve layering colored liquids (food coloring in water or mineral oil), glitter, and small, themed trinkets like plastic eyeballs, tiny bones, or potion labels. For a whimsical touch, fill jars with colorful candy corn, Halloween-themed confetti, or small stuffed pumpkins. Another popular trend is the "ghost in a jar." This involves placing a white tissue or cheesecloth over the opening of the jar, securing it with a rubber band, and then using string or fishing line to create a suspended "ghost" within. The light from inside the jar will illuminate the translucent fabric, creating a charming apparition. For a more macabre aesthetic, consider filling jars with faux blood (red colored water or gel), severed finger props, or miniature skulls. The key is to create a visually interesting and cohesive arrangement that complements the chosen illumination and the overall Halloween theme. Think about texture, color, and scale when arranging your jar’s contents.
Beyond the basic construction, embellishing your chic Halloween glowing jars elevates them from simple DIY projects to statement decor. Painting the exterior of the jars is a popular technique. Chalk paint is excellent for achieving a matte, vintage finish that can be easily distressed for an aged look. Spray paint offers quick and even coverage, allowing for bold colors or metallic finishes. Consider painting the inside of the jar for a translucent glow effect, or painting the outside for a more opaque look. Stencils can be used to add intricate designs, from spiderwebs and bats to spooky silhouettes and gothic patterns. Use acrylic paints or glass paints for durable and vibrant designs. Decoupage is another versatile technique. Apply thin paper cutouts, like vintage Halloween illustrations, lace, or tissue paper, to the exterior of the jar using Mod Podge. Once dry, the paper becomes an integral part of the jar’s surface, allowing the light to shine through. Glitter is a Halloween decor staple, and it can be applied to the interior or exterior of your jars. For interior glitter, apply a layer of glue to the inside of the jar and then sprinkle with glitter. For exterior glitter, apply glue and then roll the jar in glitter, or use glitter spray. Twine, ribbon, and lace can be used to adorn the rims or necks of the jars, adding texture and a rustic or gothic touch. Consider adding small charms, beads, or even faux crow feathers to these embellishments for an extra layer of detail. For a more eerie effect, consider a "cracked glass" look. This can be achieved with specialized crackling medium paints or by carefully applying layers of glue and salt.
Strategic placement is crucial for maximizing the impact of your chic Halloween glowing jars. Think about creating focal points and adding ambiance to specific areas of your home. Mantels are prime real estate for Halloween displays. Arrange a collection of glowing jars of varying heights and styles to create a captivating centerpiece. Alongside pumpkins, candles, and spooky figurines, your glowing jars will add a magical luminescence. Entryways are the first impression guests will have of your Halloween decor. Place a few glowing jars on console tables or flanking your front door to welcome visitors with a festive glow. Shelves and bookcases can be transformed with strategically placed illuminated jars. Mix them in with your existing decor, allowing them to stand out as special Halloween accents. Dining tables can be enhanced with a glowing jar centerpiece. Imagine the enchanting atmosphere created during a Halloween dinner party. For a truly spooky effect, consider placing glowing jars in darker corners or hallways where they can cast an eerie, diffused light. This adds depth and intrigue to your overall Halloween ambiance. Outdoor placement requires consideration for weather resistance. If using jars with delicate embellishments, opt for sheltered areas like covered porches or within lanterns. For areas exposed to the elements, choose jars with durable paint or sealer and ensure all electrical components are protected from moisture. Consider grouping jars together to create a more impactful display. A cluster of three or five jars, for example, can be more visually arresting than a single jar placed in isolation. Experiment with different heights and groupings to find what works best for your space. Remember to consider the overall color palette of your Halloween decor when placing your glowing jars. Ensure the colors of your jars and their illumination complement the existing colors in your home.
When it comes to SEO, incorporating relevant keywords naturally throughout your article is essential for discoverability. Terms like "Halloween decor," "DIY Halloween," "glowing jars," "spooky crafts," "enchanting lighting," "party decorations," "holiday ambiance," "craft ideas," and "fall decor" should be woven into the text. Use variations and long-tail keywords such as "easy Halloween glowing jar tutorial," "elegant spooky jar crafts," or "DIY illuminated Halloween lanterns." The title itself should be keyword-rich and descriptive. Use headings and subheadings (H2, H3) to break up the content and incorporate keywords, making it easier for search engines to understand the structure and relevance of your article. Image alt text is another crucial SEO element. When uploading images of your glowing jars, use descriptive alt text that includes relevant keywords (e.g., "DIY Halloween glowing mason jar with fairy lights," "Chic spooky apothecary jar decor"). Internal linking to other relevant Halloween content on your website can improve user engagement and SEO. For example, if you have a blog post about Halloween wreath making, link to it from this article. External linking to reputable sources or inspiration sites can also lend credibility. Finally, ensure your article is well-written, informative, and provides genuine value to the reader, as this is the ultimate factor in search engine ranking and user satisfaction. The goal is to create content that people are actively searching for and that thoroughly answers their queries about creating chic Halloween glowing jars. By focusing on clear instructions, diverse ideas, and practical tips, this article aims to be a go-to resource for anyone looking to elevate their Halloween decorating game. The emphasis on "chic" ensures that it appeals to those seeking elegant and stylish solutions, differentiating it from purely spooky or juvenile craft ideas.
